back page 1 | 2 | 3 | 4 | 5 | 6 | 7 | 8 | 9
Exhaust outlets…

Moulded in two parts with raised ribbed detail is never a good combination, but using plenty of liquid poly the four ducts having been assembled earlier and now thoroughly dry can be improved. Again, reference pics are very useful here and even a cursory look reveals that the two metal vanes in each rear duct are very noticeable. They are also very thin and the kit parts will be improved dramatically with a little work. The internal shape of all 4 units is improved by using a sharp scalpel and taking great care not to impale yourself! Then the rear ducts have replacement vanes cut from old metal wine bottle tops – attaching with Gaitor Glue. This great stuff (I got mine from Paul at Little Cars) looks and acts a little like thin PVA but behaves like cyano and is great for strong joins but will take a little longer to dry.
Canopy improvements…

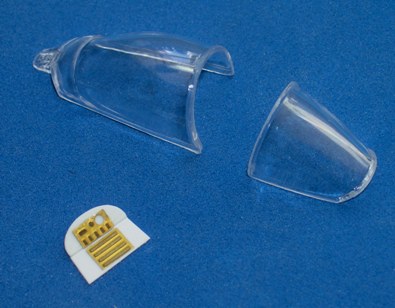
The kit canopy is pretty good as is, but it lacks any form of rear decking and from the pics in Mark’s good book, you can clearly see that there is an angled decking and flat section that moves with the canopy as it is slid back. I scratched this from small sections of plasticard and some old raised etch detail from a Reheat etched set. Not accurate detail as I didn’t have a good enough image to work from, but much better than no decking at all!
Onto the stores…
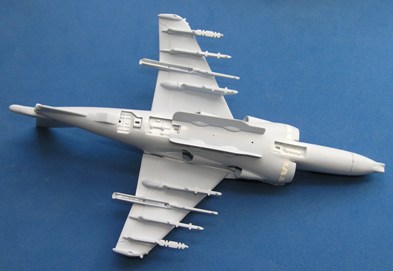
If nothing else the Harrier GR-7 is a workhorse. No less than four pylons under each wing. The new-tool kit parts are pretty good and when you’ve cleaned up the mould seam lines, they should fit very well to the underside of the wings.