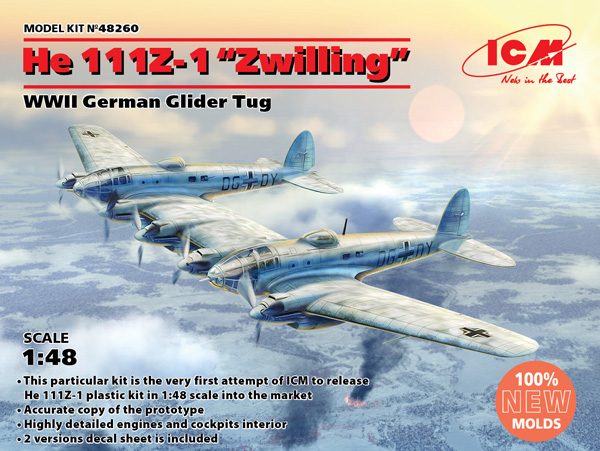
In-box browse with Dai Williams
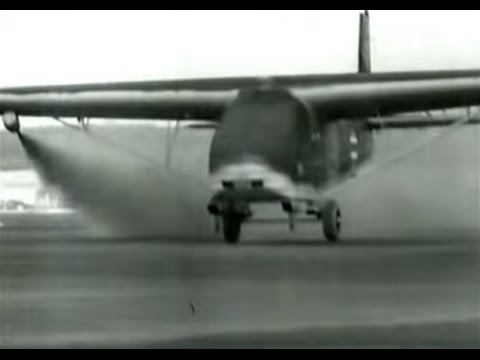
In 1940 design work began on the Junkers Ju 322 and Messerschmitt Me 321 heavy cargo transport gliders for use in large-scale airborne operations such as Operation Sealion – the proposed invasion of Britain. The Ju 322 project was dropped in 1941, but the Me 321 continued into production. Unfortunately, the transport aircraft available at the time such as the Junkers Ju 52 and Ju 90 did not have sufficient power to tow these huge gliders effectively. An alternative arrangement using three Messerschmitt Bf 110 fighters to tow the glider proved to be difficult in practice and extremely dangerous if one or more of the rocket boosters (fitted
Generaloberst Ernst Udet suggested to Ernst Heinkel that joining two He 111 bombers via a common centre section might provide an aircraft with sufficient power for the job and early in 1941 work began on two prototypes of what would be known as the Heinkel Zwilling (meaning Siamese Twin).
The prototypes were delivered in the Autumn of 1941. The new aircraft consisted of two He 111H-6 fuselages complete with their wing centre sections which retained both engines. The fuselages were joined by a newly designed central wing carrying a fifth engine. The port and starboard outer wing sections were retained.
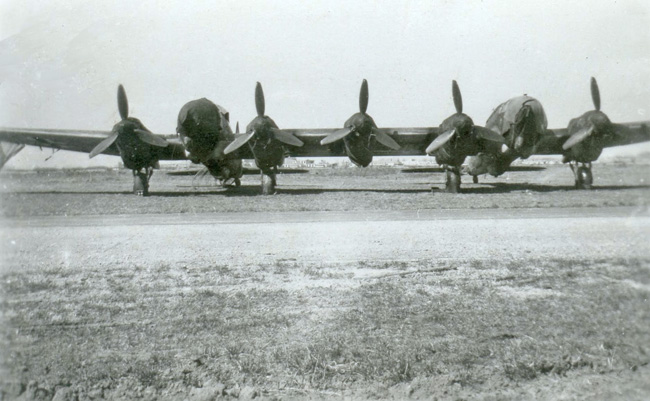
Two pilots were carried along with mechanics, a radio operator and gunners. The aircraft was flown from the port fuselage though the pilot in the starboard fuselage retained some rudimentary flight controls. The armament fitted to the He 111Z, which was essentially an extremely slow and highly vulnerable aircraft, was increased during its operational career eventually resulting in a crew of nine being needed.
Understandably the He 111Z was not the easiest aircraft to fly and it was very cumbersome in the air. However, it proved to be adequate for its intended task and was surprisingly trouble free in operation.
The aircraft was capable of towing one Me 321 glider or up to three of the smaller Gotha Go 242 gliders (though in practice only two were usually towed).
The He 111Z was intended for use in several major operations in co-operation with the Wermacht. Many of these such as the planned invasions of both the British Isles and Malta failed to materialise. However, he aircraft eventually saw action, taking part in the mass evacuation of troops from the region of the Bagerovo Bridgehead with as many as 30 casualties being loaded into the He 111Z with another 100 in the following glider.
The He 111Z was regarded as a success despite its limited operational use and its unwieldy appearance.
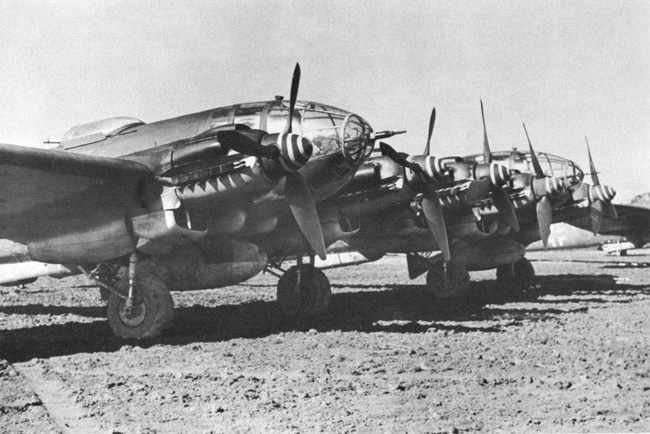
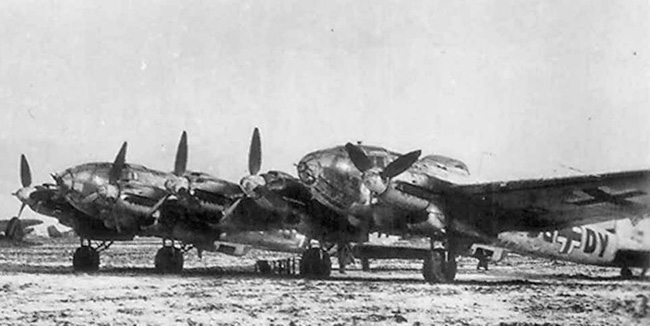
A bomber variant (the He 111Z-2) was proposed. However, the project was not developed beyond the concept stage.
The ICM kit…
The He 111Z has been available in kit form since the 1970s in the form of the Italeri kit in 1:72 scale.
Some years ago there was a limited run resin conversion from Arba enabling two Monogram He 111 kits to be joined to make the He 111Z in 1:48 scale. I am not sure if this conversion kit is still available and the Monogram kit is now also quite hard to find.
More recently ICM have come to the rescue with a series of newly tooled kits of the Heinkel which have been well received by modellers. The He 111Z kit is a development of ICM’s original He 111 kit.
The kit comes packed in two sturdy cardboard boxes and while the sprues are not all separately bagged, the clear parts come in their own bags to prevent damage and scratching.
Two sets of sprues from the original release are included, but those hoping that they might make two complete models of the bomber variant from this kit will be disappointed as there is only one set of outer wing panels.
There are new sprues containing the central wing and there is an extra engine sprue to make up the He 111Z. There are also new shortened internal spars to connect fuselages to the central wing.
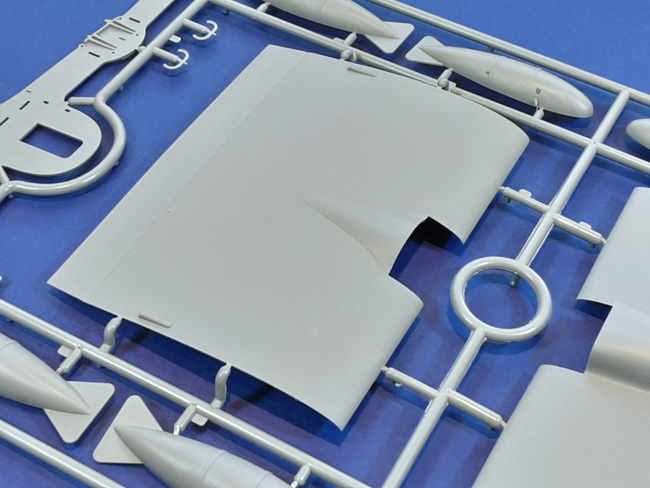
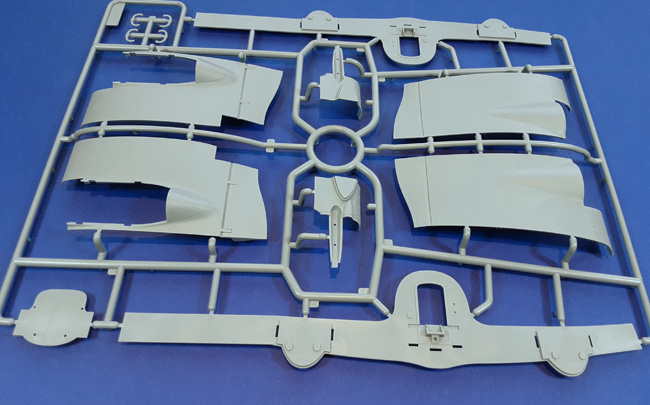
The original bomb bays and bombs are included, but these are not needed for this model so there will be a lot of spare parts left over. Perhaps these could be used to detail an old Monogram kit if you still have one lurking in the loft, or maybe to make a model of the proposed bomber version.
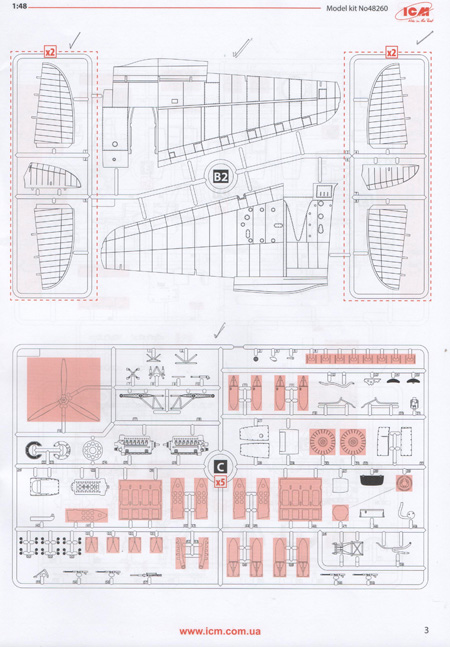
There are some new external fuel tanks included as these were often carried on the He 111Z.


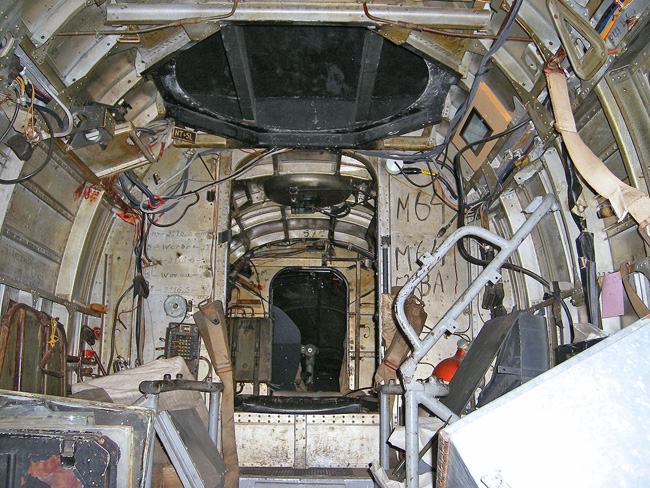
There is no detail included in the kit to replace the redundant bomb bays, though the windows in this area of the fuselage are small and so I doubt that much could be seen inside anyway. While troops could be carried in the He 111Z, I am unsure whether this would have been in the space previously occupied by the bomb bay or just in the rear fuselage.
There is extensive glazing making up the asymmetrical nose of the He 111 and this is, of course, doubled in this kit. The nose glazing is made up from a number of separate panels and these will require careful assembly to get everything lined up properly. The quality of the clear parts is very good – the parts being thin with no distortion.
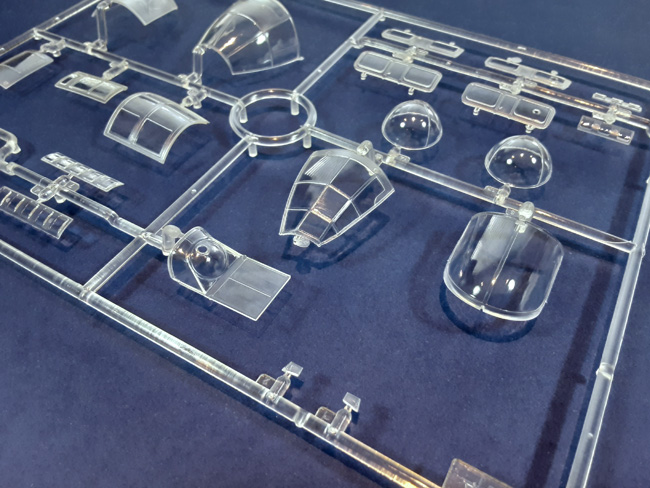
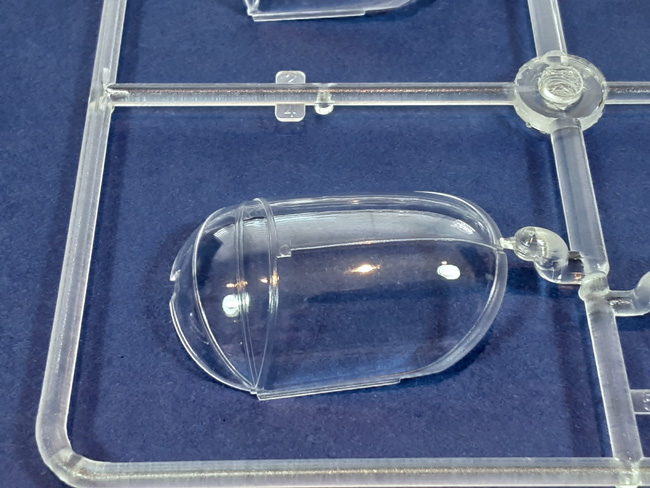
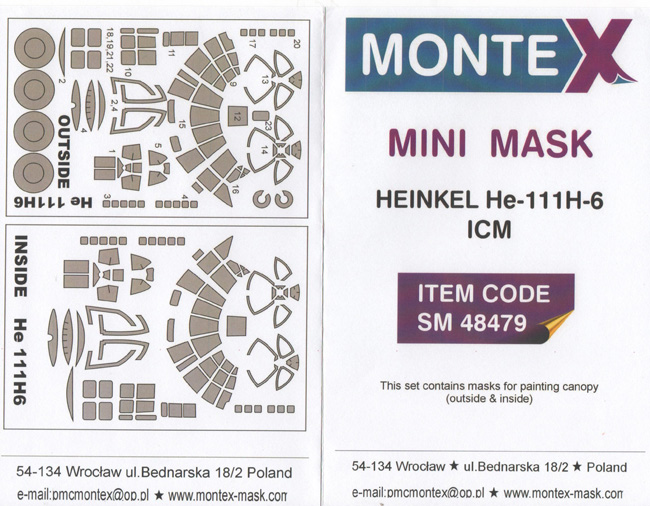
I think that masking this glazing could be a very time-consuming job. At the time of writing there are no commercially available masks available for the He 111Z. However, Montex make masks for the original He 111 kit which I assume will fit – though obviously two sets will be required.
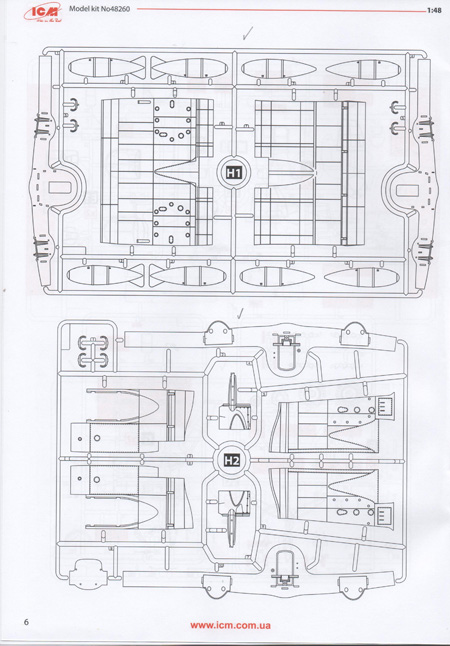
The He 111 is a large model in 1:48 scale and the He 111Z will be even bigger. I can see that this may require a degree of forward planning when building the kit. Due to the way that the fuselages are attached to the wings I do not think that it will be possible to use a modular ‘paint then assemble’ approach.
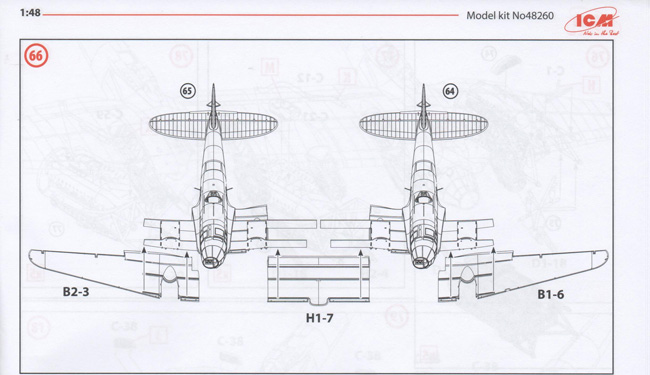
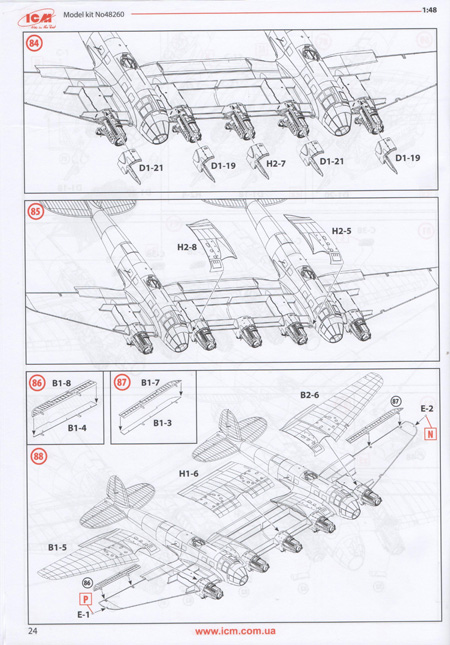
Looking at the scans of the relevant sections from the instructions may illustrate what I mean. The wings do not simply slot into the fuselage as they do on many kits. I would like to be proved wrong, but I think that the whole model will have to be fully assembled before it can be painted. Such a large (and heavy) model will be very awkward to handle during both assembly and painting.
There are some rivets (or more likely screws for removing some of the panels?) moulded into the kit parts. However, looking at Walkaround photos of the He 111 or taking a quick glance at the preserved aircraft at the RAF museum in Hendon will show that there is a lot more rivet detail that could be added.
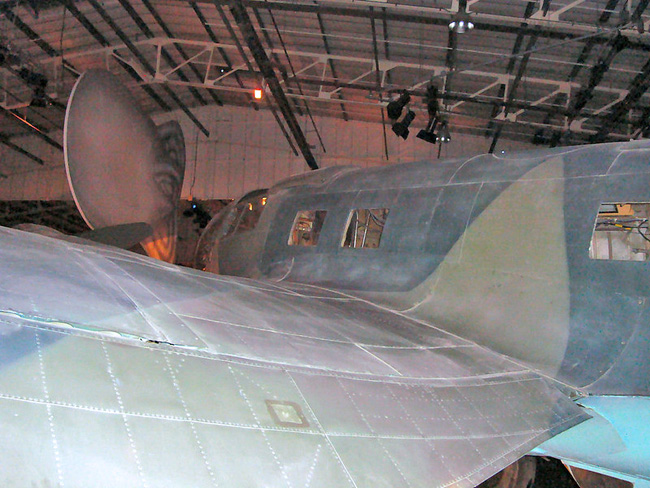
Fortunately for those who enjoy the process of adding rivets, this model provides a VERY large canvass on which to work, perhaps representing the missing detail with a pounce wheel such as ‘Rosie The Riveter’ or maybe a suitable template and punch system.
Sadly for those like me who think that missing rows of rivets probably should be there, but don’t like the extremely tedious process of adding them, this model provides a VERY large canvass …….. you can probably see where I’m going with this.
For those for whom the addition of rivets is not an issue and for those who like me will probably start adding them filled with good intentions – but will inevitably end up feeling that life is just too short – the existing surface detail is made up of neat finely recessed panel lines.

I have had issues with ICM’s transfers in the past as on some of their kits such as their Dornier Do 17 I thought that they were thick, matt, ‘over-inked’ and with a lot of carrier film, feeling that they were probably best replaced with after-market items. There does not seem to be any such issue here. On the sheet the transfers look thin and glossy with a minimum of carrier film to be disguised. This is fortunate as there are a lot of small stencils to apply and these are always good candidates for the dreaded silvering of transfer carrier film.
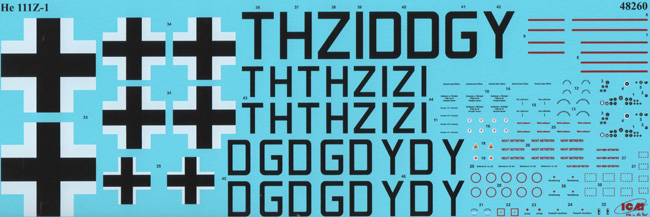
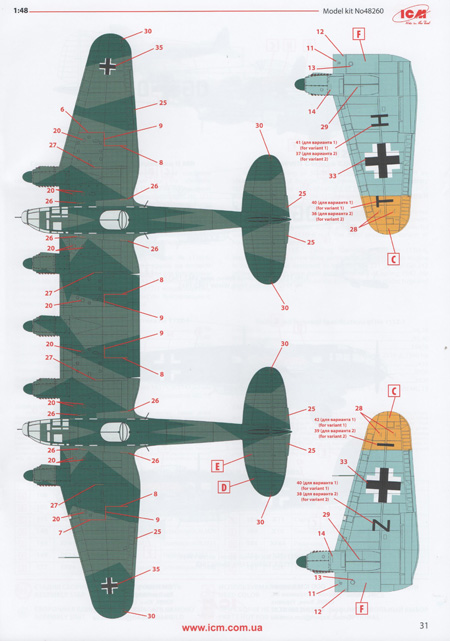
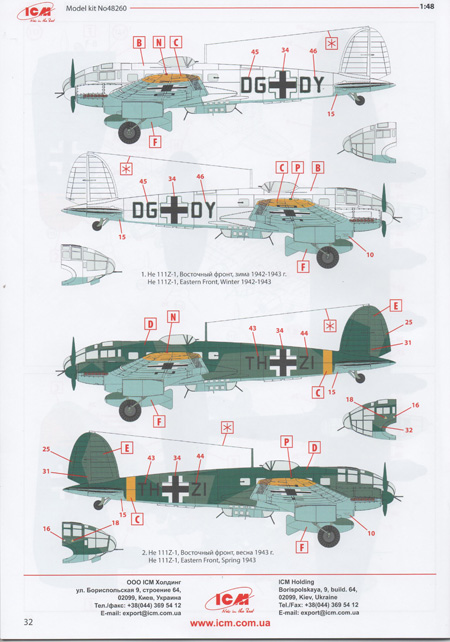
There are markings supplied for two aircraft. One is in the usual early war hard-edged splinter scheme of RLM 70 and RLM 71 over RLM 65. The other is depicted as having a temporary covering of winter whitewash. This latter scheme will be a good opportunity for those keen on the currently popular ‘hairspray’ technique of replicating a worn whitewash finish (though I assume that this aircraft started out with the normal 3 colour camouflage scheme at some point).
Conclusion…
Having seen the overall size of this kit, some modellers may consider it to be perhaps a little large and unwieldy to be of interest. Once built the completed model will have to be stored somewhere and I think that a large clear work area will be needed just to put the thing together!
The finished model will need to be handled carefully due to its size and weight (you will not be picking this up by a wingtip) which may make construction and painting awkward. Due to the way that the model needs to be constructed I don’t think that it could be painted in easy to handle pieces and then assembled later on.
Having said this, given enough space and with a little care and forward planning, these potential difficulties could be overcome. Anyone tackling this kit will be rewarded with a very impressive model.
I think this could represent the largest model I’m ever likely to build and look forward to starting this in the near future. However, I think that perhaps building one of ICM’s kits of the one of bomber versions of the He 111 beforehand might not be a bad idea, in order to see how that kit goes together and to find out if there are any pitfalls before tackling this monster.
As an aside – a few years ago Revell produced a kit of the Heinkel He 111 in 1:32 scale. This kit would itself build up into an enormous model. Being a sensible cardigan-wearing sort of chap, I think that modelling the He 111Z based on two of these kits would be a completely ludicrous and totally insane idea which would be sheer madness and well beyond the realms of any reasonable, remotely sensible practicality.
But the thing is ……. I can’t help wondering if one day somebody somewhere … (OMG! GC)…
SMN Quick summary Star rating out of 5
| FEATURE | STAR RATING |
|---|---|
| Quality of moulding | ***** |
| Level of detail | **** |
| Accuracy | **** |
| Instructions | **** |
| Decals | **** |
| Subject choice | ***** |
| Overall | **** |
Dai W.
Ask a question or add feedback:
You must be logged in to post a comment.