What’s the point of this technique then?
Well, in short look above for your answer… that’s why I and many other modellers add this kind of weathering. To get a much more realistically weathered model. These techniques can apply just as well to armour and maritime subjects, but as aircraft is my first love this is your starter for ten. We will be featuring the equivalent approach on specific armour and maritime subjects over the coming weeks, so keep an eye out for those.
In the four images above and firstly my thanks to Julian Seddon for the image of his Spitfire, you’ll see four different approaches have been used to try and get a realistic effect for the individual subjects shown. All are very straightforward to achieve and so here’s how to do it…
Technique 1 – paint chips
You might at first think that you should use silver, right? Well, no, not always. It partly depends on how extreme the paint chipping is that you want to create. Japanese WWII fighters for example demonstrate some of the most extreme paint chipping seen on operational aircraft – ever. But more usually with other subjects, like Julian’s 1:32nd scale Spitfire Mk.IX silver paint would be too harsh and reflective alone. You could do more where the wing joins the fuselage (as you can see in the pic), but it’s all about what you want. The effect here is achieved by adding very small dots of paint that’s been heavily thinned and applied with a very small, pointed brush.


How’s it done then?
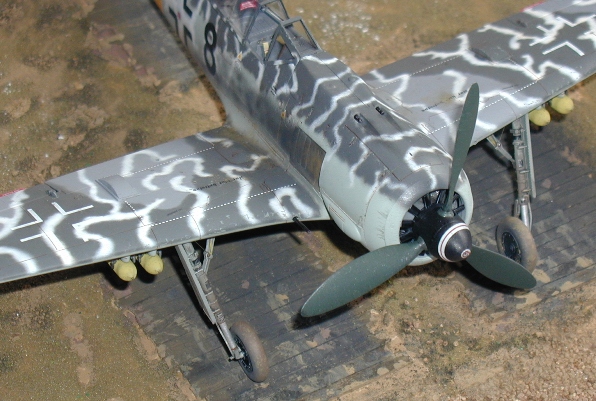
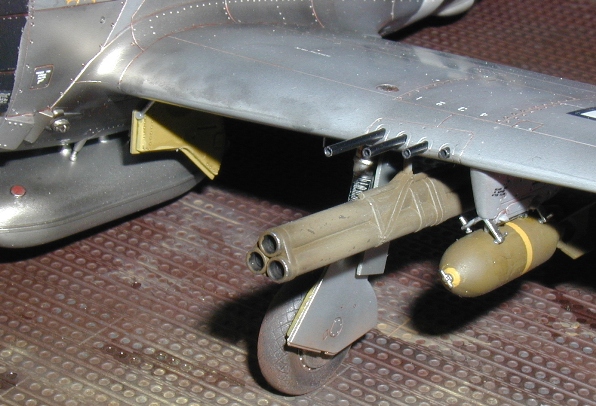
Julian’s Spit is a good illustration of this technique (and you can see it above on the wing leading edge of my Fw-190F-8, and P-47 rocket pod) because if you look carefully you’ll notice that he’s used a combination of light and dark greys predominantly. You just need to take your time and work with about a 50-50 mix of paint to thinner for the chipping colour. After a few moments you’ll find that you can get very subtle effects. The key is the correct thinness to the paint you’re using as the ‘chip’ colour. The idea is to create marks that do not sit proud of the surface at all – well not so that you’d notice. This is the secret to the effect looking convincing. Your handiwork is often enhanced by spraying a flat or satin varnish over the surface to seal everything in. To be fair, I mainly do this when the paint hasn’t gone on as thin as I’d have liked and the varnish coat helps to flatten out the surface
What to watch for…
- Not mixing your paint thin enough – about 50/50 should do or thinner. Too thin and the tiny ‘dot’ chip will become translucent and look very unrealistic.
- Being too heavy-handed – go in close and barely touch the surface. You are not painting the chip, merely touching the surface.

Technique 2 – worn and weathered paintwork
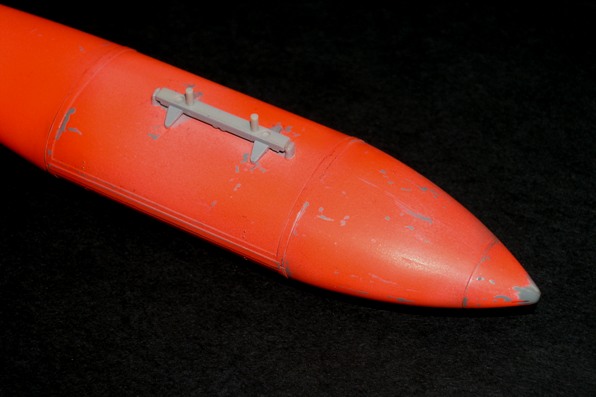
I always remember when I was doing this big Isra Decal Studio resin conversion for the lovely Tamiya 1:32nd scale F-16C, seeing a cracking image of a Day-Glo-painted centreline tank. It looked awesome and helped to break up the greys, tans and greens of the main camo scheme.
The effect is I think very realistic, when compared to the images I had available at the time. Check out some of Isra’s superb books on the ISDF, they are really stunning http://www.isradecal.com/ .
How’s it done then?
This is very straightforward and all it involves is some dry-brushing. Check out that demo elsewhere in your Techniques Bank rather than repeat it all again here. In addition though, some useful tips…
- Choose your dry- brushing colour carefully – I have used light grey here. Specifically Medium Sea Grey is used on this fuel tank because that seemed a good match for that seen in the real pics, but you can use several different tones depending on your subject.
- Enamels work best for me when dry-brushing. I know many modellers like to use acrylics, but I think enamels are great because they allow more time to work with the pigment.


