Feature article by Gary Wickham (SMN August 2012)
Here are a few pics of the finished project…
Above are some images of Gary’s finished model that we’ve added here so that you can see what he achieved at the end. The story below is all about how he got there… written at the time. This is Gary’s first build for SMN and I’m sure you all join me in welcoming such a talented guy to the SMN Review Team – welcome Gary! GeoffBackground introduction
I’ve actually been working on and off on this kit for some time, taking photos as I go and now I’ve dumped a summary of the progress thus here for the first update.
I’ve got a stack of Hasegawa Harriers to build (it’s my second favourite aircraft) and I’m taking my time with this one (being the first) so I can find out all the shortcuts and shortcomings with the kit. I’ve stocked up on the Aires cockpit sets and as you’ll see, I’ve used one here.
I’ll be using the markings from the TwoBobs sheet 48-075 OIF Harriers. The only N/A bird on this sheet is from VMA-231 that was loaned to VMA-223 during OIF.

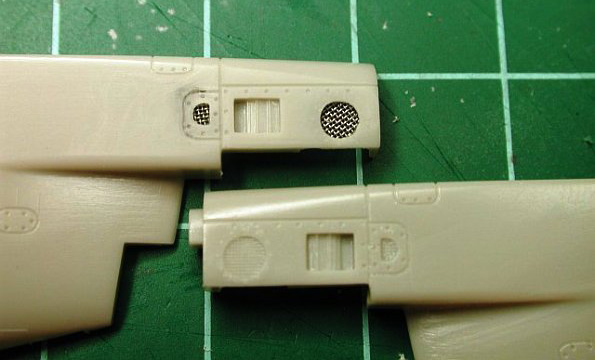
The RCS (Reaction Control Thruster) vents on the tail boom of the Harrier are quite a distinctive and visible feature. Whilst the Hasegawa’s moulding is OK, I decided to see if the effort involved in replacing them with wire mesh was worth it. The jury is out until I finish the model :)

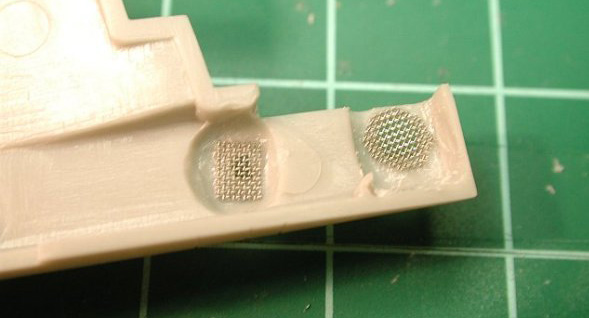
An inside view of the tail boom following thinning of the plastic with a Dremmel tool and installation of the wire mesh.


