Review by Mick Stephen
Introduction
This is a first for me on two counts, my first go at a 1:32 scale aircraft and my first try of a kit from Kinetic.
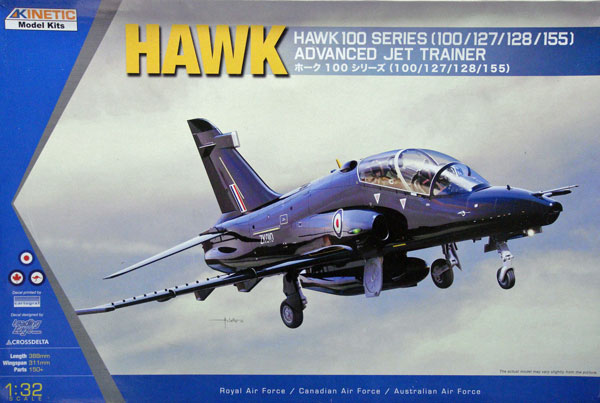
Here’s what we’re going to attempt to build.

The BAe Hawk has been widely exported in numerous versions since the original T1 for the RAF entered service. The export versions ranged through the 50 series and 60 series aircraft, which were very similar to the T1. I had the pleasure of working on the Mk.64 for Kuwait many moons ago.
With the need for a more advanced lead-in fighter trainer and adding both the attack and point-defence fighter role for the Hawk line, BAE revamped the design, which became the 100 series. Incorporating a new wing, an extended nose to accommodate the avionics and fitted out to be a weapons platform, the 100 series sporting an uprated powerplant again sold worldwide. I spent some time on the Mk 102 for the UAE, and it was a vastly different aircraft to the original.
Being highly maneuverable, there is still not much than can catch a Hawk up close and personal even today.
The Tentara Nasional Indonesia Angkatan Udara, TNI–AU (Indonesian Air Force) were an early customer for the Hawk, beginning with the Mk 53, it didn’t take long to upgrade to the 100 series and ultimately to the single seat 200 series, deliveries beginning in 1993 and the last received in 1997.
The Hawks operate from 3 squadrons, No15 with Mk53 in a training role, No1 and No12 Squadrons equipped with a mix of Mk 109 and Mk 209 in an operational role. The 100 and 200 series are primarily configured for air defence with Sidewinder and ground attack with a variety of stores. The attack configuration is optimized for COIN (Counter Insurgency) operations, with the 209 having the added ability to use Maverick AGM in a ground attack or anti-shipping role if required.
The plan
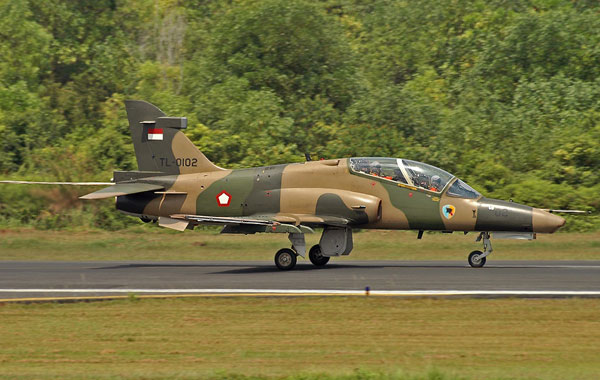
My chosen victim (subject) is a 12 Squadron (Black Panthers) airframe based in Pekanbaru on Sumatra, why you may ask? Well it’s where I now call home and I see these fly over my house every day, what better reason.
I have chosen to model the first aircraft TT-101, for no other reason than the one in the photo TL-0102 has been upgraded and I didn’t want to scratch build a new tail mounted flare/chaff dispenser, as this doesn’t come in the kit, pity. A secondary excuse is that I have the decals for 101, but I do not have sufficient serial codes in the correct font to do TL-0102.
The kit
Kinetic are a recent (last few years) entrant to the injection molded kit market and have produced quite a few different subjects of late. The Hawk 100 kit in 1:32 appeared in late 2012 and has had many reviews since, so I won’t bore you with a detailed in-box description that is easily found already online. Instead I’ll just get straight into the build adding some comments on the kit as we go and point out where I found some challenges, and believe me there are some.
The kit allows for the building of four different variants, British (2), Canadian/NATO, and Australian, with decals for some very unique airframes. However I don’t want any of those, so although this will be an OOB construction, the end result will not be as advertised. In fact, the outward appearance of the various types is basically identical, apart from ariel fit, so we shouldn’t be too far off the mark.
Initial impressions on opening the box are ‘WOW’ a 1:32 Hawk 100, with only the Revell offering of a T1/A and a Red Arrows version on the market, the 100 series is a very welcome addition for modelers around the world whose forces operate them, good subject choice Kinetic and to be applauded!
The surface detail on the fuselage is impressive, lovely rivet details that perhaps you may think are a little too over scale to begin with, but checking my references (see the reference pics in your Photo Reference Library for the Hawk) the rivets near the tail and under the cockpit sills are just right. If anything, some smaller rivet lines are actually missing from under the tail so a super detailer can go to town on this one, for me it will suffice; satisfied so far.
The plastic is very nice to work with, joins well with little pressure needed to get a strong weld, not too grainy but you’ll need primer to really show up any imperfections (we’ll come to that later).
It’s not all good news as you will see as we progress…