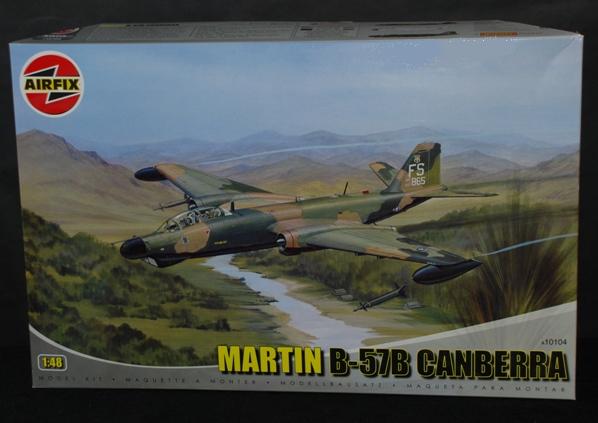
Review by Geoff Coughlin (Aug 2012)
Price around £32.99 GBP
Kit ref: A10104
See Geoff’s FINISHED NOW BUILD REVIEW
Our thanks to Airfix for supplying our review sample, get this kit here now at: www.airfix.com
Reference
There are some great Canberra walkaround pics in your Photo Reference Library; admittedly for the Canberra PR Mk.9 but useful nonetheless for detail like undercarriage, wheel bays etc.
Intro
As with many Here Now reviews, we are trying to cover these in SMN when we undertake a build project (if possible) so that, over the months and years you will have greater and greater access to a more comprehensive bank of reviews.
A little bit of background
The Martin B-57 Canberra was a United States-built, twin jet engine tactical bomber and reconnaissance aircraft, which entered service with the United States Air Force (USAF) in 1953. The B-57 was initially a version of the English Electric Canberra built under license. However, the Glenn L. Martin Company significantly modified the design and produced several unique variants.
The retirement in 1983 of the B-57 ended the era of the tactical bomber that had its beginning with the World War I De Havilland DH-4. The last two remaining flight worthy WB-57Fs are assigned to the NASA Johnson Space Center at Ellington Field, Houston, Texas as high altitude scientific research aircraft.
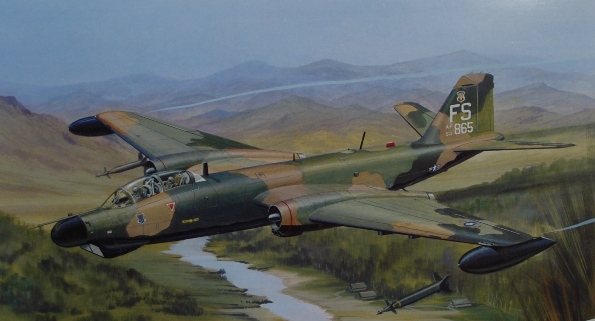
My intention is to build this model in the form of the B-57G (how can I resist that camo scheme!), so here’s a little bit more about that version.

B-57s returned to Southeast Asia in the form of the Tropic Moon III B-57G, deployed to Thailand during the fall of 1970. Intended as a night intruder to help combat movement along the Ho Chi Minh trail, these aircraft were equipped with a variety of new sensors and other equipment, and were capable of dropping laser guided munitions. The relative kill rates per sortie during Operation Commando Hunt V between the B-57G and the AC-130A/E showed that the former was not as suited to the role of trucker hunter. An attempt to combine both led to one B-57G being modified to house a special bomb bay installation of one Emerson TAT-161 turret with a single M61 20mm cannon as a gunship under project Pave Gat. After delays in testing at Eglin AFB, Florida, due to competition for mission time from the Tropic Moon III B-57Gs, Pave Gat tests proved “that the B-57G could hit stationary or moving targets with its 20mm gun, day or night. Loaded with 4,000 rounds of ammunition, the Pave Gat B-57G could hit as many as 20 targets, three times as many as the bomb-carrying B-57G. The Pave Gat aircraft could avoid anti-aircraft fire by firing from offset positions, while the bomb carrier had to pass directly over the target.” Deployment to SEA was resisted, however, by the Seventh and Thirteenth Air Forces and others as the decision had been made in August 1971 to return the B-57G squadron to the U.S. in early 1972, leaving insufficient evaluation time. Project Pave Gat was terminated 21 December 1971. The B-57G was removed from Thailand in May 1972. Plans remained for the continuation of the B-57G program but post-conflict spending cuts forced the abandonment of these plans.
Now let’s go inside… fuselage and wings
I have built one 1:48 Canberra kit already and that was very enjoyable – the PR.Mk.9 (and the Classic Airframe B2/TT.Mk.18. the Airfix kit goes together well and from recollection the cockpit was just a bit imprecise in terms of location but with the B.57G this should be much more straightforward given the tandem-seating arrangement within a set cockpit tub.
The fuselage and wings were also odd on the PR9, mainly because the wings had accurate recessed panel line detail but the fuselage erratic and not so accurate. It’s becoming a little tricky to find decent reference on the B-57G but I’ll do my best with the build that’s about to start in Build Now, pointing out any areas for you to consider adapting. The overall shape and look is good though.
Panel line detail generally is a bit heavy to be honest, especially the rudder that has excessive engraved detail. I’ll use Mr Surfacer on this to reduce the ribbed recessed detail as I did on my PR.Mk.9. a dry fit of the wings to fuselage looks as good as ever, so that should be ok.
Sub assemblies and detail parts
The breakdown of the parts looks very logical and options abound. The immediate highlights are the: stores options, bomb-bay, seats, wheels and wheel wells.
Moving to the cockpit
Not too bad for the scale with the decals mentioned above and a reasonable representation of the ejection seats. You’ll need to carefully paint the moulded straps or add some replacements from photo etch or metal foil (as I’ll probably do). The side consoles on the tub have basic raised detail that looks a little sparse to be fair but the main instrument panel is better and these should all paint and come up well with a wash and weathering.
Clear parts
These are simple as on the real aircraft; clear and largely unblemished so should look good when painted and attached. Although I am going to add some detail to the cockpit, it will be limited as I plan to have the canopy closed this time (rare for me!) to preserve the lines of the machine. The large ‘box-like’ fairing under the nose will go a long way to ruining the graceful lines of this Canberra, but my objective is trying to capture that worn South East Asia paint scheme!
Stores
You can clearly see from all the attached images what’s on offer and the 4 X LGBs I will need for this project are included which is great. Further options abound so check out the pics.
Decals
There are 3 great schemes offered in this package and all are very different so you can take your choice from:
- Martin B-57G, 13th Bomb Squadron, 8th Tactical Fighter Wing, Ubon, Thailand 1971
- Martin Rb-57E Patricia Lynn, 6,250th Combat Support Group, 2nd Air Division, Tan Son Nhut, South Vietnam 1963
- Martin B-57B, 822nd Bomb Squadron, 38th Bomb Group (T), Laon, France 1966/67
An all-colour painting guide/decal instruction sheet is included that also offers invaluable reference.
I have seen one model on the Net that appears to be finished in the Airfix decals and, sadly, there is a lot of carrier film showing. A really glossy finish is essential for these earlier Airfix decals (always good anyway) and trimming some of the carrier film away on the large serials and other markings will also help. You may even want to use the decals as a template for creating masks from low-tack film and spraying the same – much easier than you’d expect. I am planning an HD video demo on how to do this so keep an eye on your techniques Bank.
Instructions
These are good and there are clear and unambiguous instructions on assembly. At all stages there are some neat symbols to indicate options for your build.
To conclude
This is a simple kit of a very successful type in worldwide service. Here you have the chance to create any one of three great finishes from the decals included. Overall an impressive package bearing in mind the specific points identified above.
Recommended
Geoff C.


