Windshield

With the fuselage work coming along, I wanted to see how well the windshield fitted. I had been pre-warned by others who have built this kit that this was a potential trouble spot. Initial test-fitting showed a very poor fit, but with a patient attitude and some poking and prodding I realised that the main fault was that the clear part needed to be spread slightly wider than moulded to get a snug fit with the fuselage. To accommodate this, I used some 40-thou plastic strip to create several “spacers” on each side. Now when the windshield is attached, the “spacers” force it apart that small bit and it fits almost perfectly. Other modellers were not so lucky it seems.

Last task tackled in this update was the control surfaces. On the P-51D model, all control surfaces (other than the rudder) were metal skinned. Here you see work being done to the flaps, again removing unwanted rivet detail using super glue as a filler.
Control surfaces

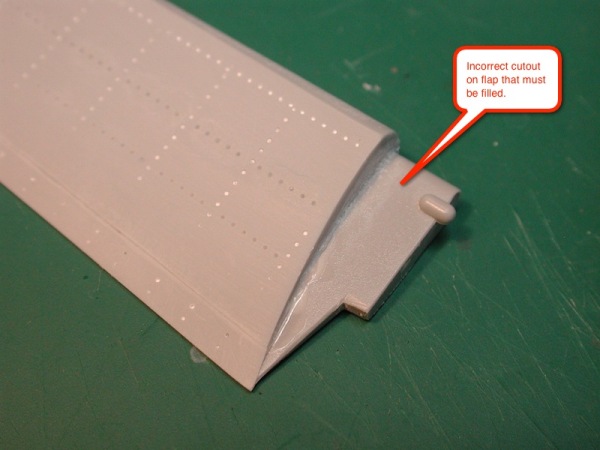
Another of the glaring inaccuracies of the Dragon kit is the cut-outs on the inboard edge of the flaps. Not sure why they did this as the kit can be modified to be correct. If I can do it, then surely they could have done it. Basically the P-51 flaps are solid, without this cut-out. Interestingly, the new Tamiya kit is much better, but even they have a small cut-out section that needs to be filled (with a part they provide) if the flaps are displayed down.

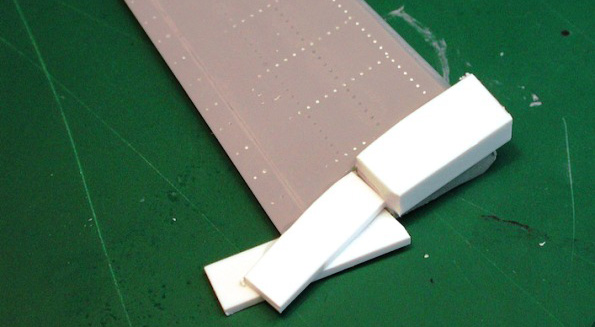
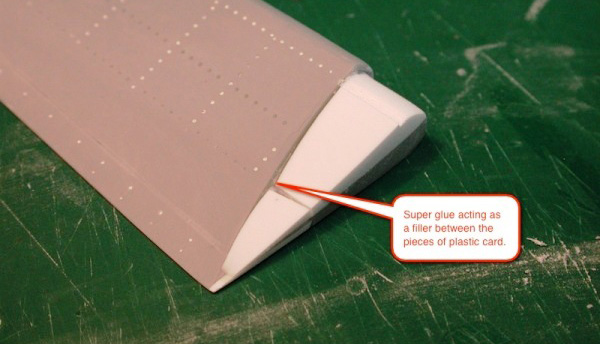
First step is to fill the gap with appropriate sized plastic card. What you see here is very rough and will be trimmed, filed and sanded to shape. I used super glue here as the fit was not very good and I wanted the glue to act as a filler.

After much trimming, sanding and cutting, the plasticard is shaped in line with the rest of the flap. All that remains is to add the rivet detail and apply a coat of primer to check the finish.

Just as the inboard section of the flap was wrong, so was the wing root on the fuselage. All of the plastic behind the flap hinge point must be removed to allow the flap itself to retract into.