Feature Article with Calum Gibson
Just before we get started, here’s a quick look at how it all turned out…
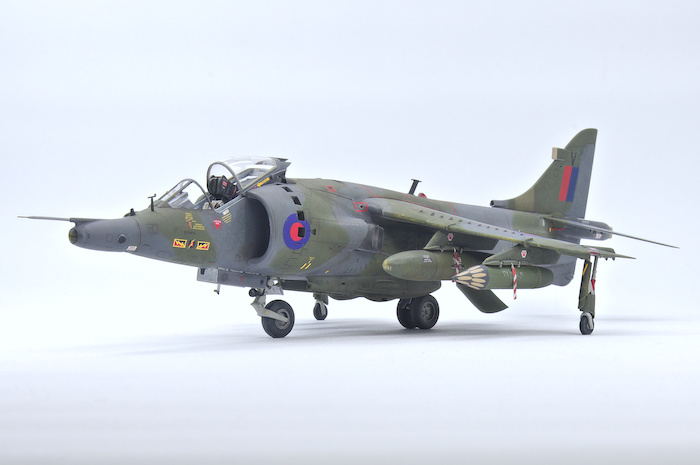
The only other “modern” RAF subject I have built in the green / grey wrap around scheme was the Jaguar. For that I used Mr Color straight from the bottle. After the weathering was done, I felt the colours were too dark.
For this build I wanted a bit of contrast / saturation, particularly in the green so after seeking advice online I added a generous dollop of radome tan to some Mr Color RAF Dark Green (C330) to get something I liked.
Onto Dark Sea Grey. I’ve always liked Mr Colors Dark Sea Grey from the bottle. But the newer bottles I have appear different from my really old one. The new ones have a distinct purple tone. It doesn’t look as bad in the photos as it does in real life, and for the record the Mr Hobby version is the same shade. I wasn’t convinced it was what I want.
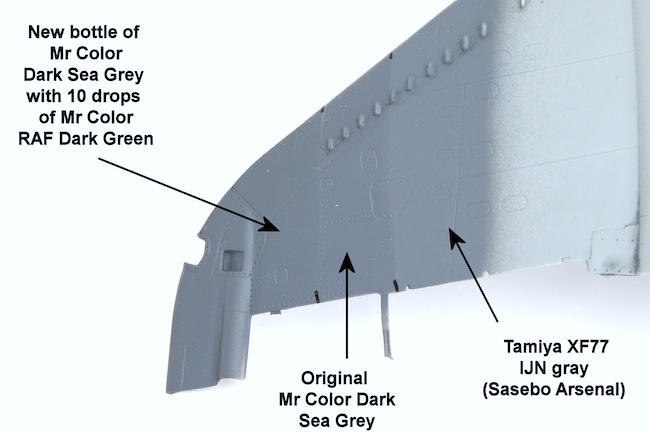
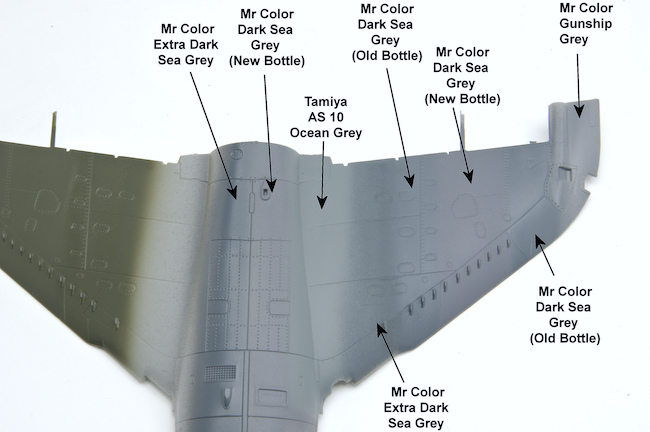
The image of the Spare Harrier wing in the kit shows some of the colours I tried including the remnants of my old bottle of Mr Color Dark Sea Grey.
The Harrier images look a little closer to the Purplish shade in the new bottle of Dark Sea Grey… But it was shot with a flash so I think this affected the hues of the grey.
After some googling and a trip to my local Hobby shop I decided on what to use for Dark Sea Grey.
The owner, who used to be a spray painter, suggested that, if I don’t like the purple hue to add some green (as green kills red). So I bought a new bottle of Mr Color Dark Sea Grey and added about 10 decent drops of Mr Color RAF Dark Green. That took away most of the purple hue.
I also bought Tamiya XF-77 IJN gray (Sasebo Arsenal) which I really liked straight from the bottle. It is a touch lighter than the modified Mr Color so that will be the starting point.
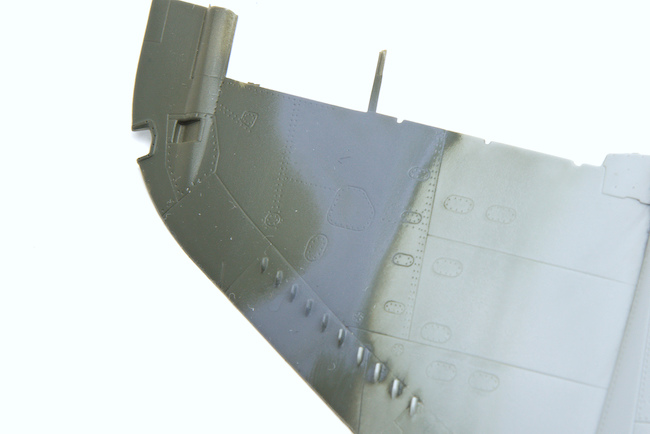
It’s hard to get the camera to capture the subtle differences but they are there. The 2nd image is my RAF Dark Green mix, (where I added some radome tan to the bottle) and XF-77.
