Feature Article by Jamie Haggo
Why this project?
I have always had a thing for weathering and so what better canvass than a really beaten up Japanese aircraft from WW2. I had a trawl through the internet for examples of heavily chipped Japanese aircraft and most seemed to be things like the Ki-84 (which I have already modelled) and other fighters. I thought about getting a Ki-61 or Ki-44 in 1:32 however these days Hasegawa’s pricing policy is not really compatible with a limited budget so I was delighted to see a 1:48 Hasegawa B5N2 Kate in the specials section at Hannants. At just over 20 quid I couldn’t resist, especially as I had found a particularly battered example on the web. Now, I won’t be doing this exact aircraft as trying to match those chips will be a nightmare so I’ll be modelling a fictional aircraft from the same location and unit and in a similar state of mingingness (not really a word but I like it).
Conclusion, Gallery and PDF…
On to the build
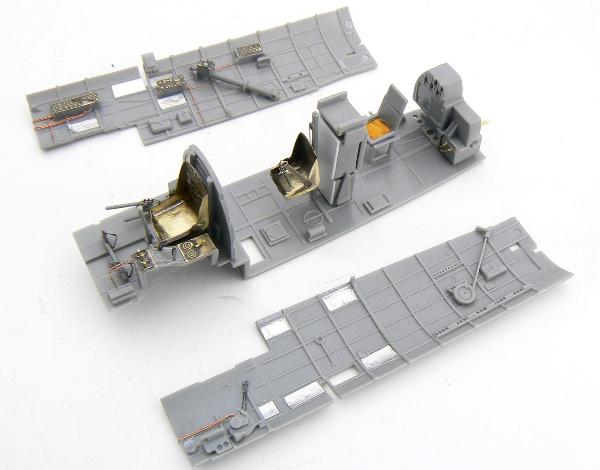
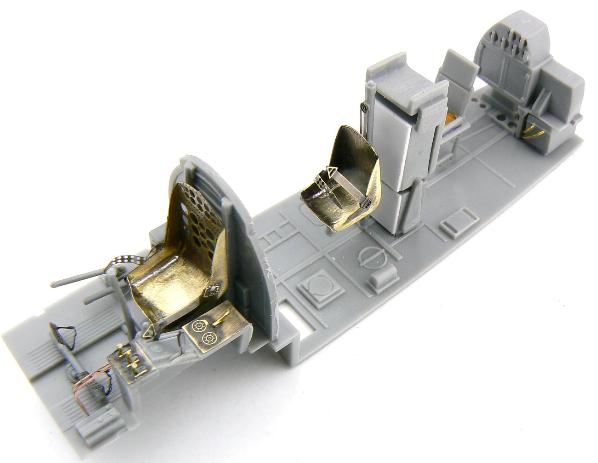
As ever, I grabbed the Eduard photo etch update set which hopefully will add a few nice details here and there. Work started in the cockpit and as normal, I try and glue together as many parts as I can before painting. Eduard plate their photo etch with a nickel silver colour which to be honest I don’t really like therefore I usually polish this off first so that’s why it looks brass in the pictures. You’ll also note I’ve added some extra wiring; now I didn’t have any cockpit photos of this aeroplane so I used a bit of modeller’s artistic licence, I hope you can forgive me. The seats have been soldered and seeing I normally have a nightmare trying to glue seat harnesses to seats I soldered these on as well. Note there are only lap belts which was common in Japanese aircraft of the period. 
 The injector pin marks are a bit of a nuisance. I covered some with plastic card, filled some others and also left some. These ones were on the cockpit side walls and would be very hard to remove. Let’s hope that the cockpit openings are small enough that they’ll be hidden!
Now for some paint…
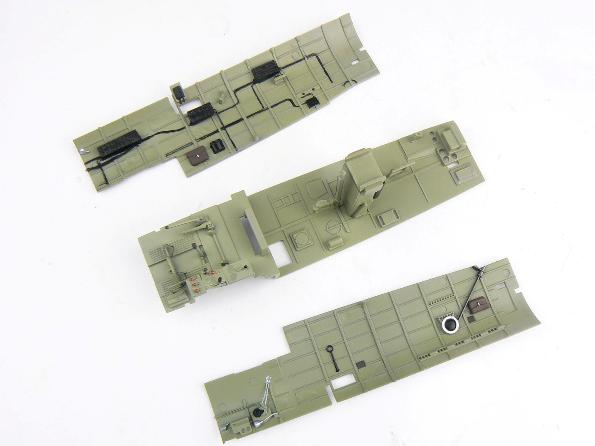
I put out a call on Hyperscale.com regarding the colour and got an absolute mine of information back, much of it contradictory. From all the blah I received I decided to use a Tamiya colour Nakajima Grey and added a drop of buff and Field Grey (actually a green) to wash it out slightly. In addition, some Gunze Clear was added to the mix to make it glossy, this is important for the weathering. 