Paint! Paint! Paint! (sorry, just been watching Father Ted on TV and Father Jack gave his opinion…!)
Ok, Ok I’m getting there…
Night undersides

True it’s been a little while coming but there now and this update completes this project from Revell.
Lifecolor has recently released a great set in their themed ranges, this time one containing six different shades of ‘black’. My original plan was to use these on this model but having just laid down the base colour for the Night undersides using Polyscale S NATO Tri-Black I felt the Lifecolor blacks were a bit too light. If you start with these and want a weathered, light black look then they will be ideal; so I’ll find another opportunity to use them soon.
As you can probably see in this image, the black went on really well, giving a great smooth finish onto which a slightly lightened tone of the base colour was sprayed – it’s hardly perceptible in this pic but the underside I felt wasn’t going to fade too much under the wings, even in the hot climate my subject operated in. More lightening using grey pastels for the fuselage sides (see the Techniques Bank for an HD video on doing this).
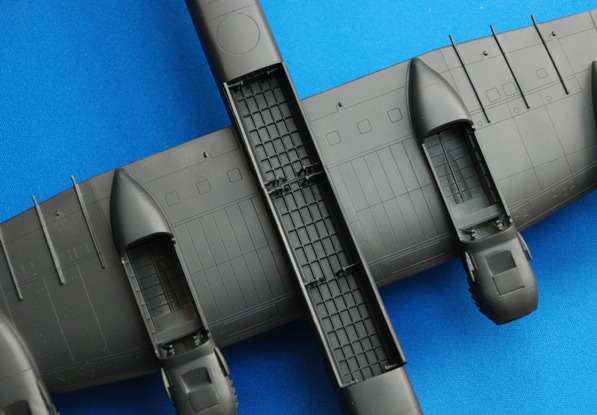
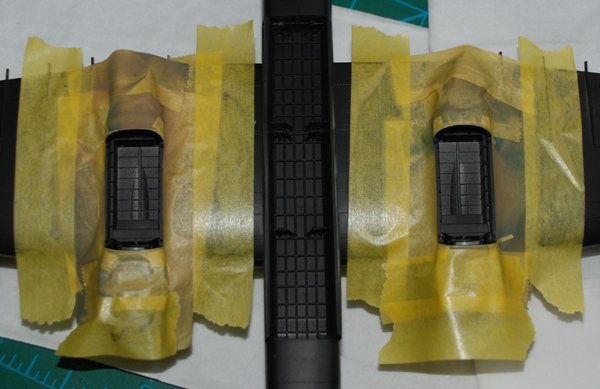
Wheel wells

While your Halifax is inverted, it’s a good idea to mask off and spray the wheel well interior. Most aircraft seemed to have black on the bay door interiors and so they are left alone for now, picking up some brown, grey and yellow pastel dust later on.
Upper camouflage
This is standard RAF Dark Earth and Dark Green and again, Lifecolor water-based acrylics are used. I really like this paint, mixing well, spraying evenly and cleaning easily in water, any residue in the airbrush after water washing being removed with Foaming Airbrush Cleaner (available from The Airbrush Company ).
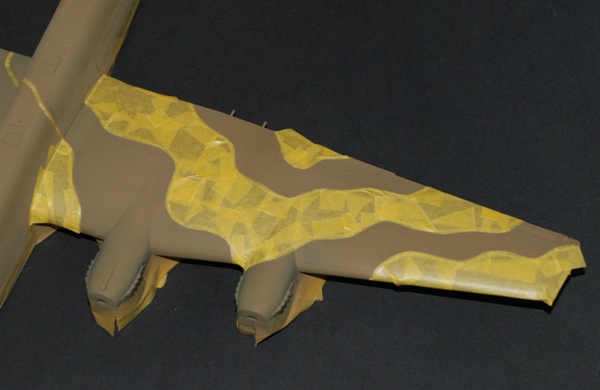
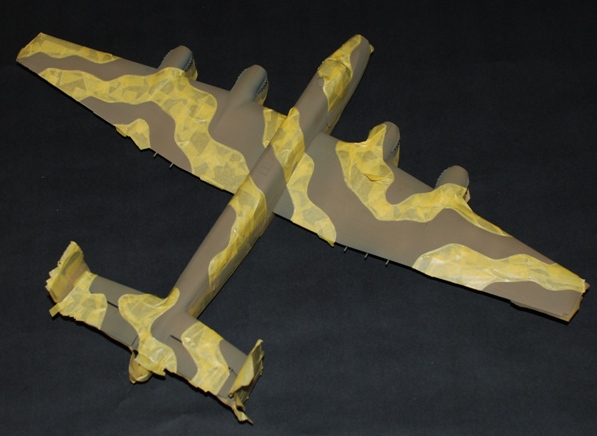
The Dark Earth went on all over the upper sides after masking the fuselage sides and undersides with Tamiya tape. This is mainly so that later, when the green is buffed back with Micromesh, you may get some slight show-through in some areas and the dark earth helps to create a weathered finish – blended and not too stark a demarcation between the colours, but more of this in a moment.
Thin strips of Tamiya masking tape are bent to create the shape of the camouflage pattern, larger, old pieces saved from earlier projects being used to fill in the larger areas. This will take a long time, but it’s a tried and tested method of mine that always works. The Dark Green is sprayed directly overhead the edges of the mask to avoid unnecessary and excessive build up of paint against the inner edge of the tape and as we are using water-based acrylics, the paint is soon touch-dry in about 10 minutes and the tape carefully removed.


Removing the camouflage demarcation ‘line’. However hard you try, even with well-thinned paint there always seems to be what is often a thin raised line between the camo pattern and this had to be buffed back to get a perfectly smooth transition across the surface between the colours. If you don’t remove it, any decal laying over the top will have an unsightly raised line running through it (not good…). I have dropped an HD video into your TB to show how easy (but important) it is to remove…
Micromesh to get rid of paint demarcation lines
Once this is done you end up with a nice, slightly weathered finish that’s getting closer to the final effect I am after for this model – not all models, just this one… an aircraft in sandy, dusty climes. You should be able to see that in this short video..
Johnson’s Future (Klear) gloss varnish
This is sprayed on to provide a good smooth, shiny surface for the decals. Be careful not to put it on too heavily, layer it on in thinner coats over each area as you work and you can see the effect you need building up. It dries to a hard, smooth finish and is cheap – great stuff if you can still get hold of it.