Feature article by Geoff Coughlin
Introduction
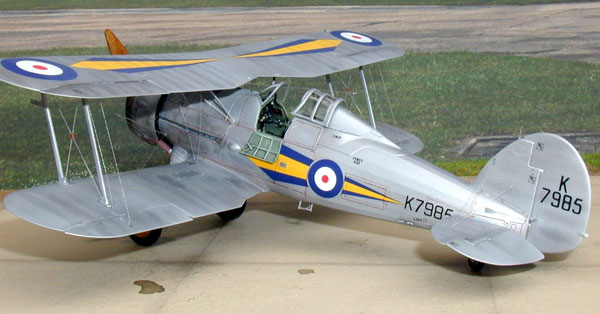
Luckily this is a model that I finished a little while back and so I can show you a photo of the completed model before we start! I really enjoyed this one for many reasons not least because it pushed me a little in terms of difficulty but also created some very nice surprises along the way – not least with the Eduard photo-etch cockpit detail set – but more of that later.
Another useful thing for you all is that I can add a detailed breakdown of the accessories, paints and materials used at the start so that you can consider what of this you may use. Normally it isn’t possible to add this data at the start of a build because I want to bring you the build pretty much as it unfolds, although all the team does of course say in every article exactly what paints, colours, materials and accessories we have used in each Feature Article or review build.
A little bit of background to the famous Gloster Gladiator
The Gladiator was the final British biplane fighter to be designed by the Gloster Aircraft Company; not only this but it was also the last biplane fighter to serve with the Royal Air Force. There is no doubt that the Gladiator marked the end of an era – perhaps a golden era because with the introduction of the Hawker Hurricane and Supermarine Spitfire all the biplane fighters were rendered obsolete, almost at a stroke. This is not to say that they didn’t go on to distinguish themselves operationally during WWII, because they did; the siege of Malta and its defence being notable among the Gladiator’s achievements. The Gladiator was designed to replace the visually similar Gloster Gauntlet.
The Gloster SS.37 prototype (G.37) was rolled out by the company at their Huccelcote facility in September 1934, also making its maiden flight at that time. The aircraft incorporated several features of the earlier Gauntlet, including an open cockpit. Ironically, Gladiator pilots often flew with their enclosed cockpit canopy open for comfort as exhaust fumes often used to build up to uncomfortable levels. In a further twist, the Air Ministry consensus at the time was that they still did not totally like enclosed cockpits – yet most of the new designs had this feature.
The Gladiator Mk.1 was fitted with a Bristol Mercury IX nine cylinder, air-cooled, radial engine. Maximum speed was a modest 253 mph, although good for a biplane. The engine drove a two-bladed Watts wooden propeller and these were sometimes painted and fitted with an optional contoured spinner. The Gladiator Mk.1 was fitted with two .303 calibre Vickers Mk.V machine guns mounted in the forward fuselage. Two Vickers ‘K’ guns with 100 round drums were incorporated in streamlined fairings below the lower wings. Gloster built 378 Mk.1s between 1936 and 1937, not only seeing service with the RAF but several overseas air arms.

The Roden kit and my thoughts
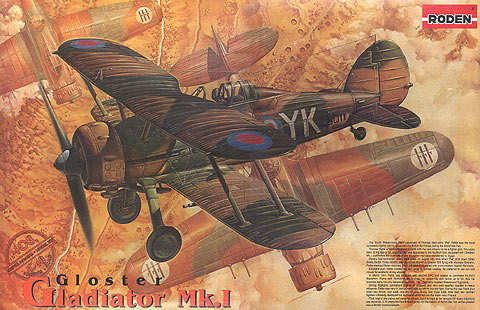
I think that this kit was released around 2003 and at that time we had been waiting for a long time to see a good quality injection moulded kit of the Gloster Gladiator in quarter scale and, to date I don’t remember seeing many / any newer tools in 1:48 scale. A previous offering by Lindberg many years ago was fairly basic, but with the introduction by Roden of not one, but three versions of this famous type, scale modellers are much better served. The company have also released a Sea Gladiator and a Mk.II.
The moulding is in white plastic that is pretty soft so needs care when cutting and trimming, but the engraved detail is very good by any standards. There is little flash and the fit of all parts is generally very good. The exhaust stubs didn’t fit too well and hang down a little on my completed model and two of the main wing struts also gave problems, but overall, I can’t complain at all really – a very nice little kit.
I have to admit to knowing little about Roden before their release of this kit but I think that has all changed with these new models and their extensive range of new models in recent years. The kit offers no less than five different sets of markings, although it is a little disappointing that the one silver finished aircraft is so dull. That has been resolved though by Max Decals who have their superb selection on sheet 4812. My review model is finished as an overall aluminium silver machine K7985 from No.73 Sqn RAF when base at Digby in 1937/8. This is the aircraft flown by Pilot Officer E.J. ‘Cobber’ Kain. Kain became the RAFs first ace of WWII before, sadly, being killed in an accident on 5 June 1940. Returning to Roden’s decals they are really pretty good quality, being very thin. The few stencils I did use mostly went down well, but the lovely Dunlop tyre markings inexplicably just bloke up! All the remaining kit decals are for camouflaged versions in RAF service.
Accessories and materials used
Paints used:
Alclad II
- Aluminium – overall silver finish
- Pale Gold – mix for collector ring
- Magnesium – mix for collector ring
Xtracolor
- X-11 RAF Trainer Yellow – wheel hubs
Testors Poly Scale acrylic
- NATO TRI Black – part engine, tyres
Tamiya acrylics
- XF-57 Buff – Propeller base coat
- X-19 Smoke – wash for wheel hubs, engine
Humbrol
- 78 RAF Interior Grey Green – interior
Citadel Colour
- Ink wash, Rust brown – panel lines
- Chainmail – lightly added to rigging wire
Windsor & Newton
- 0102 074 Burnt Sienna – watercolour in tube for wood effect on prop
Additional parts:
MDC clear lens for ventral light (pack L 23) – from ED Models
Aerial wire from very fine fishing line (Mitchell Pro)
Eduard etched set: No. 48 428 for Gloster Gladiator Mk.I
Max Decals: Decals sheet 4812 Gladiator Selection for Mk.Is and IIs
Accessories used:
Superscale Set decal softening and setting solution
Adhesives used:
5-Star cyanoacrylate (thick), Grip cyano (thin), EMA Liquid
Plastic Weld, Micro Kristal Klear (canopy)
References
‘Gloster Gladiator – in action’ (No.187) published Squadron Signal Publications
‘On Silver Wings’ by Alec Lumsden and Owen Thetford, published Osprey Aerospace