The empennage…
The tailplanes of the Hawker biplanes had quite a complicated arrangement for altering the incidence angle of the horizontal stabiliser which the Silver Wings kit doesn’t quite depict accurately.
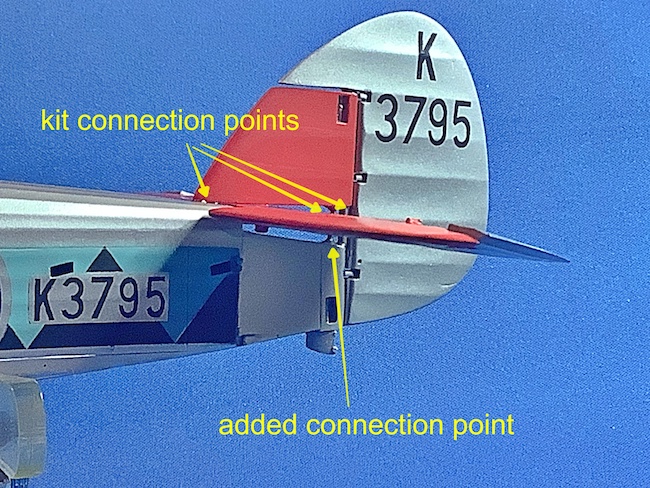
The incidence angle was changed by a screw jack column which ran from the bottom of the stern post up through the fixed fin. The lower rear bracing struts went through slots to the bottom of the screw jack column, which moved up and down, and the topside rear wires went to the top of the column, as shown in these photographs.
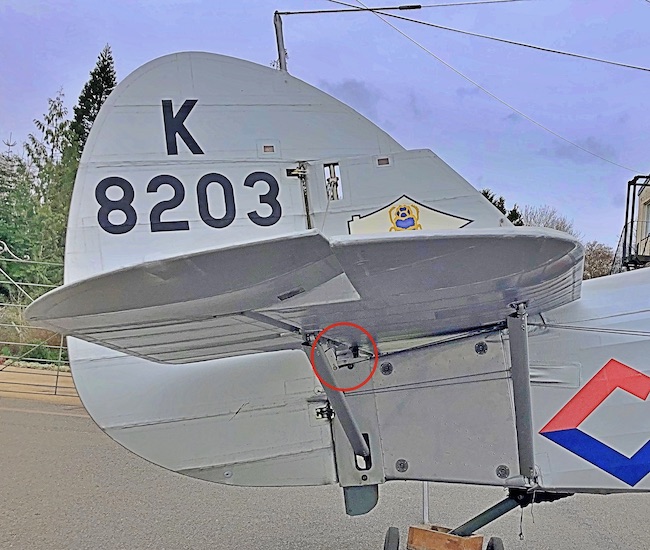
The SW kit made provision for the upper section of the screw jack column but not the under section.
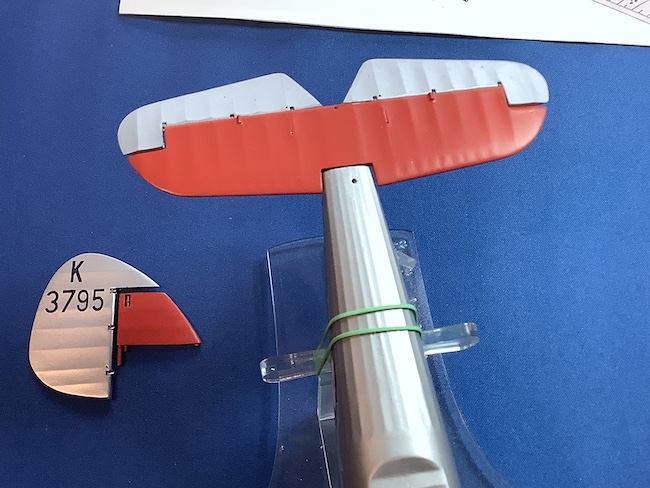
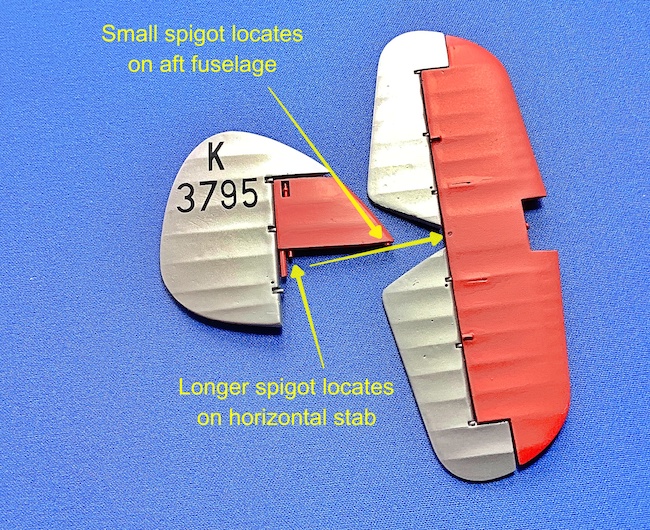
Note in the top view the correct offset location for the forward fixing point of the fin.
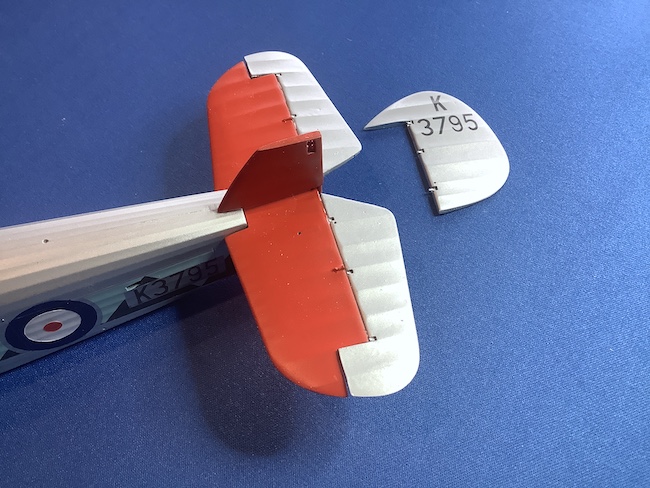
This small but important correction was simple enough, a short piece of plastic rod positioned accurately in line with the other two sections of the screw jack column which is not only more technically correct but which also makes this previously rather flimsy assembly more robust.
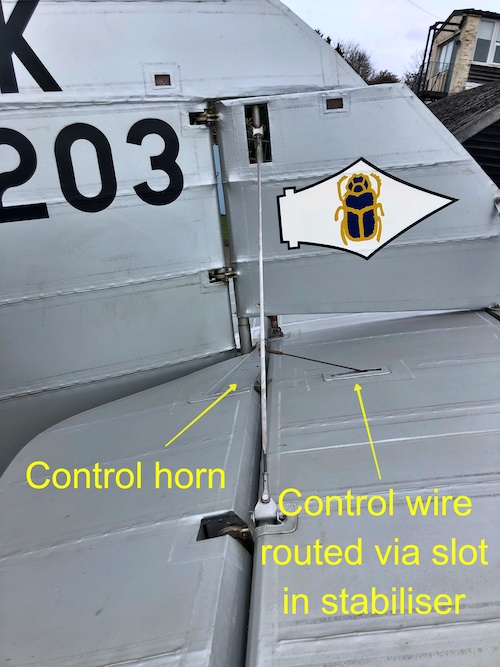
At this point it’s also worth noting and understanding something that had me puzzled for ages with the Hawker biplanes; the routing of the control wires for the elevators! As can be seen, the cables from the upper control horn pass through a slot in the stabiliser…
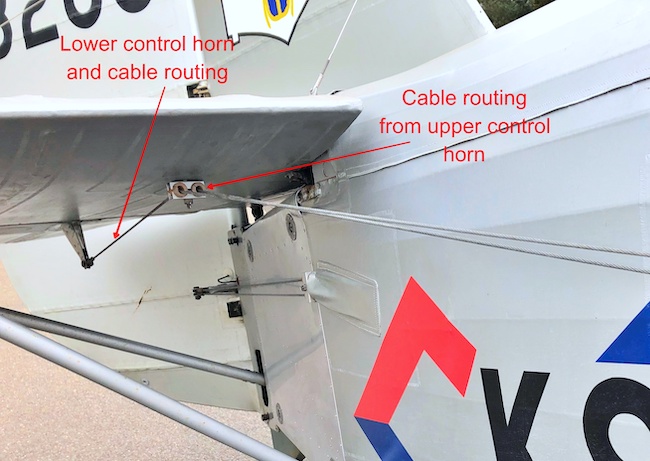
…and then both the upper and lower cables run through a “gate” on the lower surface before going into the fuselage side.
Due to potential handling difficulties I’ll be adding these cables much later in the build!
Painting
Silver Wings provide decals for 64 Squadron K4520, which is the same Squadron as the Shuttleworth one, and K4500 of 604 (County of Middlesex) Squadron, an Auxiliary squadron.
I enjoy aviation research and then cutting my own masks for my chosen subject using my Silhouette Cameo 2 machine; I’m not a great fan of decals (mainly because I always mess them up) and I like to paint my models wherever possible during the build process rather than wait until it’s all completed, but which scheme?
These three slightly fuzzy pictures intrigued me:
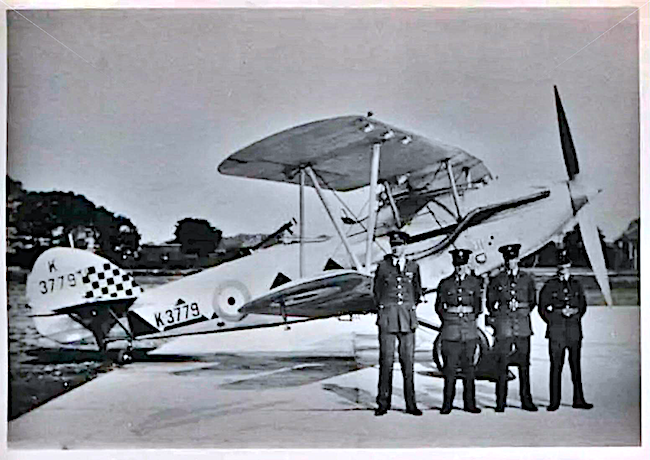
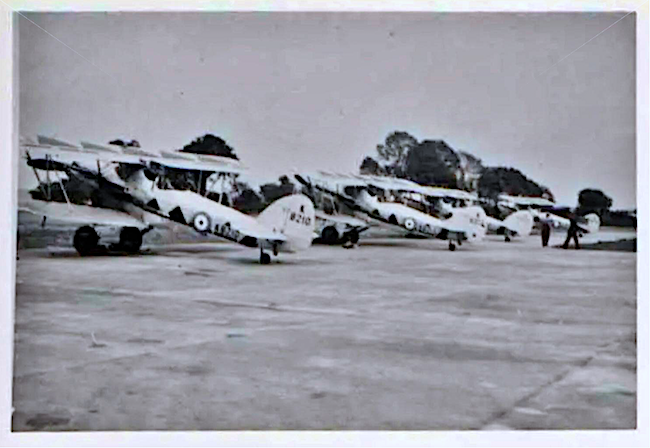
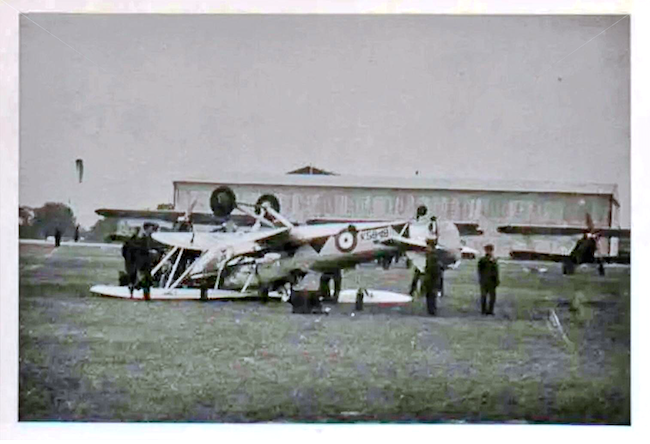
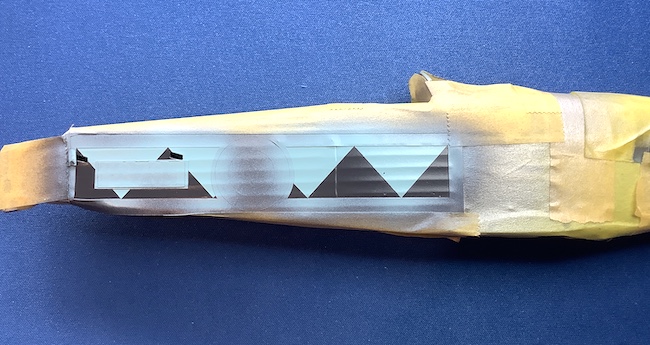
and further research revealed them to be of 608 (North Riding) Squadron and the colour scheme to be eau-de-nil and black triangles along the fuselage and the top wing. The “A” Flight Leader had red wheel centres, a red band on the spinner and a red fin and tailplane. Most attractive, so that was it, K3795.
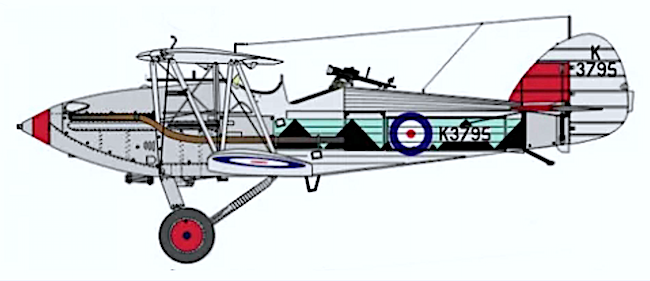
Masks were soon designed and cut ready for painting:
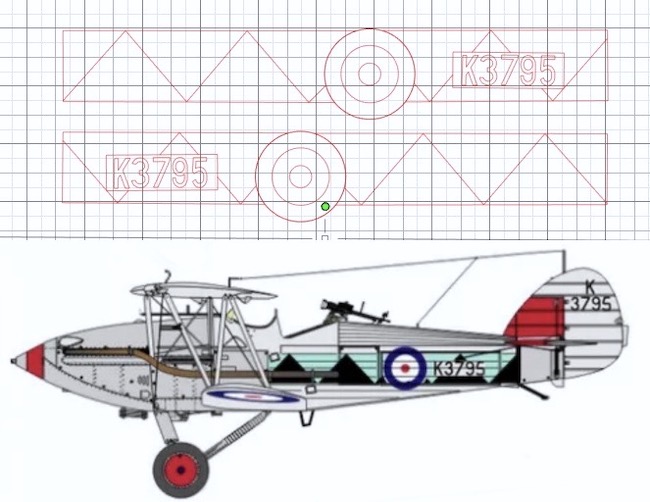
Snippets from the ORBs show that 608 Squadron were equipped with Demons on 14 January 1937, and they were transferred to No.12 Fighter Group in early May of that year and became 608 North Riding (Fighter) Squadron.

![]()
It was a straightforward, if fiddly, painting process:
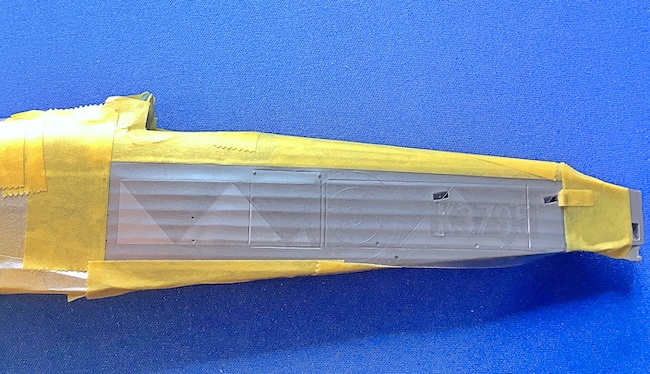
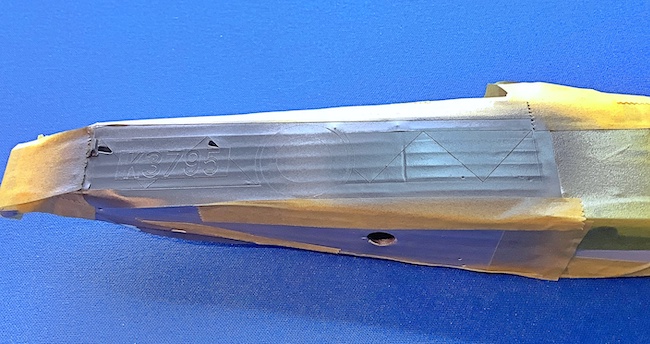
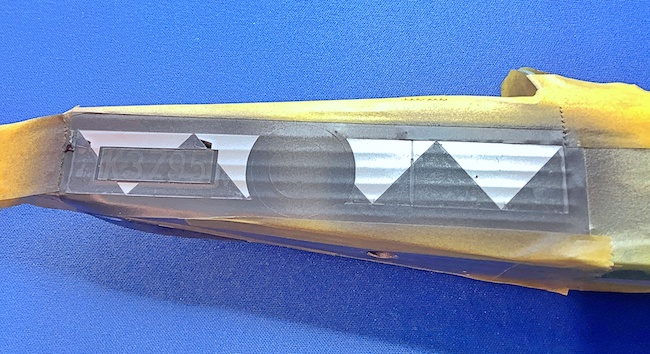
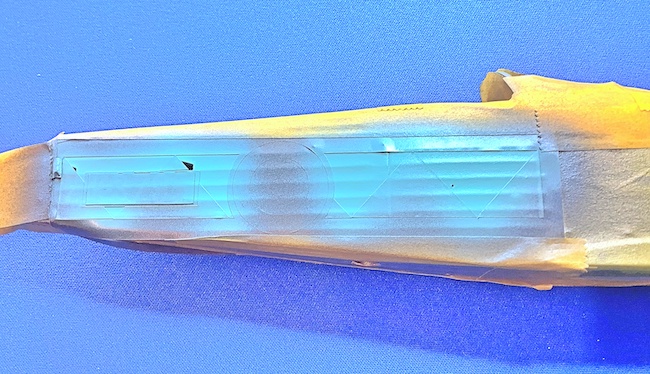
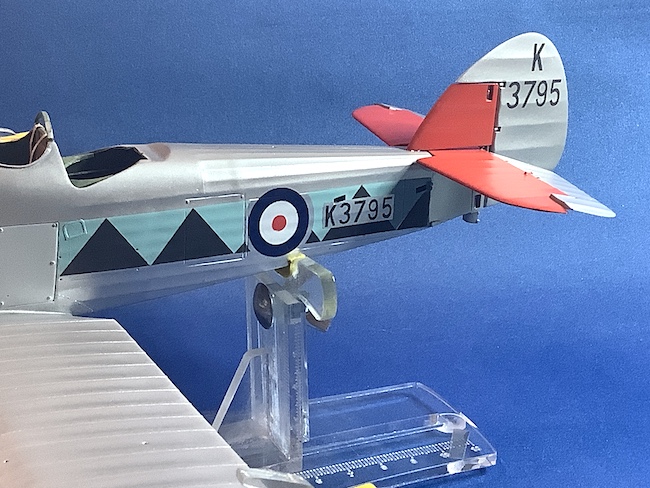
In this heyday of the RAF Golden Age each squadron took great pride in their aircraft which with the fighters meant lots of shiny metal on the nose……how to achieve this on my model? Watch this space!
Bruce Anders says
This is excellent Maxwell. Having the kit in my stash, I am following with interest
Bruce
Max Williams says
Thanks Bruce, it’s a lovely kit and pretty straightforward but I’ll be making a couple of changes as you’ll see soon!
Christopher Woolford says
I saw the Demon at Old Warden. Wonderful machine. Watching your build with interest.
Max Williams says
Thanks Chris….fancy seeing you here! Made a start on your Gauntlet yet!?
Tim Haynes says
What a beautiful result Maxwell, excellent work..
Max Williams says
Thanks Tim, much appreciated. The Hawker aircraft of this era are very photogenic both “in the flesh” and as models. I’m very pleased with the result and it spurs me on to tackle the Hart, the Fury and a further Hart modified as a Hind. Watch this space!! :)
Rob Ruscoe says
Lovely job Max. Love this period of aviation.
Max Williams says
Thanks Rob, I have to agree about the beauty and almost magical quality of the 1930s aircraft.