By Chad Summers
Motivation for the Build
Tamiya’s 1/72 WW2 kits are among the best models out there, in my opinion. With just a little effort, you can turn these little pieces of plastic into real gems that often look just as good, if not better, than their larger scale counterparts. After having so much fun with their Birdcage Corsair last year, I just had to have a go at another. When I was invited to an online build-off recently, I knew it was time. I typically don’t build too many US aircraft in foreign service markings but I remembered seeing the Soccer (or Football, depending on your preference) War scheme both on the 1/48 Hobbycraft release as well as in some online searches of other Corsair builds. After bringing up some of those images again, I was hooked.
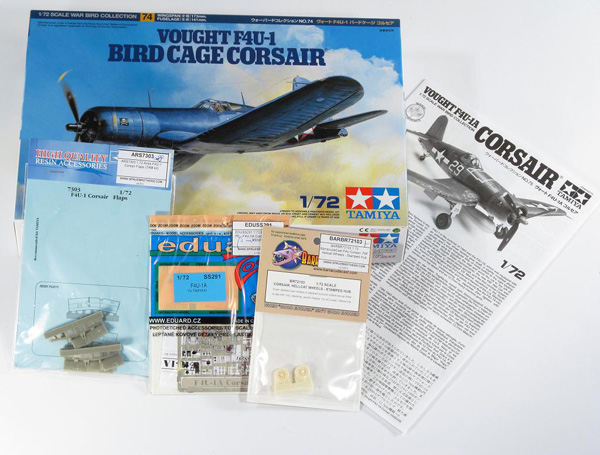
To me, a Corsair just doesn’t look right unless it has those flaps lowered. Thankfully, Aires produces a set for Tamiya’s 1/72 F4U-1. Since I was not going to be building out of the box with the addition of those lowered flaps, I decided I’d better spruce up the cockpit a little with Eduard’s Color Zoom etch set as well as Barracuda Cast’s resin wheels. I had picked up a kit through an online deal but it came bagged. So for the purposes of showing the contents of the kit build, I put it in my Birdcage box.
Bent Wing Surgery
Rather than start things off with the cockpit and fuselage, I wanted to get the surgery out of the way. The Aires set is outstanding, not only is the casting great, the engineering is superb. They are molded as single piece, drop in assemblies for each wing, with the flaps all connected to the aft spar that just drops into place after cutting the appropriate sections away from the kit trailing edges. The only issue that I have had with them (and I’ve had it in 2 of the 3 sets I have ordered) is that if they are not packaged carefully from wherever you purchase them, they can easily break. 2 of the 3 sets I have purchase have had the exact same failure. The inner most flap on the starboard wing gets broken off. You can see that in the previous picture. At first glance, it would appear to be a simple manner of just reattaching it to the spar. That’s the easy part. The real challenge (and it’s really not that big of a deal) is making the little inner webbing that bridges the large gap between the inner most flap and the center flap. I remade one out of sheet and strip styrene. Not hard, just something that could have been avoided.