
Short Feature Article with Marcin Ciesielski
Hello,
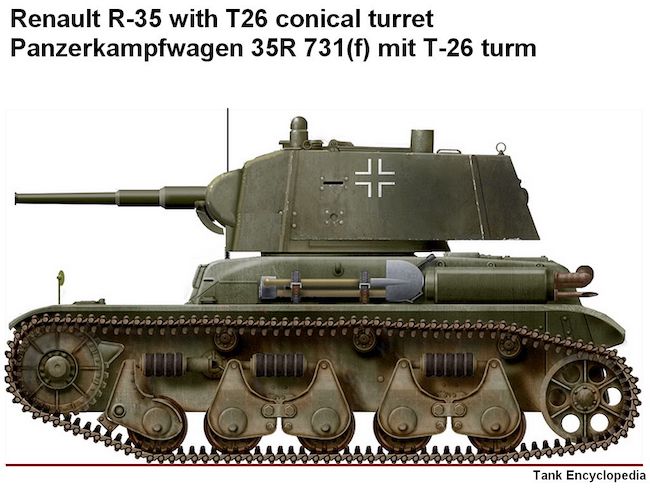
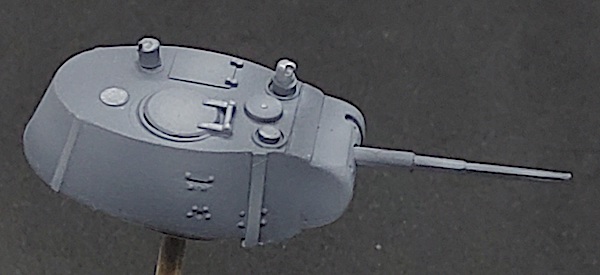
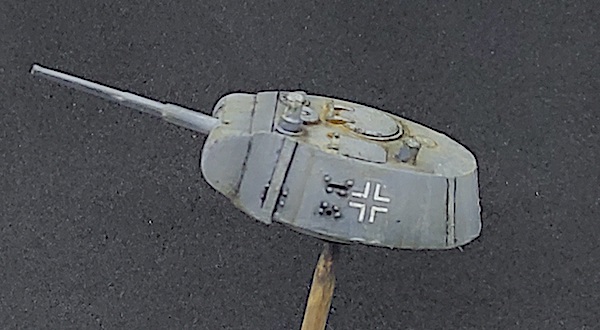
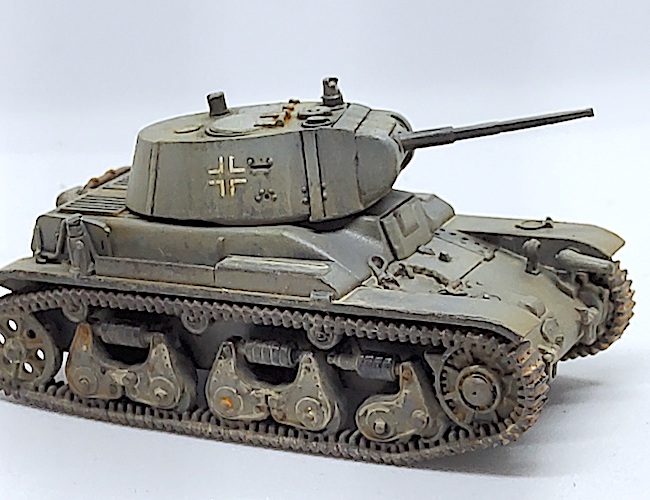
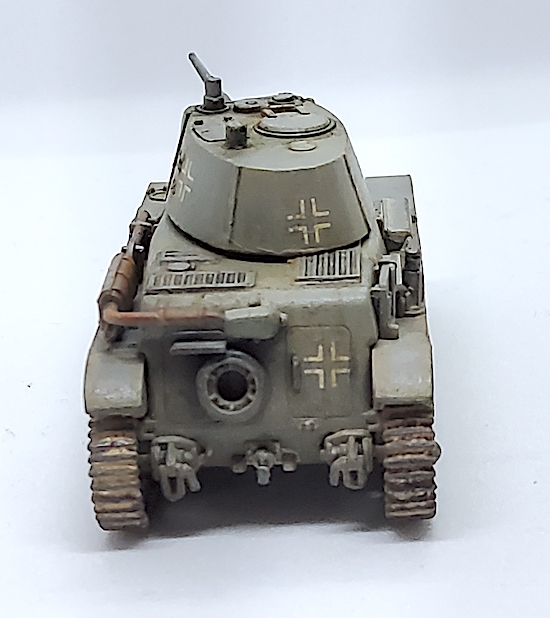
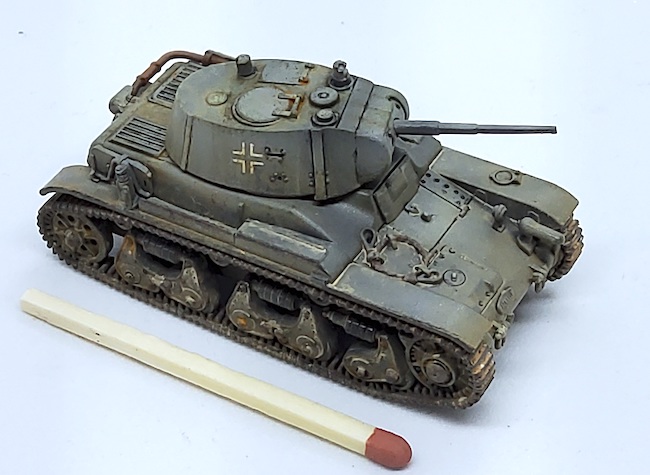
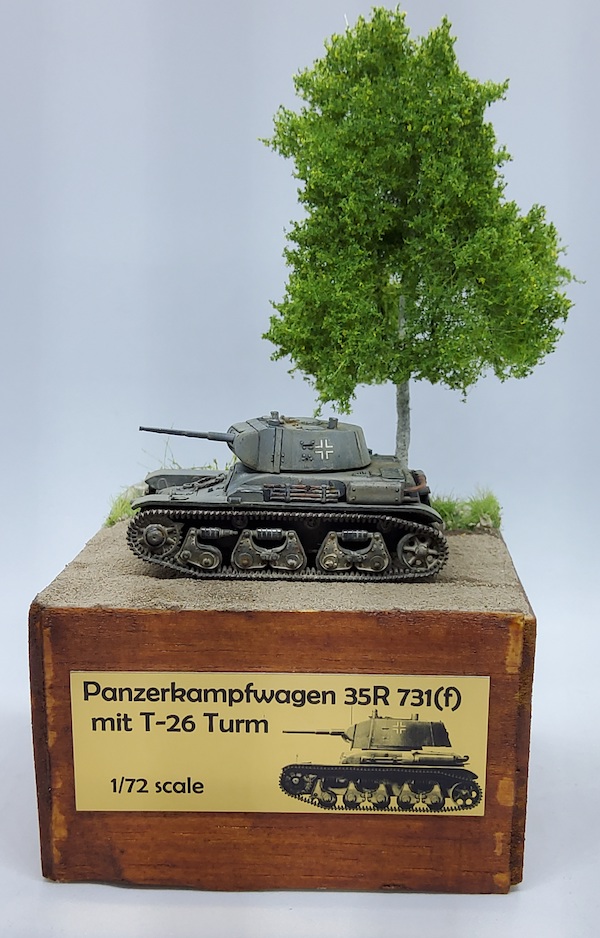
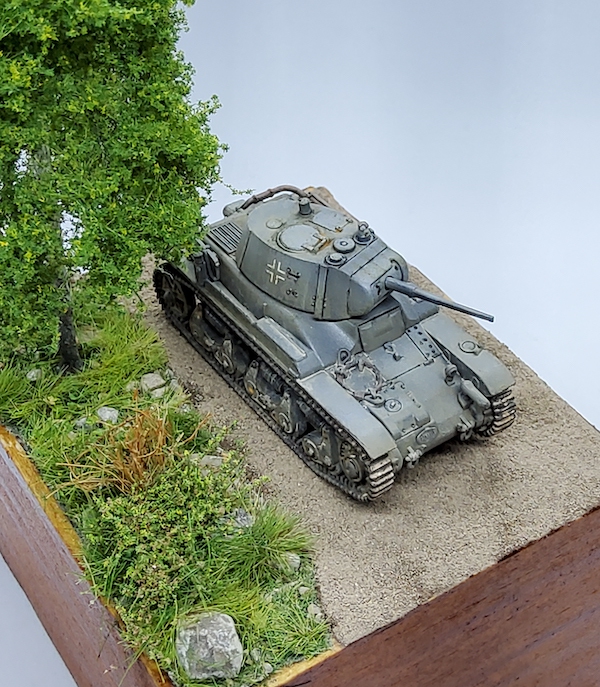
I would like to present the construction of the Panzerkampfwagen 35R 731 (f) with T-26 Turm.
History…
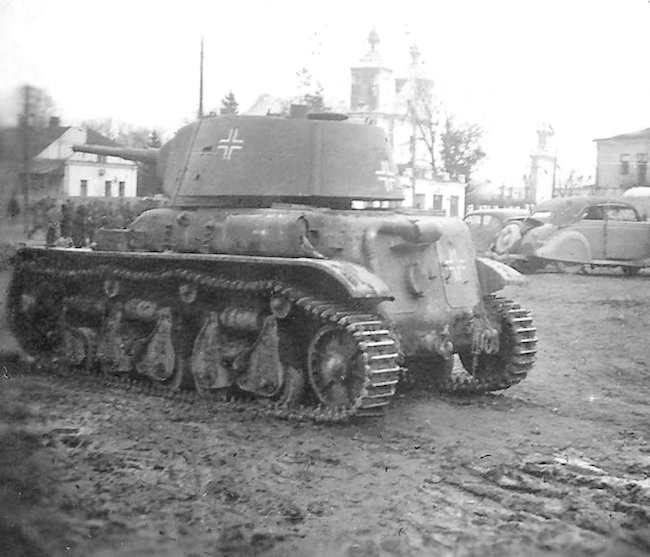
R35s were used on the Eastern Front in the early stages of Operation Barbarossa, some as munitions panzers, but some as security vehicles. This conversion has sparked substantial debate among the Tanks Encyclopaedia team as to its origin, date, location, etc. One thing is agreed upon – practically nothing lasts four years on the Eastern Front, so the conversion was most likely done in 1942 or 1943; by which time, the R35 was generally deemed poor for even the role of munitions panzer. However, the more believable theories place this vehicle in mid/late 1944.
Wysłano z mojego urządzenia Galaxy.
The build
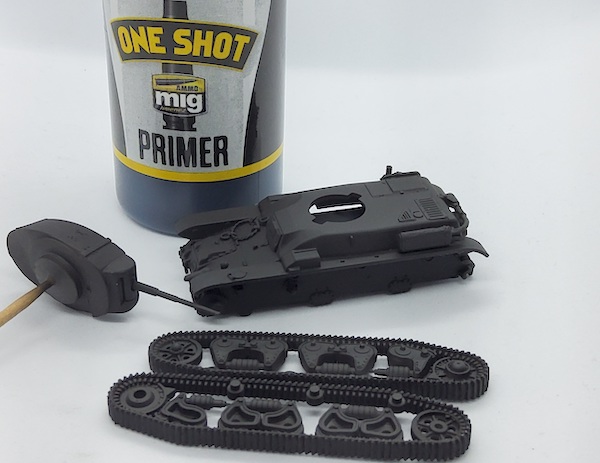
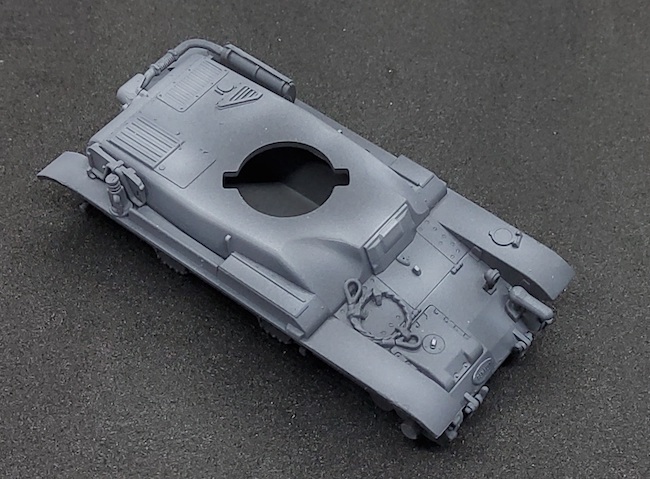
To build this model, I used the First to Fight light tank R-35 and the T-26 turret, it is a resin tower from Modellbau and the kit is from First to Fight.
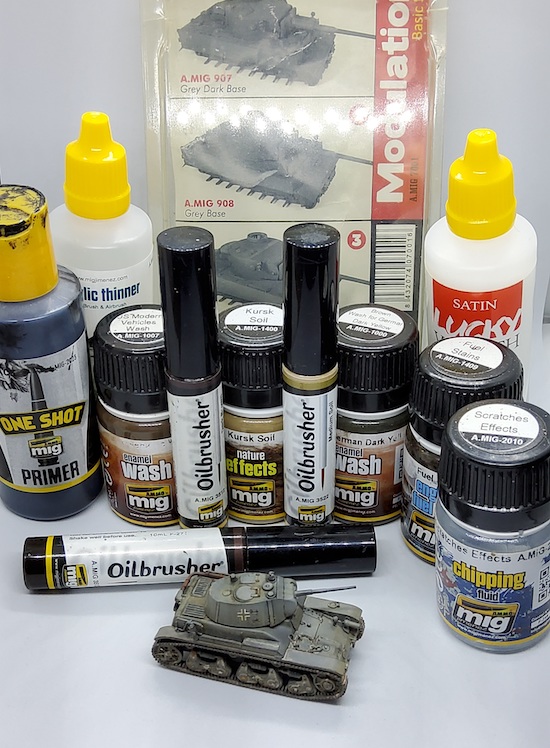
After assembling the tank and the turret, I painted the whole thing with a black primer, one shot (Mig) the product.
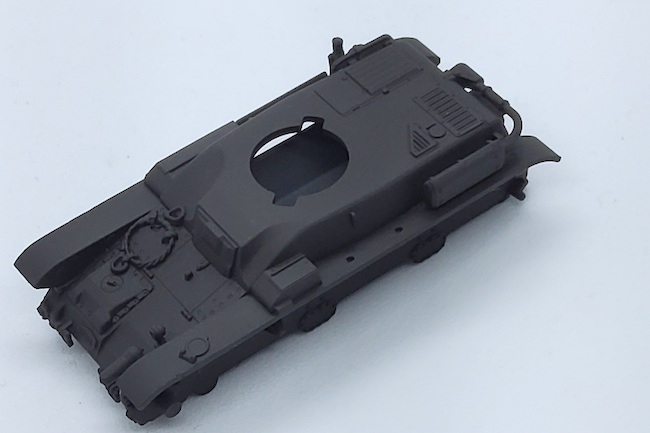
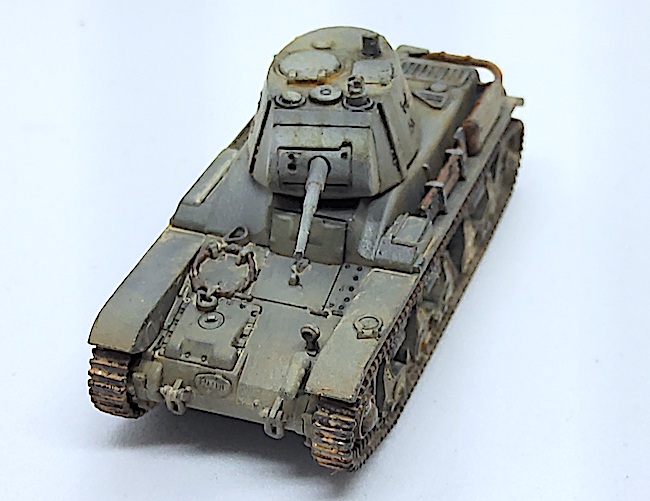
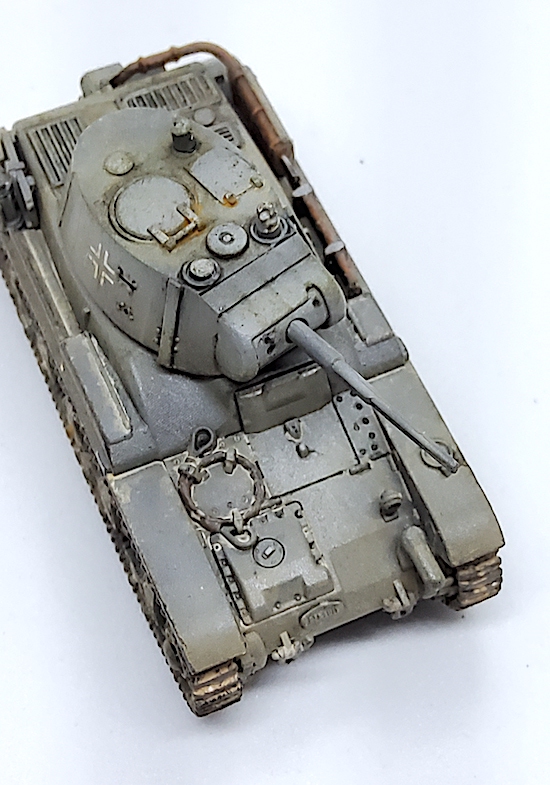
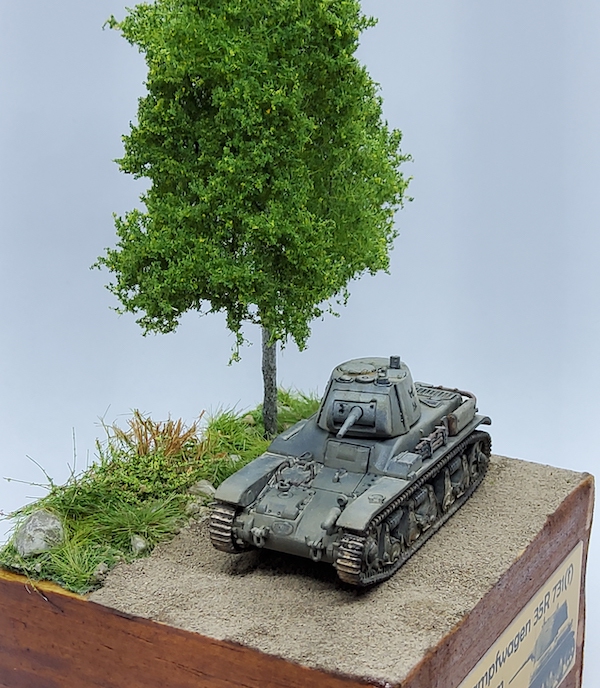
The next step I applied the base color and made modulation. For this I used the dunkelgrun modulation set (Mig). The first color that I put on the model with the Aerograph was the Gray Dark base, then I started to gradually brighten up the parts of the tank.
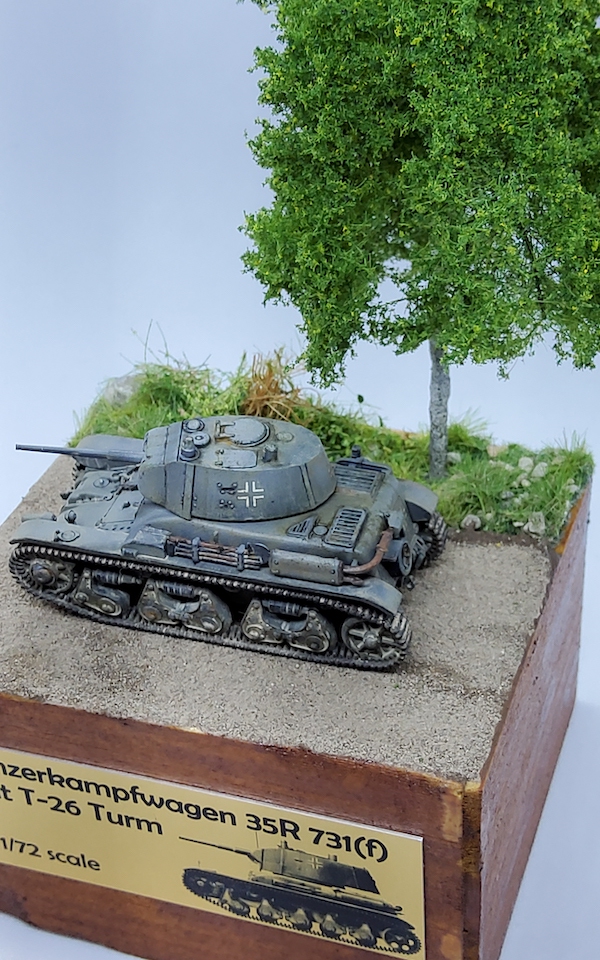
After completing the modulation, I covered the whole thing with clear varnish (gloss), and when dry I applied the decals from Star Decals (Balkan 1941-1946). When these were dry, I again I repeated the application of the clear coat.
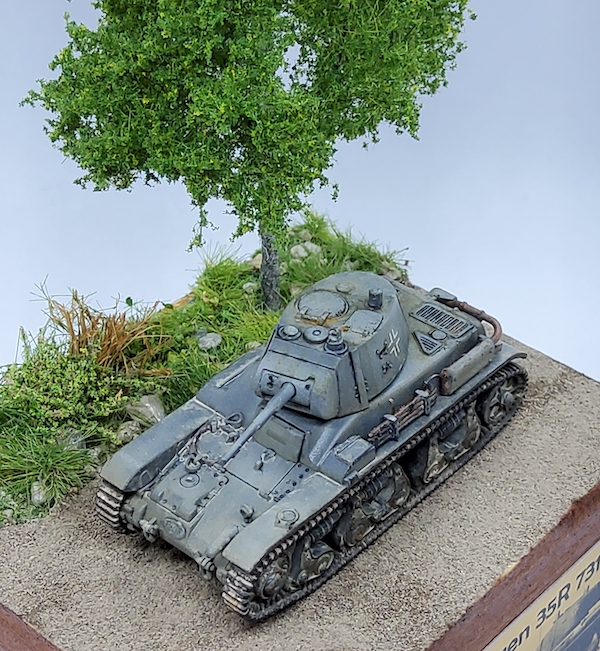
After waiting 24 hours, I started applying a black spot wash to the model. In the area of the tower mounting, I started to do the effects of dirt, grease, and rust with oleic paints. The next step was to dirty the engine area. In order to achieve effects of dust, earth and grease I also used oleic paints. After putting everything on, the effect was satisfactory.
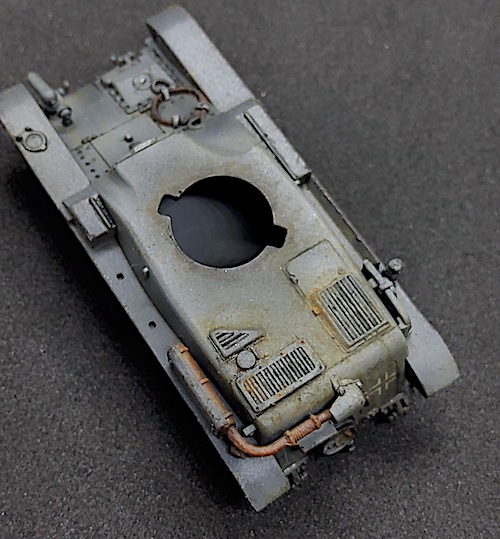
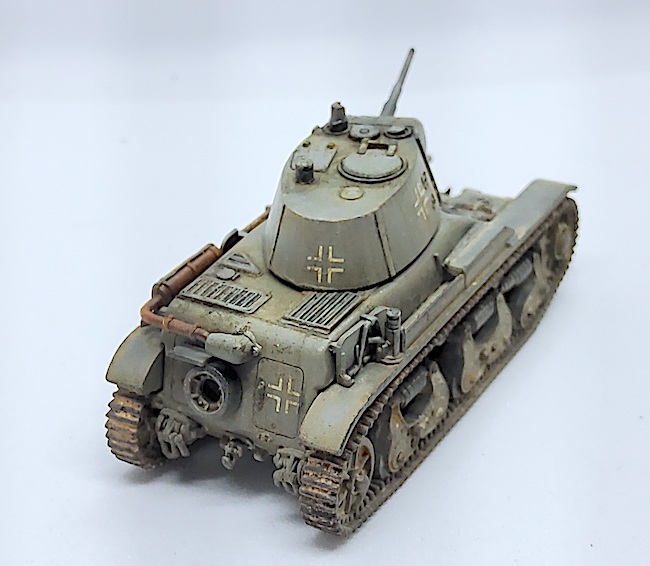
In the meantime, I also painted the exhaust, using thin rust, and then, with a sponge, I applied another color of rust, giving the effect of various rust on the exhaust. Next step was to make various stains all done with oil paints. The chipping on the vehicle was made with a sponge.
Time to get the model dirty with the dust effects. I started by applying the chipping effect to the bottom part of the bathtub, after waiting a while I applied the natural effect soil course after 4 minutes with a wet brush, I started to remove the excess, giving the effect of uneven dust. I did the same on the lower parts of the hull. Lighter shades of dust are the result of mixing dust with water and applying it in the nooks and crannies – the effect of the work can be seen in the photos.


Base
The model also has a base. I cut a small piece of polystyrene, stuck it with plywood and then painted it with wood varnish. Then on the surface I applied natural wood glue (Wikol) diluted with water. I sprinkled all of it with sand previously prepared for this. The grass is a finished product which, like the tree on the base. After the sand was dry, I applied two colors of the earth, darker and lighter, with the use of the hydrograph.
Finally, I stuck a sign telling me what kind of vehicle it is. I hope you like it all. I invite you to the gallery.
Marcin C.
Gallery
Below are a series of images of the completed model. Click on a thumbnail to see the enlarged image.


Ask a question or add feedback:
You must be logged in to post a comment.