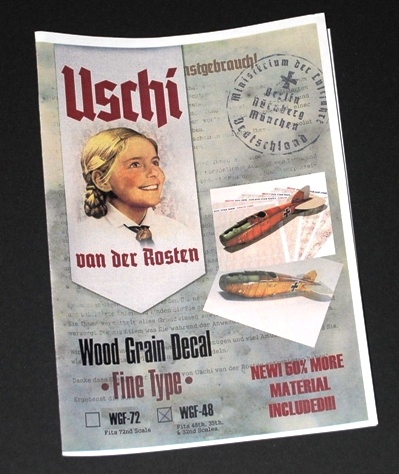
Reference:
- WGF-72 (fits 1:72 scale models)
- WGF-48 (fits 1:48, 35th and 32nd)
A great source of information on how to use these decals is the all-colour instruction sheet supplied with each set but also try Uschi’s own website at: www.uschivdr.com

Review by Geoff Coughlin (Jul 2012)
Our thanks to Albion Alloys for supplying our review sample.www.albionalloys.co.uk
Albion Alloys will be well known to many of you from the many references we have made in SMN over the months to their excellent products like precision tubing and rod. Now their already extensive range of modelling tools and materials is expanded with a series of new products (to them) that will be very interesting to you – so do keep an eye on HN to see what else this excellent company has to offer us modellers… Geoff
Click on the images below to enlarge or view the slide show:
Packaging and instructions…
What immediately strikes you about this decal set is the all-colour packaging that is both highly creative as well as practical and informative – an excellent start! The 8-stage illustrated instruction sequence is enough to get me enthused and wanting to have a go at this decal sheet.
2 sheets of decal are included in the pack. The whole point of the sheet is to help you create a realistic wood grain effect on your completed model. You may well have seen how Les, Dave C and I to mention just 3 of the SMN review team create wood grain effect on small areas like WWI bi-plane instrument panels and propellers but achieving a highly realistic finish across the whole fuselage is something quite different. Certainly possible but how much more authentic and (hopefully) easier might it be to apply sections of decal that, together with the use of appropriate base colours, pre-shading and oils?
Some excellent advice is provided on more general info like tools and paints you’ll need and I really like that kind of thoughtfulness – again, it sits well with our philosophy here at SMN of trying to offer help, solutions and advice rather than being overly critical and leaving you with more questions than answers – answers and solutions are what I want, how about you?
Quality…
The decal quality looks to be good and you simply cut sections of decal pre-measured from masking tape and apply to your model.
Conclusions…
Obviously we’ll need to try these out and there are a couple of builds in the pipeline that could be idea projects so do watch this space (or rather Build Now!) and we’ll give them a go.
Highly recommended
Geoff C.


