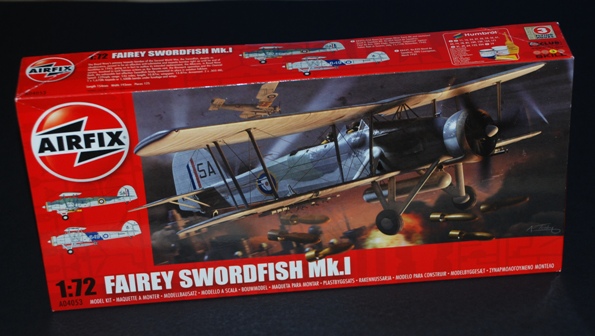
Price: £12.99 approx (Jan 2012)
Review by: David Gaylard
See our FINISHED NOW BUILD REVIEW
Our thanks to Airfix for supplying our review sample. 
Some Inspiration…
The Swordfish was a truly remarkable aircraft. Seemingly obsolete at the start of World War Two, unlike many other designs it was still in service at the end of the war. In fact, it outlasted the Albacore which was intended to replace it.
Yet it was instrumental in two of the most famous British Naval actions of WWII; the sinking of the Bismarck and the destruction of the Italian Navy at Taranto.
There are several inspiring videos on YouTube; these are just two of them:
The Kit
Click on the thumbnails below to enlarge images.
The kit comes packaged in the new sturdier tray and lid style box. The first impression is that the box is well filled. Go ahead and give one a shake, there’s very little movement.
Four grey sprues and one clear totalling 125 parts; I’ve never thought of it this way before, but that’s only about 10p per part (well, why not? Amazon quotes some kit prices per ounce. If you don’t believe me, search for “Revell Swordfish”)!
Now, the clear parts are not very significant on the Swordfish, but they are separately packed to avoid scratching.
The last “new tool” Airfix kit that I built was the Harrier GR7/9 starter kit, which I tackled a as a challenge with minimal tools while away on holiday (yes, it is possible to build and paint a kit during the time it takes your daughters to get dressed and made up in the course of a fortnight)! Whilst overall I was very impressed with this kit, I had two gripes about it (apart from the quality of the included acrylic paints). These were:
- Very coarse sprue gates
- Arrangement and numbering of parts on the sprues made it very difficult to find parts.
At first glance both of these points have been addressed in this kit, at least partially.
The sprue gates do appear to be finer, but in several places they do encroach on the detail and visible surfaces of the parts, requiring careful clean up.
As for parts numbering, this time the sprues are identified as A through to D, each containing parts numbered from one, arranged in order! Airfix must read these pages!
So here are some of the highlights:
- Beautifully crisp cleanly moulded details, as you would expect in a new tool
- Detailed cockpit including tubular “cage”. This is particularly impressive in this scale
- A nice radial engine, which will be very visible
- Folded wing option
- A jig for setting the wings into position
- A sturdy looking spar for the lower wings, if extended
- Bombs and a torpedo or a drop tank
- Even a trolley is provided for the torpedo!
Instructions
The instructions are typically good as expected from Airfix, but get this…the construction is split into 73 steps over 8 pages!
The first nine steps alone are taken in the assembly of the cockpit. Now that speaks not only for the relatively high parts count, but also for the clarity of the instructions. Do the maths; on average, each step introduces less than 2 additional parts!
There are several pre marked holes on the lower wing sections, some to be drilled out, and others not required. This must be a sign of things to come, most likely a rocket armed Mark II, I would guess. I’m no expert, but there is nothing in the lower fuselage to suggest a floatplane version though.
The instructions include the usual call-outs to Humbrol colours for details, and the now customary painting and decaling guide printed in colour. I couldn’t resist looking to see what colour they recommended for the inside of the fabric skin of the fuselage.
While I was initially impressed to see that they differentiated between the colour of the of the fabric (#61) and the tubular framework (#78), I was shocked when I dug out my Humbrol colour chart to see that #61 is “flesh”. As they say, “check your references”.
You may want to refer to the editor’s “How to Build..” guide for the Tamiya Swordfish, to see a photo of a restored swordfish clearly showing that this should be a faded red.
If there is a shortcoming, it would probably be the lack of a rigging guide. Well that’ll be my excuse for skipping this anyway!
Decals
The decals look very nicely printed in perfect register and with a satin finish. As far as you can tell, they appear to be thin enough to settle down onto surface details.
Markings are included for two machines:
- An 824 NAS machine operating from HMS Eagle, a participant in the aforementioned Taranto raid finished in Extra Dark Sea Grey/Dark Slate Grey camouflage over Light Grey.
- An 820 NAS machine operating from HMS Courageous finished in Light Grey and Silver.
Overall
Highly recommended. This kit seriously represents superb value for money.
I cannot comment on accuracy, as I don’t have any scale plans to compare it to. If there was a category for “Value for money” I would rate it a perfect “*****”!
David G.


