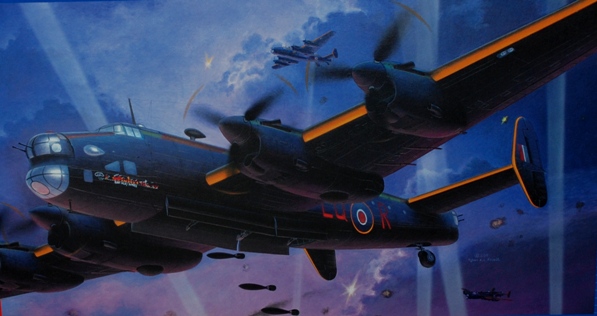
Update: Something to Watch…
I have returned to this Here Now having got part way through the build, to give you a heads-up on one a couple of points.
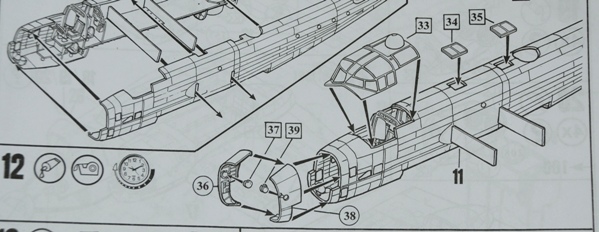
The main issue concerns the optional separate nose sections (Stage 12). At this stage you may well (as I did) simply attach the separate forward fuselage sections, without realising that this will commit you to making the Mk.II Series Ia (Stornoway Scotland option on the decal sheet), rather than the nose turret and bomb-aimer’s blister option.
An annoying oversight by Revell on their instructions that should have been made clearer at this stage with a warning over the options.
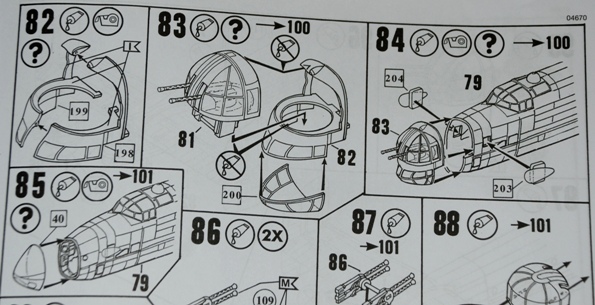
All may not be lost, though, if you do make a mistake with the nose sections…
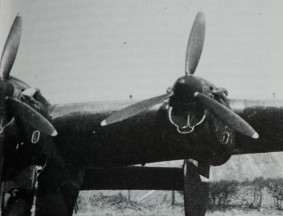
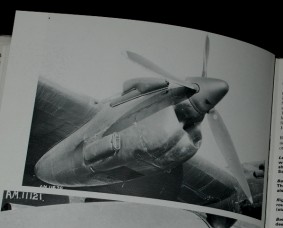
As you will see, I have found two images of later B.Mk.II Halifax aircraft that feature the glazed nose, ‘flatter’ lower profile Boulton Paul A Mk.VIII mid upper turret (adopted for the improved Series 1A Halifaxes) and ‘square’ fin/rudder arrangement. The inclusion of both angular and square fins in the kit is helpful.
Wings
Moving to the wings, they are well tooled and, although the panel line detail is quite prominent, this will appear less obvious when the upper camouflage pattern is applied. The fabric effect on the elevators looks quite restrained and fine in this scale. Not so sure at this stage about the separate elevators, I just hope that they fit snugly and avoid a toy-like appearance.
Tailplane leading edges (and trailing edges too) are commendably thin and will give a refined look to the model when complete.
Engine/Undercarriage Sprues
The four engines are a distinctive feature of this British WWII ‘Heavy’ and are nicely detailed, especially as this is 1:72 scale.
This being the Merlin-engined Halifax (B.Mk.II, 1a), the engine cowls are streamlined, unlike the later Hercules-idea examples.
The upper profiles look a bit square but we’ll see in the build, although the interior ventilation air intakes are present on the inboard nacelles, only that is correct. No less than three types of intake shape is provided and all look reasonable accurate in outline profile, although the interiors are simplified – perhaps overly so.
No separate detailed engines are included and I for one am not too disappointed about this as it means I can get on and build the model, focusing on trying to get a decent weathered finish for a British bomber in this scale. We’ll see how I get on and you can be the judge of that!
Options for three and four-bladed props are included, which is great, especially if you want to build the four-bladed GR Mk.II (Series Mk.Ia).
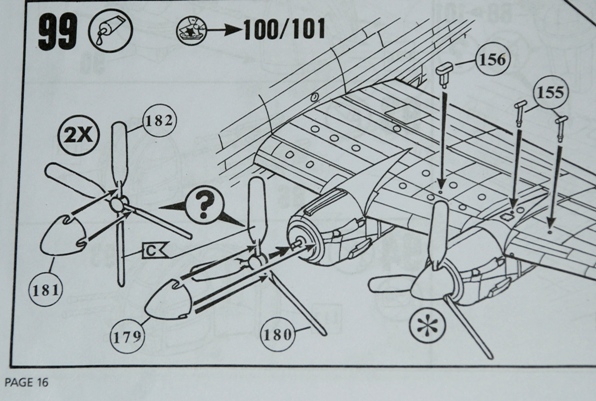
There is a real problem though with the two different types of prop blades included; that being that they are completely the wrong shape. They more resemble the paddle blades on Lancasters than the thinner, more pointed shape typical of the Halifax.
I suspect Revell have tried to cut corners and include propellers that will more suit a Halifax Mk.III, but neither of the options included in this boxing of the kit. The spinners are moulded separately.
The undercarriage units look like they are going to be a strong feature of the package, with well detailed bays and legs, with of course the chunks main leg portions representing the Messier retracting units featuring strongly. The tyres look slightly undersized so we’ll have to see how they look when assembled.
Clear Parts
The clear parts look clear and the canopy, nose blister/windscreen looks accurate.
The canopy framing is restrained and light, but precise as well, making for a very neat looking area of the model. All the turrets and upper fuselage glazing is there and when painted should look fine.
The Halifax had multiple variations in the exact location and arrangement of windows around the forward fuselage section, so depending on the specific aircraft that you intend building, you may need to fill some of the recesses.
Instructions and Decals
The Revell instructions follow their usual exploded stages format. Location of parts is clear but colour paint coding is for Revell paints and mixes only. The build sequence is pretty standard and logical (except the misleading Stage 12 explained above), but many modellers will part company with the stated order to suit their experience.
The decals look to be of good quality – certainly good subject choices:
- Handley Page Halifax B.Mk.II Series 1, No 405 Sqn, Royal Canadian Air Force, Topcliffe, England, July 1942 – in Night undersides / fuselage sides and Dark Earth/Dark Green upper surface camouflage
- Handley Page Halifax B.Mk.II Series 1A, No 58 Sqn (GR.Mk.II), Royal Air Force, Stornoway, Scotland, early 1945 – in white undersides and fuselage sides, with camouflaged upper surfaces (check your references)
Stencil detail is also provided and is almost always well worth adding, even in 1:72 scale to add additional interest to your completed model, though I suspect you’ll have your own views on this.
All the colours are in-register and colour density looks impressive and carrier film limited, so I wouldn’t expect any problems with application.
Conclusion
This is a great subject and will undoubtedly sell well.
The inclusion of good colour schemes on Revell’s decal sheet is a highlight, as are the optional parts like the four-bladed props. The model itself looks to be well engineered at first glance and, from the dry/test-fit, the build experience is hopefully going to be as good as the initial review would suggest this kit is.
Moulding is good and the panel detail perfectly reasonable for current 1:72 scale kits. Levels of detail are good, as are the options provided and should mean that you pretty much have what you’ll need to make a reasonable model of the much-admired Halifax.
We’ve waited a long time for a good model of the Halifax, but it must be said that this release has been let down by some poor decision-making on the tooling front.
Much like this manufacturer’s release of a new-tool 1:72 Avro Lancaster a while back, this new-tool model is a bit of a mixed bag and not as impressive as I first thought. You’ll have a lot of scale modelling for your money, but I’m afraid some of it is going to be spent on trying things like re-shaping those prop blades – not easy at all. Do watch that nose and decide what you want to build before you go for it.
At the time of writing, this re-worked Here Now review (Feb 2012) is in the light of my build experience on it so far and some helpful input from GN and others (thanks guys). Due to the issues above, my build is taking longer than I had planned but a new update is due into Build Now shortly, so we’ll see how I go then.
Geoff C.
