Materials: Injection Moulded Plastic
References:
- The instructions (all one needs really to be honest)
- The YouTube video below. Not the real thing, but evocative nevertheless.
Review by: Les Venus (Jan 2012)
Our thanks to Wingnut Wings for supplying our review sample.
We have multiple builds of Wingnut Wings kits… just check out your Wingnut Wings Finished Now area in SMN.
A bit of reference…
Background
OK, before we start let’s be clear here.
I approach every review with an open mind and try, as best as I am able, to give a professional, impartial review that will help you to make a buying choice. The snag is that, when you review superlative kits, it can seem that the reviewer may have a certain bias. I don’t, and it’s really important to understand that, as to think otherwise really undermines the quality of the manufacturer.
I mention this as it’s my fifth Here Now review on a Wingnut Wings (WW) kit and I have found each to be simply first class.
I have also built two and have found the experience of each different, but in all my years modelling, the best experience I have ever had undertaking this hobby.
So will this kit be any different? Let’s see…
I have wanted to build the Gotha (pronounced Go Tar) since I first saw it announced on the WW website in 2009. It’s a magnificent aircraft and I think the world’s first strategic bomber (Zeppelins aside).
It also looks amazing with that quad undercarriage and for the time sleek lines.
When it arrived from New Zealand last week, Geoff called me and asked if I wanted to give it a go…I was at his house before the phone had hit the receiver! This one was mine and I am so very glad that it is.
I have only seen two of these wonderful kits built as they deserve to be, but have seen neither of them in the flesh, so to speak. One is the wonderful example on the WW site and the other is that built by the editor of Windsock Magazine Ray Rimmell, who followed it up with a book on how he did it.
I saw one at IPMS Scale Model World 2011, but the builder admitted he wasn’t happy with any of it and blamed himself not the kit. His assessment was correct I feel and I did spend some time walking through some of the things that seemed to have stumped the poor chap. He seemed happy enough at the end and I hope he gives it another go.
So, with a paucity of examples out there and only one at a show, I plan to get this one done as soon as I can, so it can hopefully be at Milton Keynes in February. Let’s see.
History
I really am not going to bore you with my shameful lack of knowledge of this magnificent aircraft but simply refer you to the WW website, where you can find a history, some colour photos of the Mercedes engines and a raft of archive shots of the real aircraft.
I tell you, this is a value based company and one that understand modelling and modellers. Nothing I can say will add to this, so take a look.
I also recommend Ray Rimmell’s book too (I will review it in your SMN when it arrives), as I believe what he has done for modelling – let alone WW1 modelling – over the years deserves all our support and admiration.
The Box
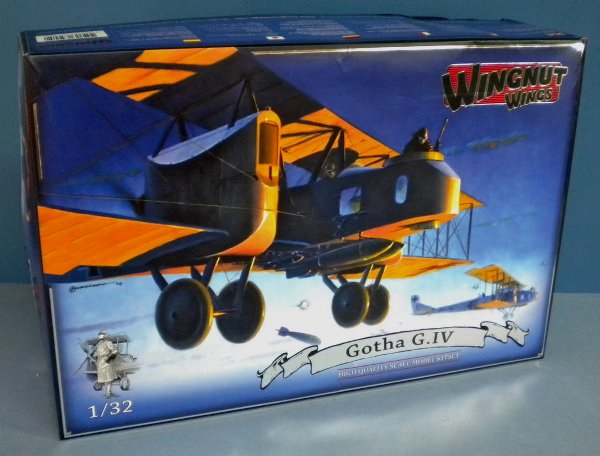
Well look at it, it’s not only huge but has such a great painting of two Gotha’s on a mission probably over the UK.
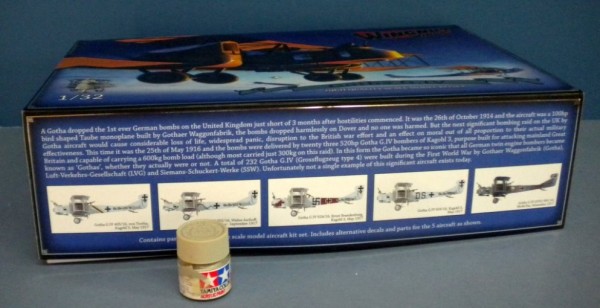
The close-up shot of the nearest aircraft is brilliant and, for me, says ‘BUY ME’ in big letters! Yes, the box paintings are not in the same league as those from Tamiya (best in class with Hasegawa), but still really stir the blood. I have placed a jar of Tamiya paint next to the box to give an impression of the sheer size of the box, which is full to the brim.

Instructions
WW instructions are, without question, the best there is and for me is the model for what all manufacturers should strive for. Goodness me, I would love ship models to have instructions as thorough as this.
Every page is not only a clear CAD designed instruction on assembly and painting, but also includes a reference photograph or two of the real thing.
This, especially in WW1 modelling, is essential and, in kits as detailed and accurate as WW models, more so. What impresses me about the instructions is not only their clarity, but also their logical build sequence. Yes, I chose to ignore these too but that’s just me, a relative novice could follow them and pop out a decent model at the end.
Rigging instructions are excellent and again logical. I would say that it is essential to paint and decal the aircraft and indeed weather it too, before rigging. Take the control lines; it would be impossible to paint and decal the model after you rig it, so sequence is critical.
I will, as ever, walk you through how I tackle this when I build the beast.
Click on the Thumbnails to enlarge images below and you should see what I mean.
Colour Options
There are 5 colour options offered in the kit. Four are pale blue overall and the last is a very attractive two tone camouflage version, as featured in the built version on the WW site. I am going to do one of the blue versions, though I am not sure which one yet.
Decals
The decal sheet is huge and complete (see the Gallery above).
In fact, there are two. One is the main markings including decals for instruments and full stencils. The smaller one is the green snake featured on one of the colour options. I had a few snags with decal softener with my RE 8 as in truth a softener is not needed. I suspect the same here. We shall see.
The Plastic
All sprues are sealed in polythene bags. The plastic used is now familiar to me. It’s pale grey, beautifully moulded and flash free.
The fuselage halves are impressive, but beware there is a need to drill out access holes before joining. The instructions are clear on this.
Simply picking up the parts just has you looking for the glue. The wings are simply huge. This beast has a wingspan not far short of two feet in old money and the detail on the ribs and plates where the many struts join the wing is sublime.
Like all WW kits I have seen so far, detail parts are moulded as well or better as Tamiya, the universal benchmark of excellence.
I love the rendition of the cockpit, which is all wood and will I hope look spectacular when I have finished it. The unique gun tunnel is also represented beautifully and tyres are moulded round or with flats.
There is a full bomb load with bombs of different sizes provided. The Mercedes engines look very familiar and I will be going to town on at least one of them with all panels off.
Glazing is clear and with a dip in Alclad 2 Aqua will look stunning.
Click on the thumbnails below and explore the contents for yourself!
Etched Set


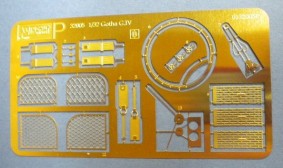
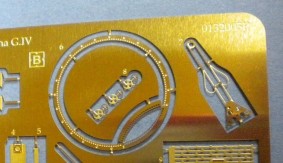
The small but beautiful brass photo etch set enables the seat belts, prop guards and cooling jackets for the machine guns to be made. I love the commander’s turret ring though, as I think, given its prominent position, it will set off the cockpit wonderfully.
Summary
This is a truly sublime kit and I can honestly say that I have never, in all my modelling years, wanted to build any kit more than this one. That’s in any genre or any scale.
This really has hit every spot for me and I will do my level best to make it a show stopper. I will be starting it soon and building in parallel with the ships I am currently building.
At £139.00, this kit seems like a lot of money but rigging material aside there is no need for anything else and that includes references. Couple this with as full a package of quality engineered plastic and brass and this is modelling nirvana.
I cannot recommend this kit enough.
Les V.


