By Steve Noble
Most modellers will recognise the symptoms of impulse buying. It is more noticeable in AFV and aircraft modellers than figure modellers who tend to be more fixated in a single build and paint project.
The temptation to have the latest kit (even if you already have the same version), fill a gap in the collection, or get a must have bargain as a show ends results in the purchases being added to the “stash”. As the stash grows – lurking in the loft, a cupboard or the garage, what once was a promising purchase loses favour. A visit to the stash may bring a momentary feeling of guilt but soon passes as the kit disappears further towards the back.
After many wasted hours scouring the loft, I was finally forced to start cataloguing the models I had. Sorting out the kits that would never be built generated a free supply of kits that were given to junior members in the club I attend. Any that were left over were donated to a scout group where they would be put to good use. This still left 40 folding crates which are now catalogued with 6 still to go. Amongst the stash was a large collection of Sherman tanks of which the Tamiya versions had been surpassed in quality by other manufacturers.
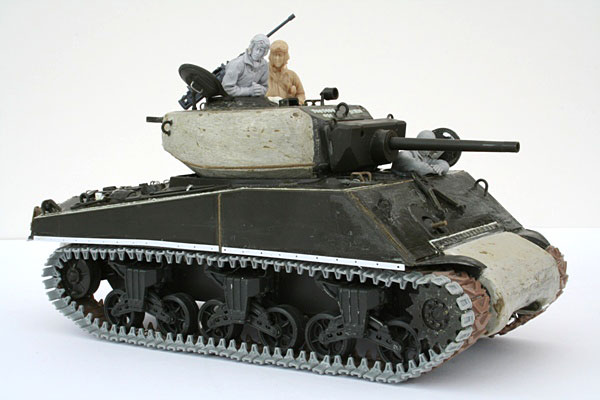
Heavily criticised for being inaccurate, the Tamiya M4A3E2 “Jumbo” remained un-built having lost its attraction. Designed as an assault tank for D-Day, the vehicle’s armour was increased significantly, giving it a distinctive rugged shape. Correcting the kit would involve reshaping the turret and transmission cover. The kit was extracted from the stash along with a M4A3 version to be fitted with sandbag armour, the aim being to resurrect them both.
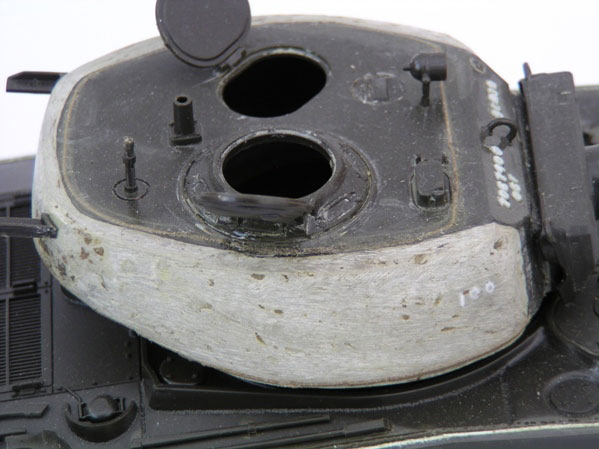
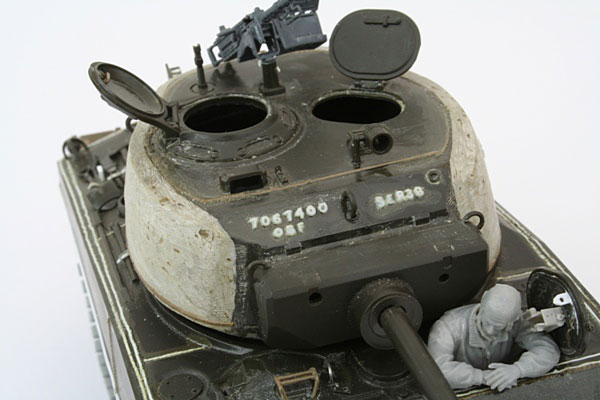
Leaving off fine detail, the Jumbo kit was built as per instructions. All of the turret dimensions are too small but can be corrected in terms of length and breadth. Tackling the height issue was too complicated and was left. The turret was remodelled using Milliput to improve the shape and dimensions.
On the top of the turret the weld seam indicating the start of the turret wall was removed. Conveniently the armour of the turret should start at the edge of the existing turret. With a set of plans as a guide, the sides and back of the turret were reshaped with the putty. A new weld seam made from stretched sprue and textured with glue and a craft knife was added back at the edge of the built-out walls.
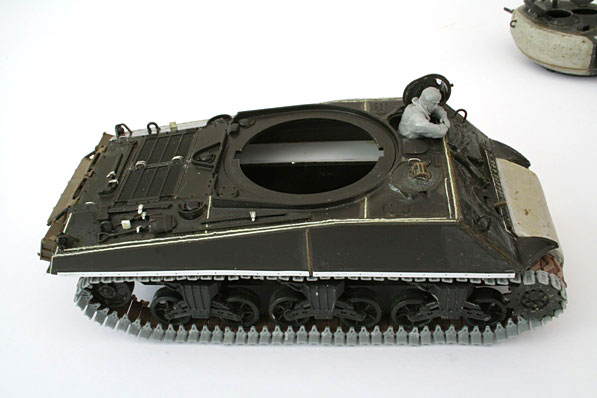
The sponsons on the kit are open underneath. Also the weld seams are recessed rather than being raised. These were corrected by filling the sponson floor with plastic card and adding new raised weld seams from plastic rod and sprue softened with glue and shaped with the blade of a scalpel.
The other prominent feature is the heavily built transmission cover with its distinctive round profile. This was reshaped with putty.
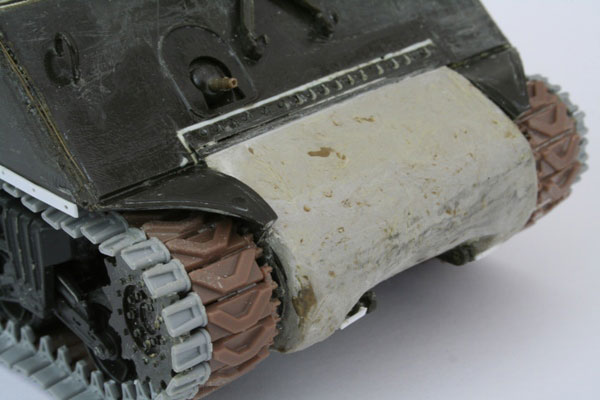
Due to the additional armour used on the Jumbo, the weight of the vehicle increased significantly. Duckbill extensions were added to the tracks to improve flotation. The tracks and duckbills were taken from spare parts from a dragon kit in place of the rubber band type supplied with the kit.
Another addition was the use of Slater’s numbers and letters to represent casting symbols. Hatches were detailed with grab handles made from wire, periscopes added along with locking mechanisms.
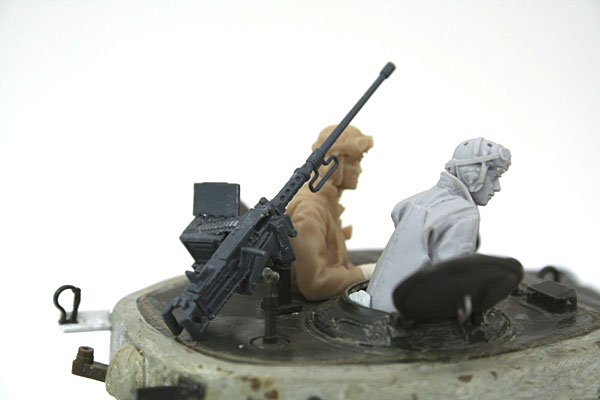
The 50 calibre machine gun was replaced with a more detailed gun from Academy which I consider being a cost effective improvement.
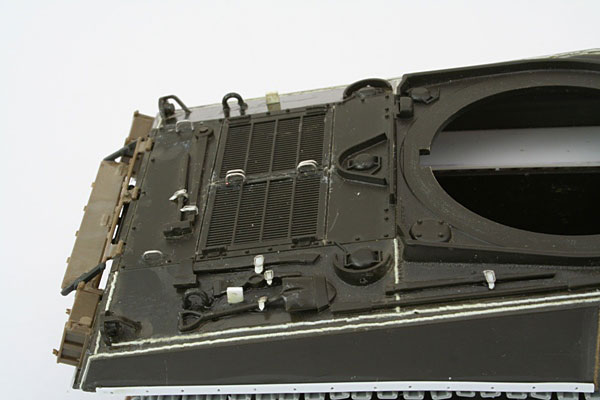
Tie down buckles were formed by wrapping fuse wire around a square file then splitting them with a sharp knife to release the individual buckle. A tie down from thin plastic sheet was added to the buckle and fixed to the pioneer tools. Grab handles for the engine deck were replaced with wire equivalents and stops for opening the engine door added from plastic card.
The completed model is shown below with weld seams visible between the additional 1.5 inches of armour added to the front and sides of the Jumbo. Also seen is the rail for fixing mudguards to the vehicle.