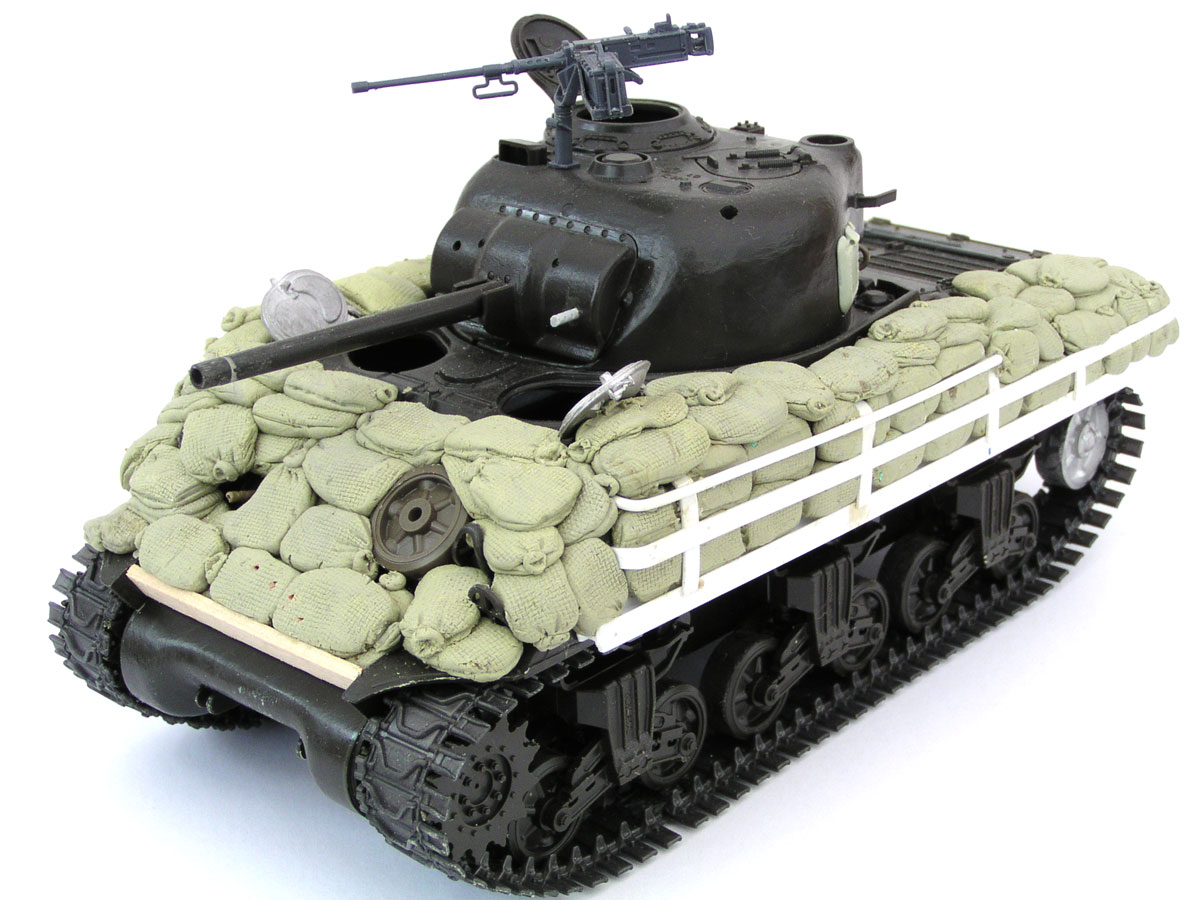
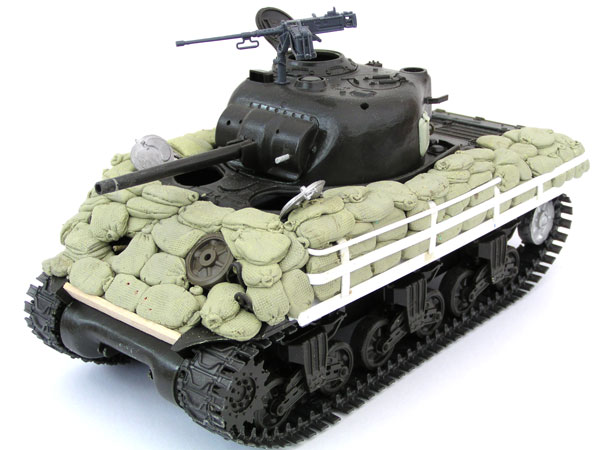
The next kit to be worked upon was the standard M4A3. The tank was given a protective layer of sandbags to ring the changes and draw it away from being a mediocre model. The primed model below awaits finishing.
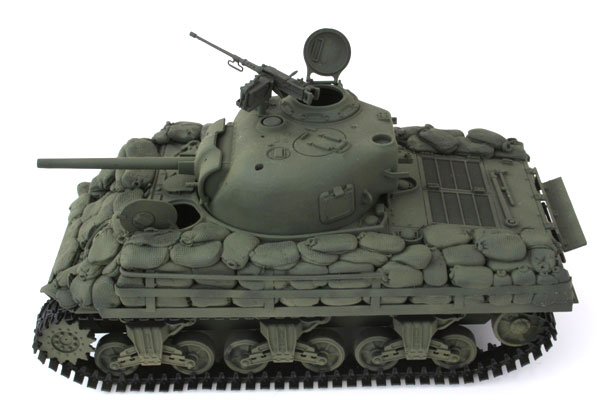
The kit was assembled as per instructions with the same corrections to faults as described above including a new 50 calibre machine gun. Sandbagging Sherman tanks was carried out in the field by crews or a workshop using whatever was available. Therefore there was no standardisation leaving the modeller to select their own design.
Plastic card base, the end of the strips were dipped in hot water to soften them then formed around a metal rod.
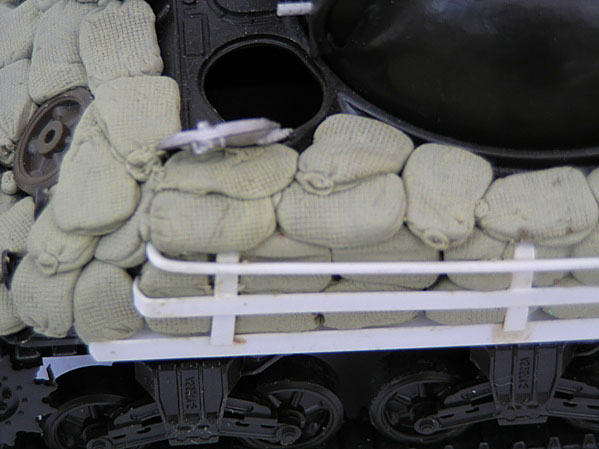
The sand bags were made from a sausage of Milliput cut into 1cm lengths. Using a plastic or metal mess similar to the size found on a tea strainer, frying pan splash guard or plastic mesh supplied with models, the mesh was pressed lightly into the Milliput to leave a light impression and slightly flatten the bag. The neck of the bag was represented by rolling a small ball of Milliput, placing it at the top of the bag and opening it up and shaping by pushing the tip of a pencil into it. The seam of the bag was scribed in place using a pencil.
The bags were then pressed into the framework, pattern side facing out. Once filled with bags, the framework was pushed onto the side of the tank to ensure the putty conformed to the shape of the hull. The assembly was then set aside to dry while the opposite side was built. With both sides assembled and dry, they were attached with super glue and allowed to set.

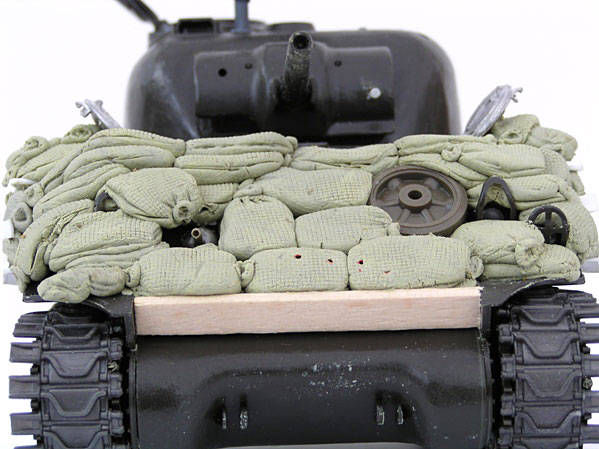
Using a section of wood (from an ice cream stick) a plank was made to sit between the mud guards and support the sand bags. The sandbags were added as before with the exception that the mesh imprint. This was left until last to avoid fingers prints in the Milliput. To add some additional interest, a wheel was used to replace one of the sandbags. Bullet holes were made in a number of bags by pushing a pin into the bag but kept to a minimum rather than overdo the effect.
The sandbagging was then carried around the edge of the tank deck to complete the build.
ZOOM - Move your mouse over image
Why do it?
You might ask, why try to resurrect old kits when the rework of the Jumbo cannot match the accuracy and quality of the new Tasca kit?
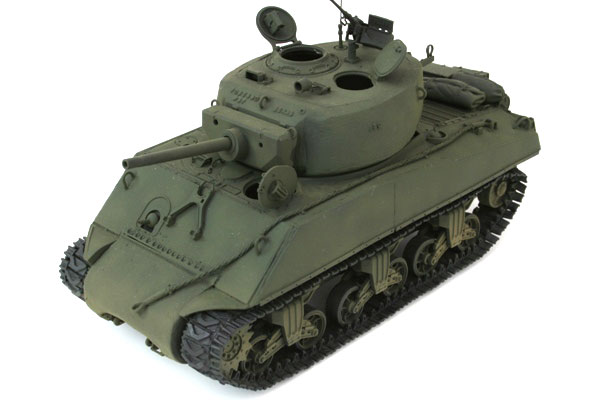
Firstly, both projects offered low cost options compared to buying more modern kits/conversions and effectively scrapping the old ones. By mainly using Milliput, the Academy machine gun set and plastic card/strip, for an outlay of less than £15 I have two improved models that I am happy with. This compares with the purchase costs of £70 buying the Tasca kit and the Resicast sandbagged hull conversion and a further £30 in not using the Tamiya kits.
Secondly, the projects help increase the range of modelling skills and add to the enjoyment of the hobby and lastly the stash has been reduced by two as opposed to two new items being added.
If anyone has difficulty getting plastic card or strips, bear in mind that a lot of food packaging is plastic e.g. margarine tubs, lollipop straws etc. give a ready to hand source of plastic if cleaned and grease free. Some accept glues better than others but nearly all can be assembled using superglue.
Steve Noble
