Galleries: A | B | C-E | F | G | H | I-L | M | N-R | S | T-V | W-Z
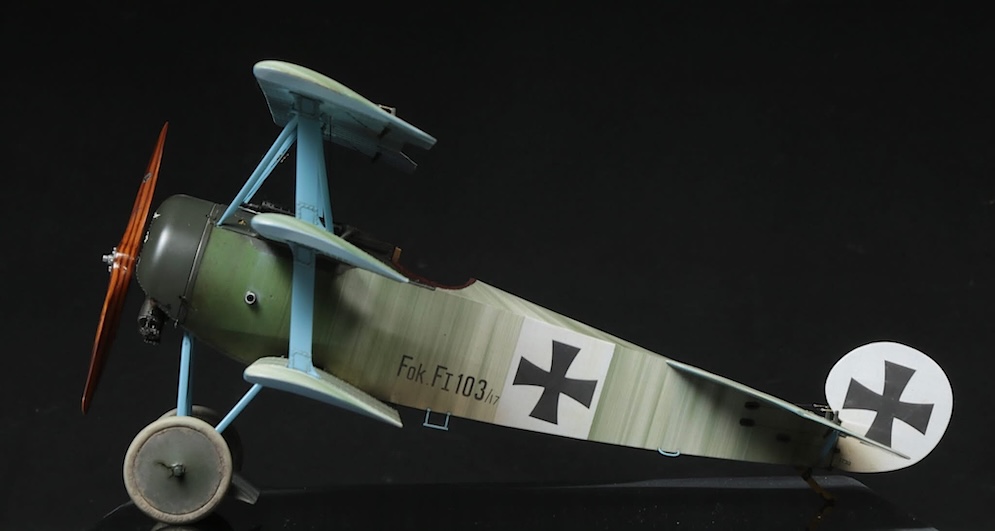
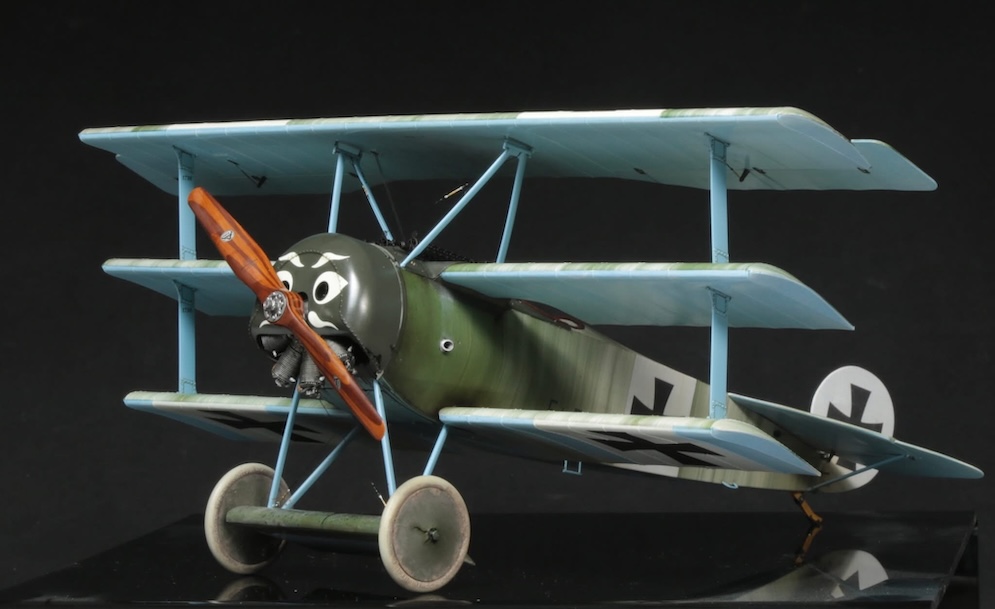
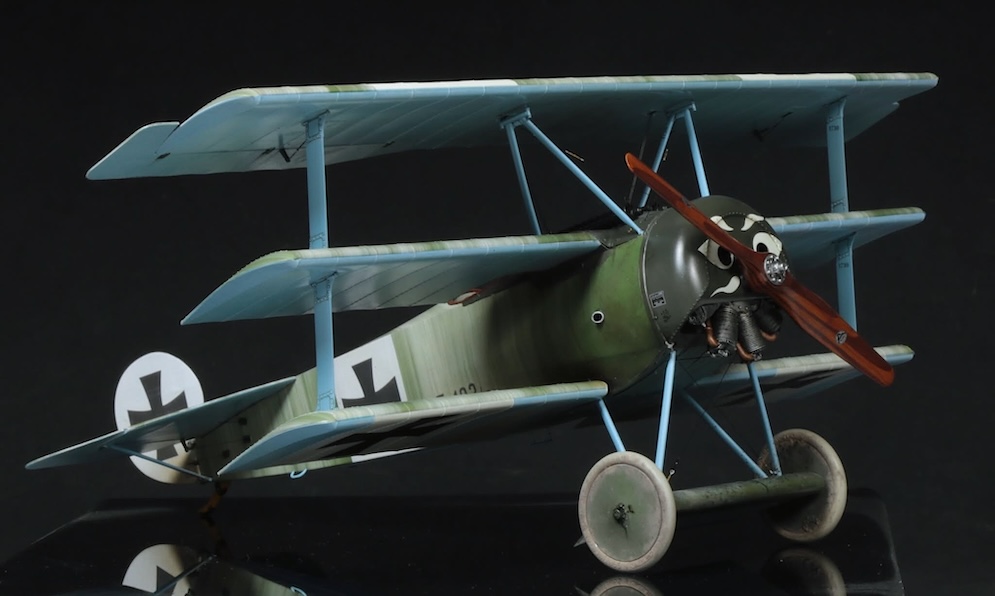
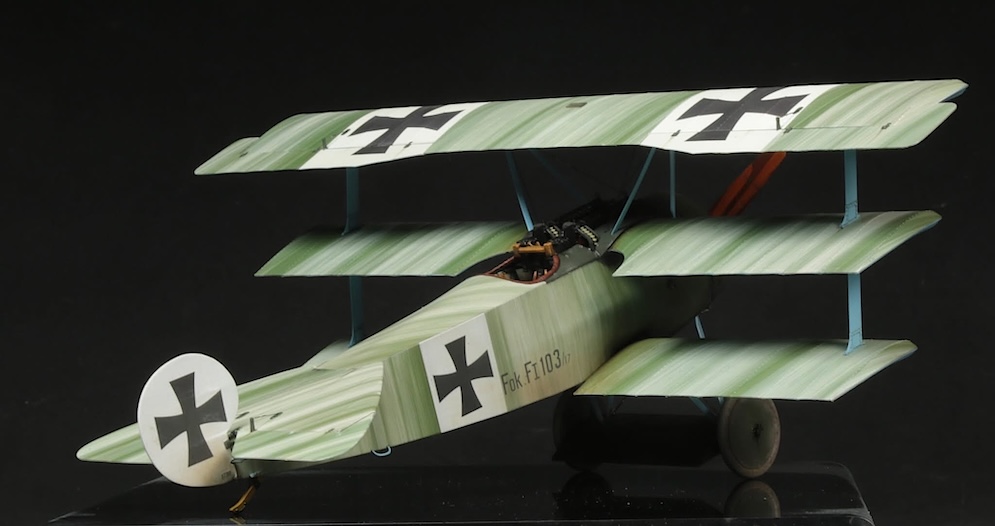
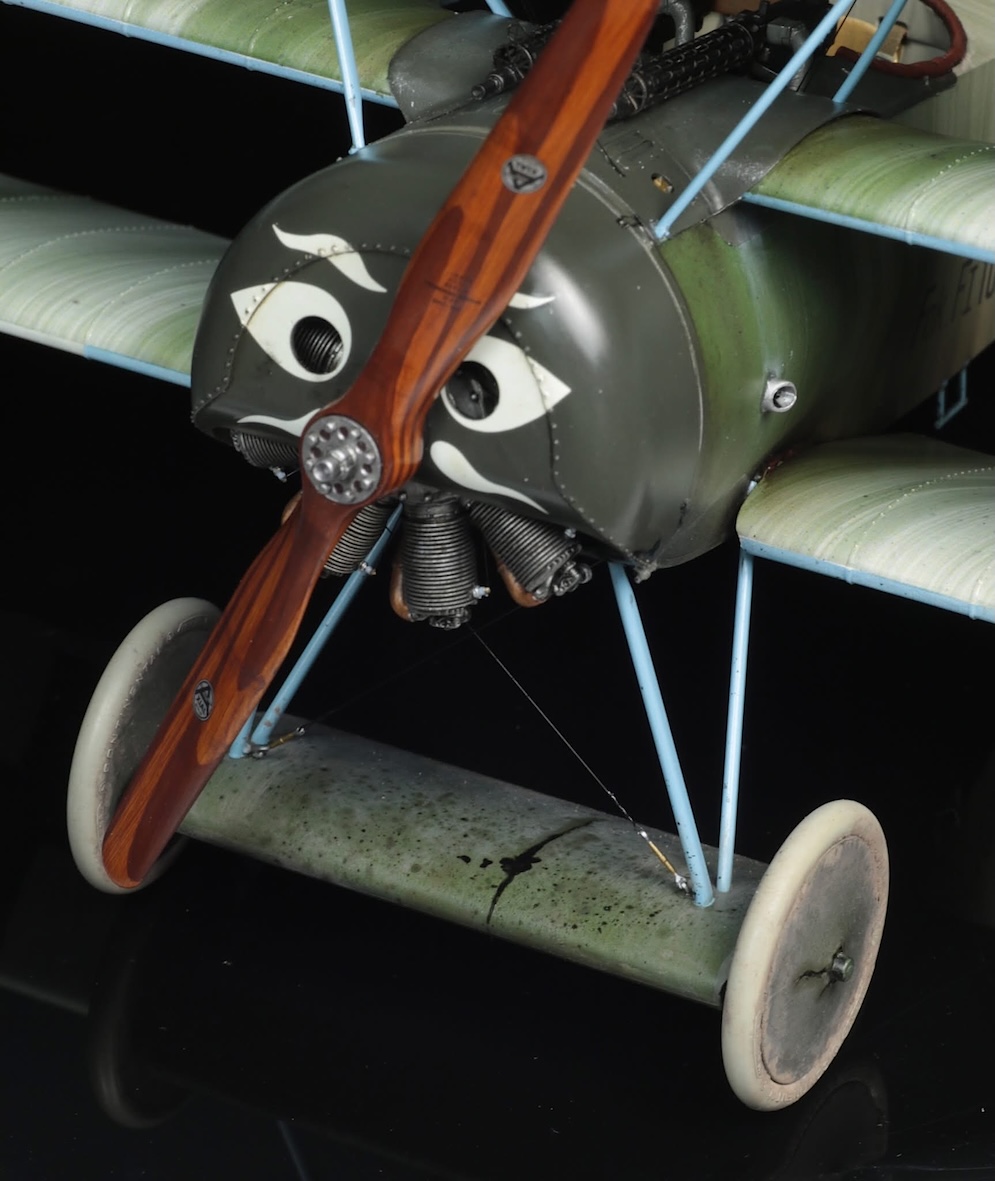
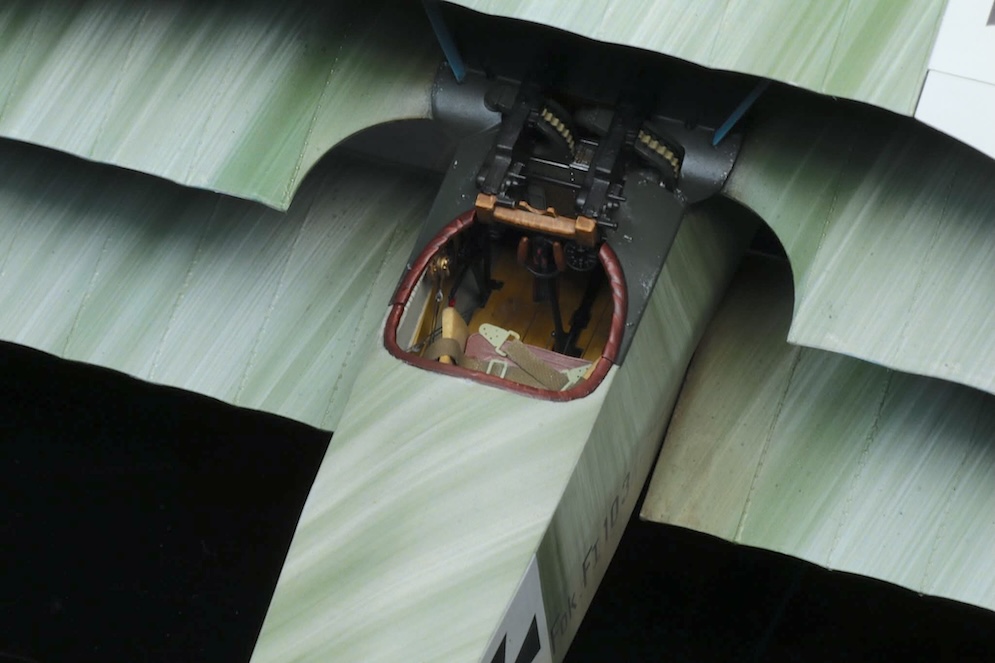
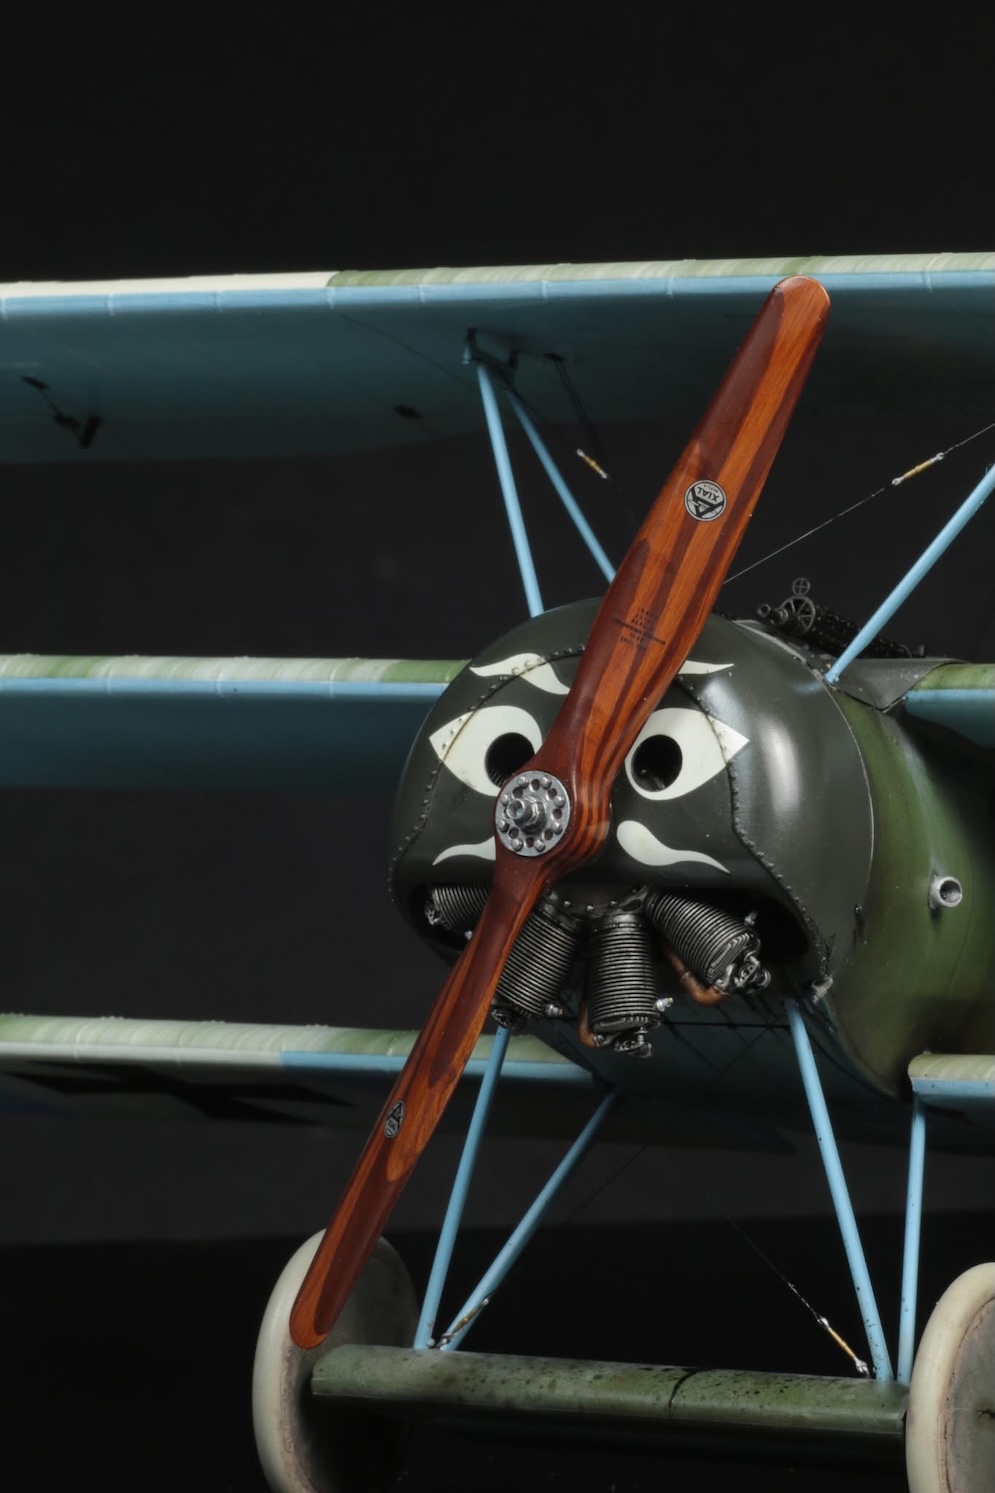
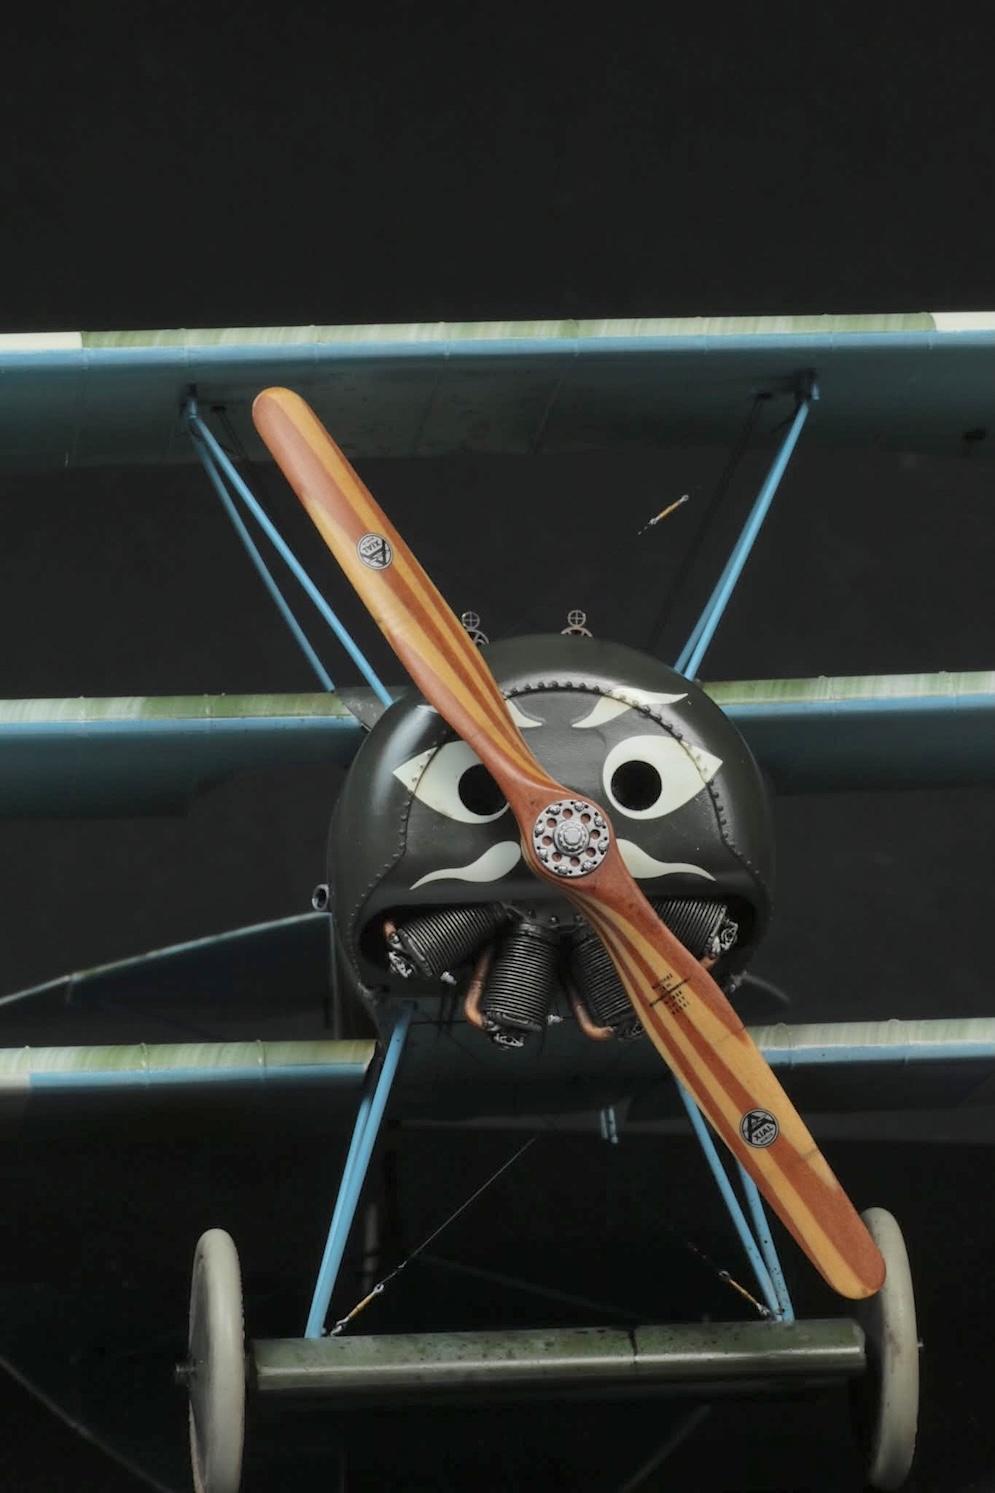
Meng Fokker F.1 103/17, Werner Voss
Aviattic decals with Aviattic conversion set for the empennage and control stick.
Painted plastic prop and a lovely wooden prop from Proper Plane.
Eventually to be presented with CSM 1:24 Voss figure with his Wanderer motorcycle……figure is complete but, I sent the motorcycle parts flying through the air to crash land on a hard floor and the resin parts fractured too badly to be restored. Awaiting a new Wanderer……
David L.
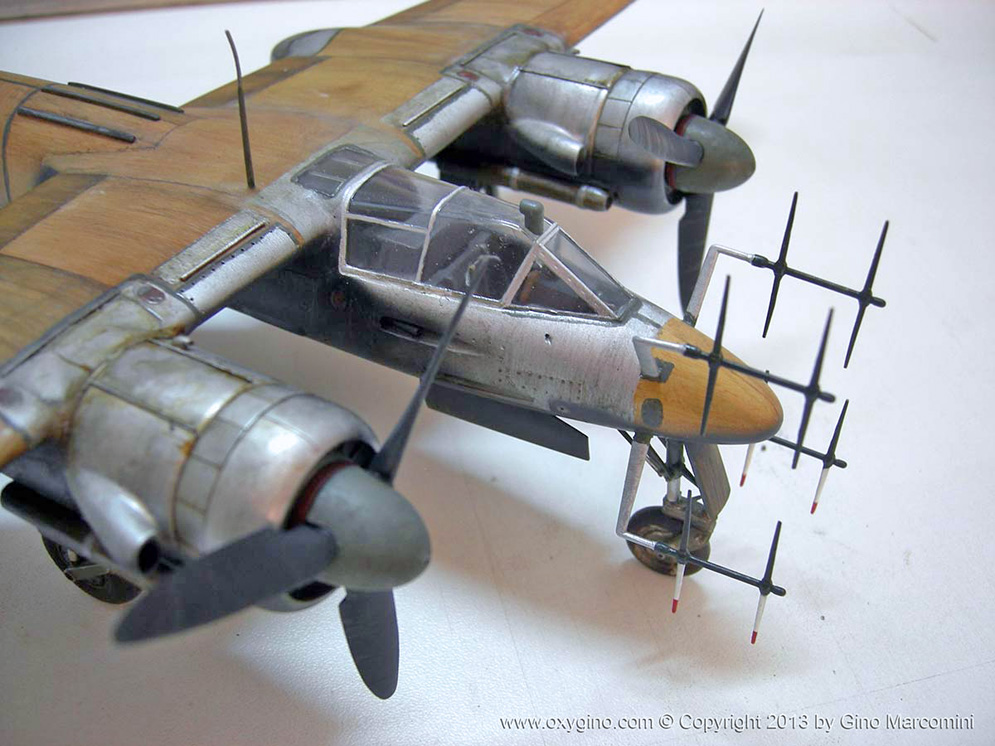
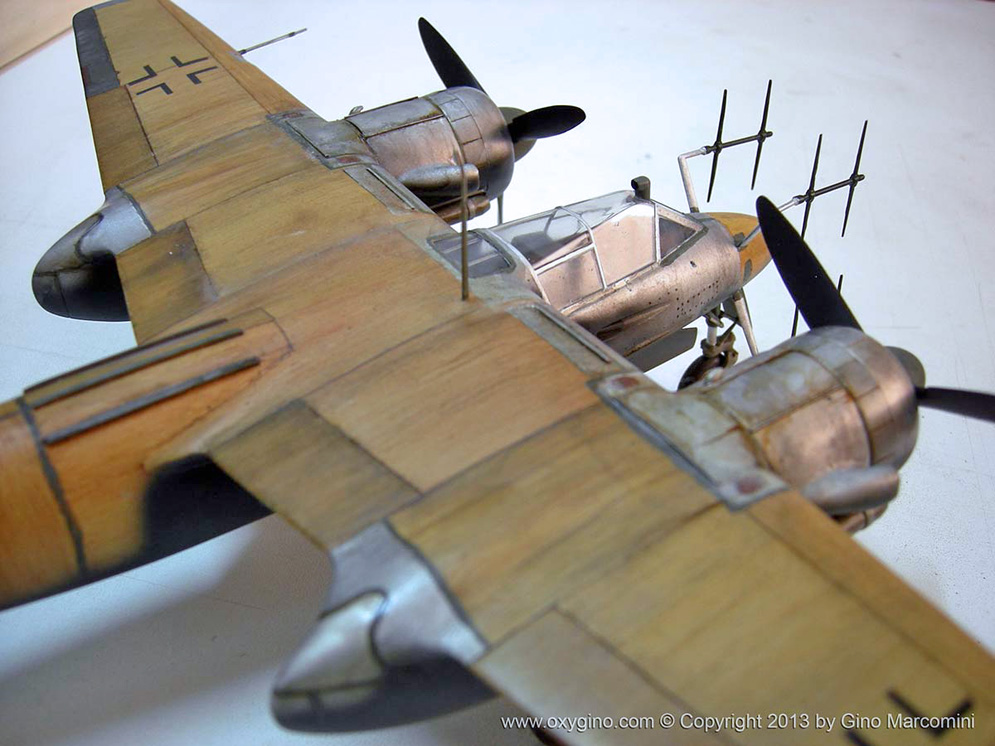

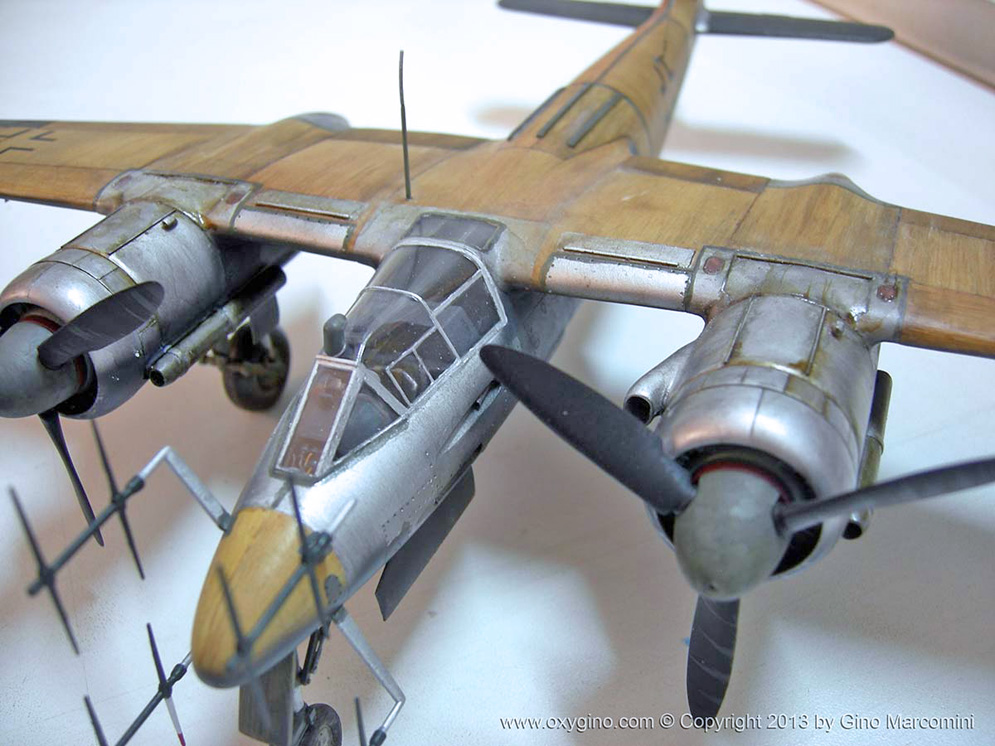


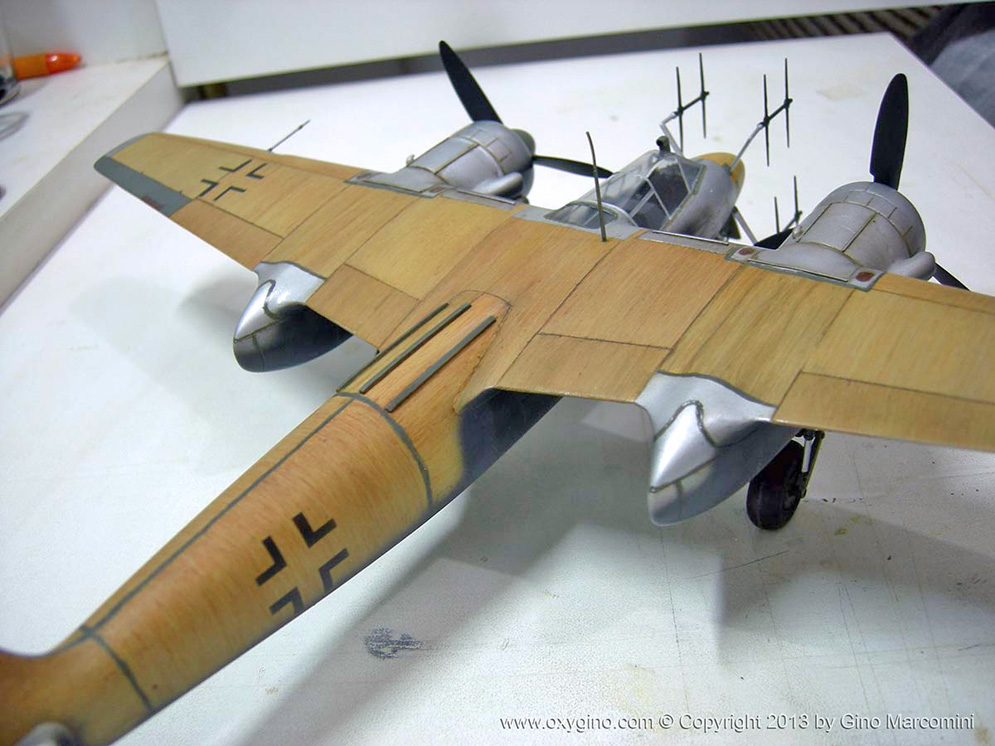
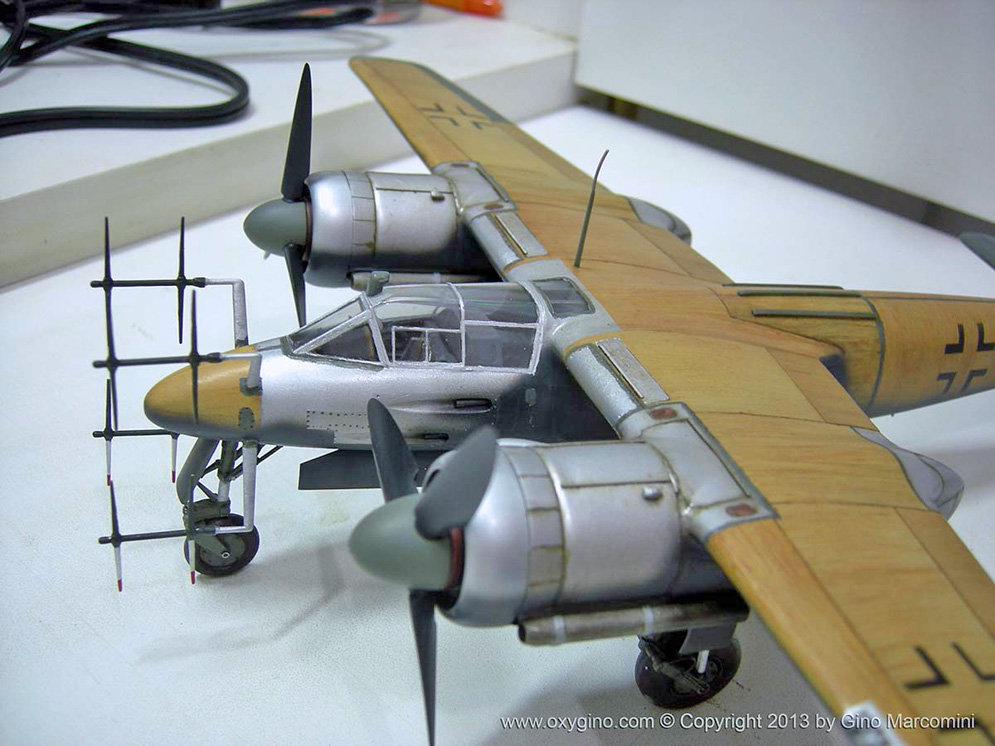
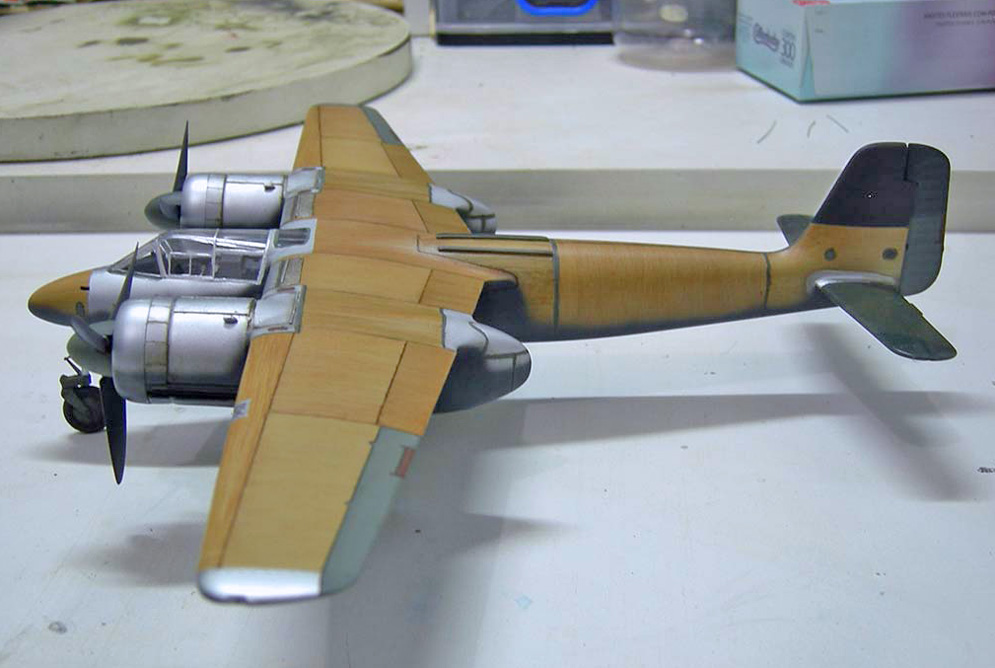
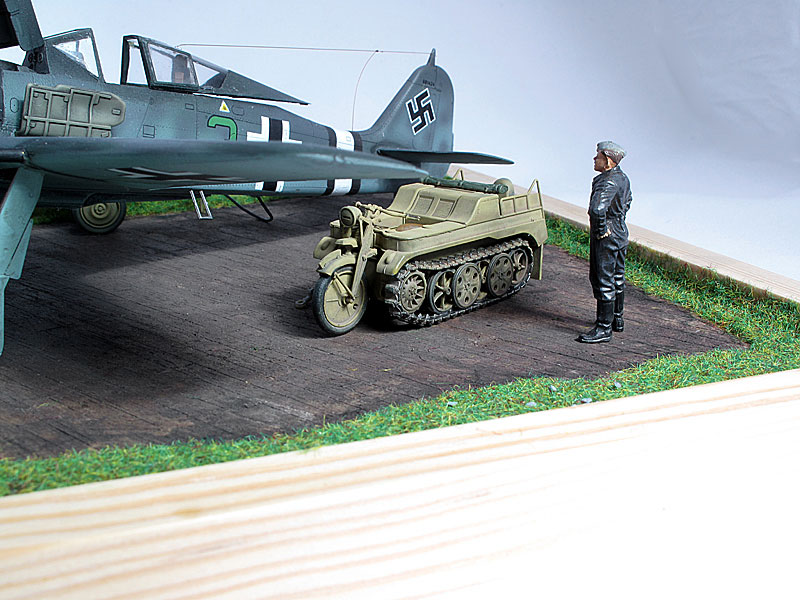
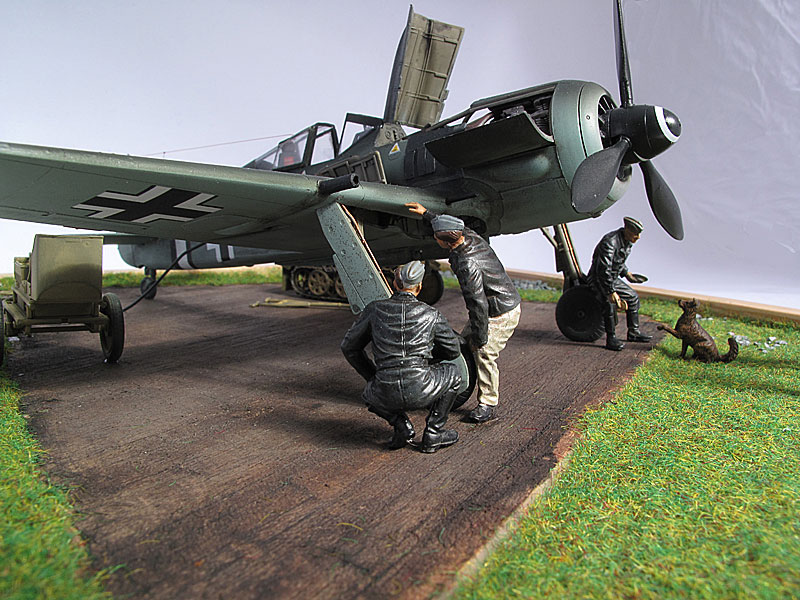
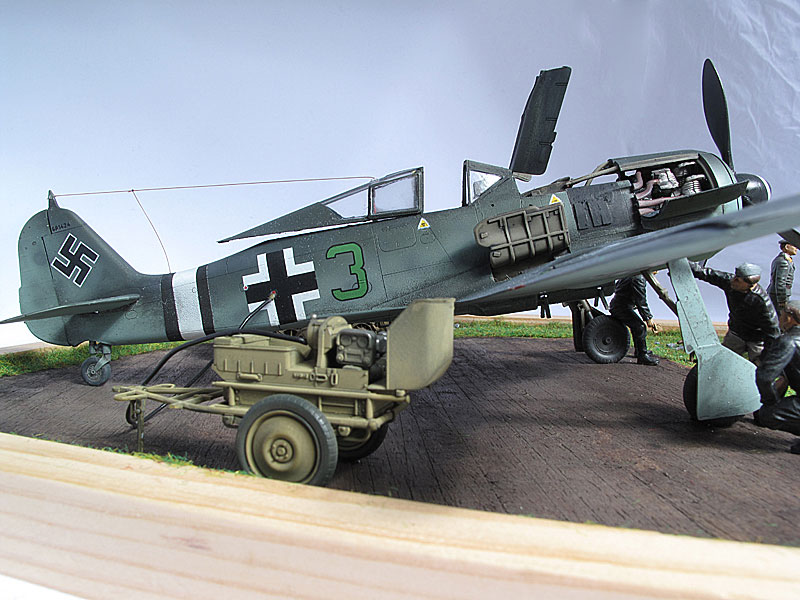
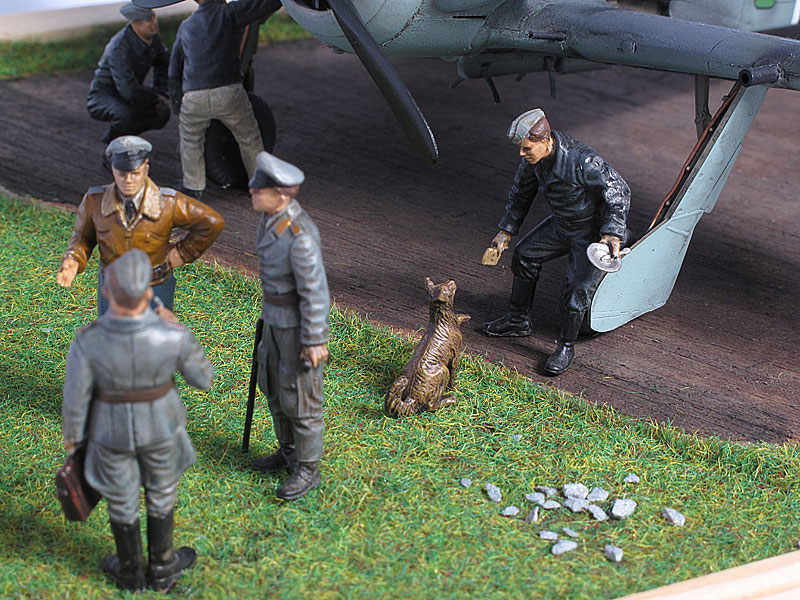
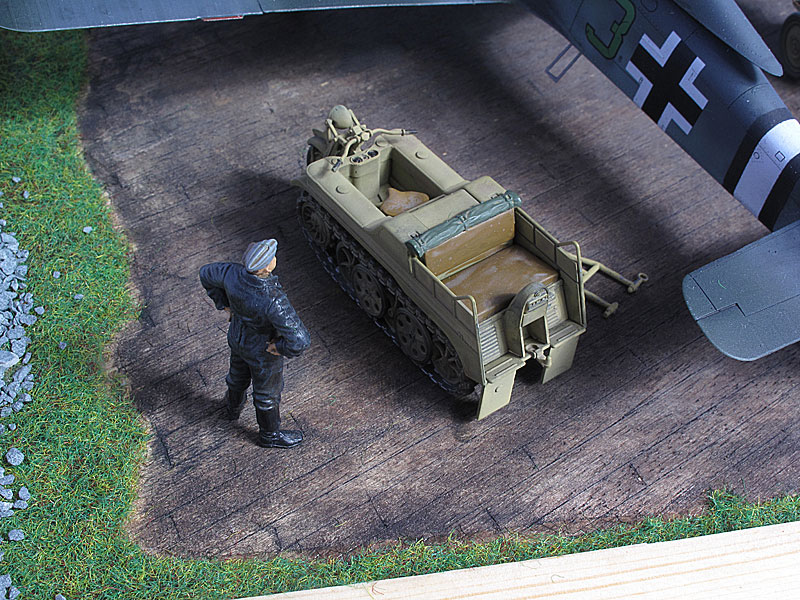
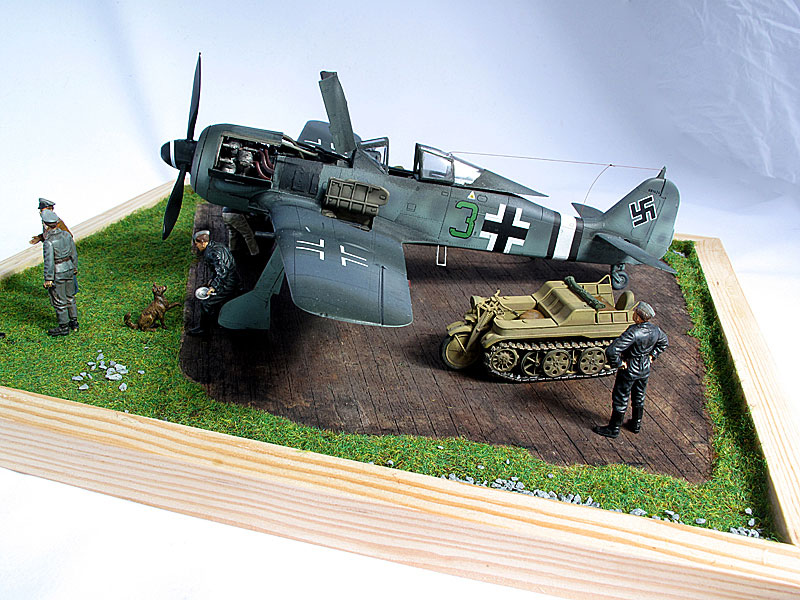
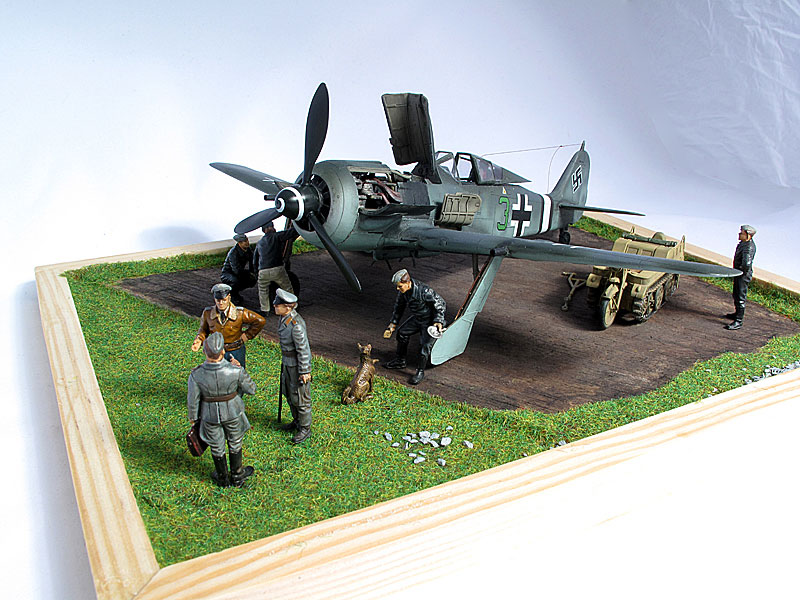
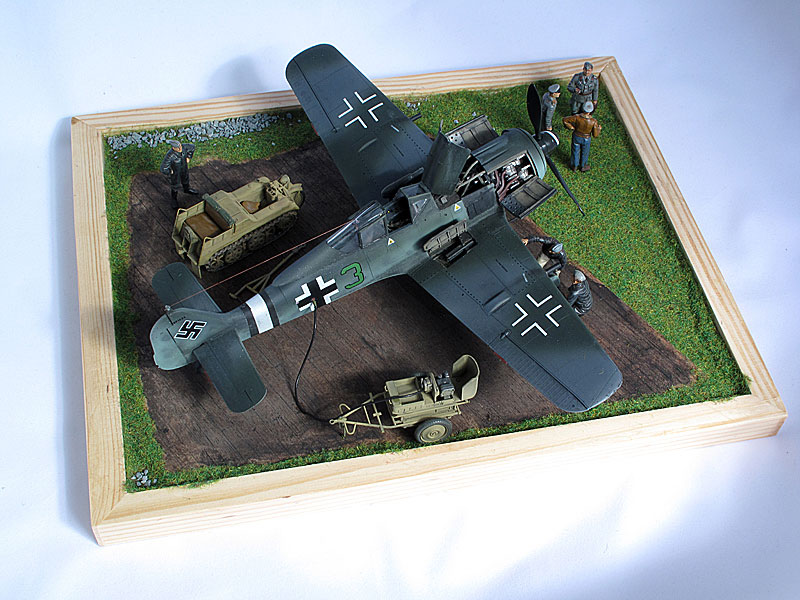
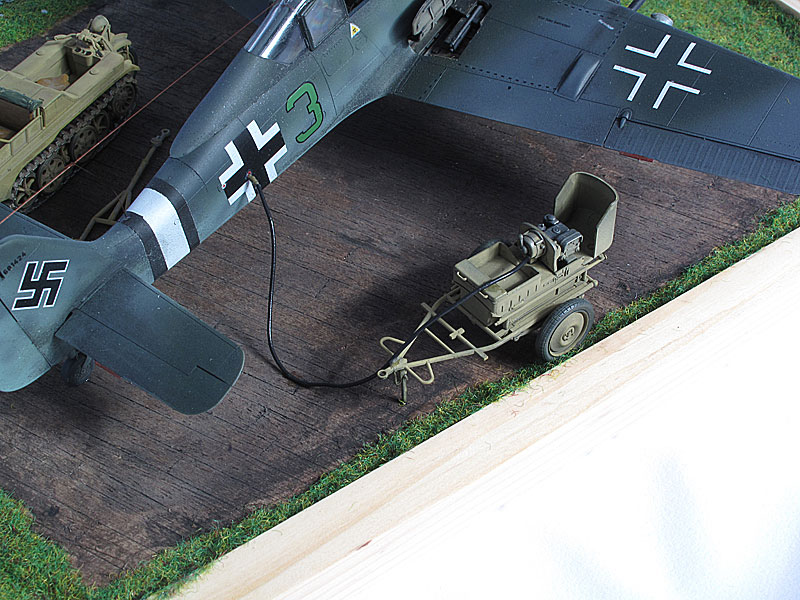
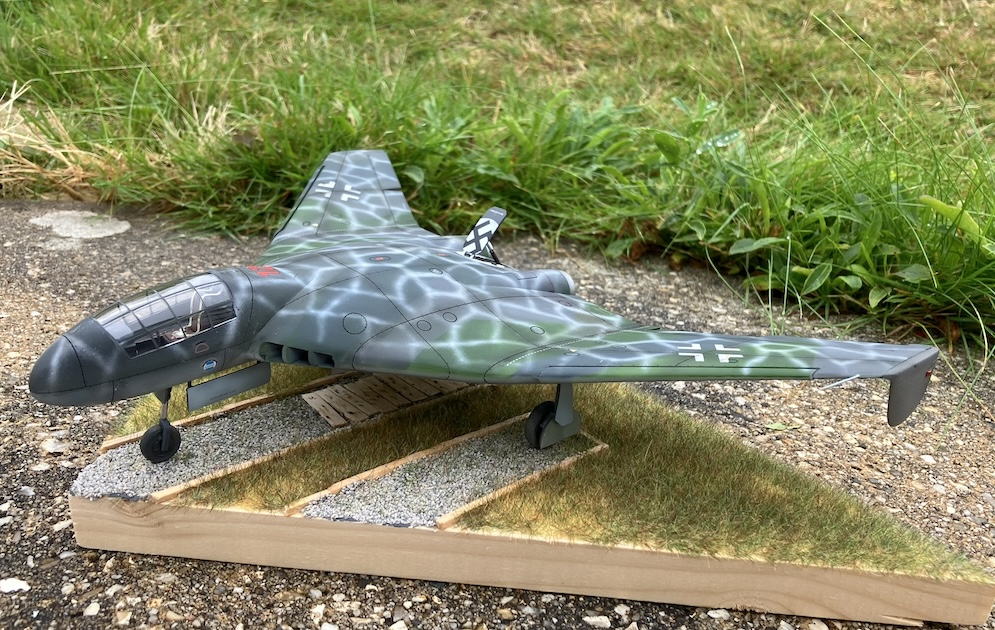
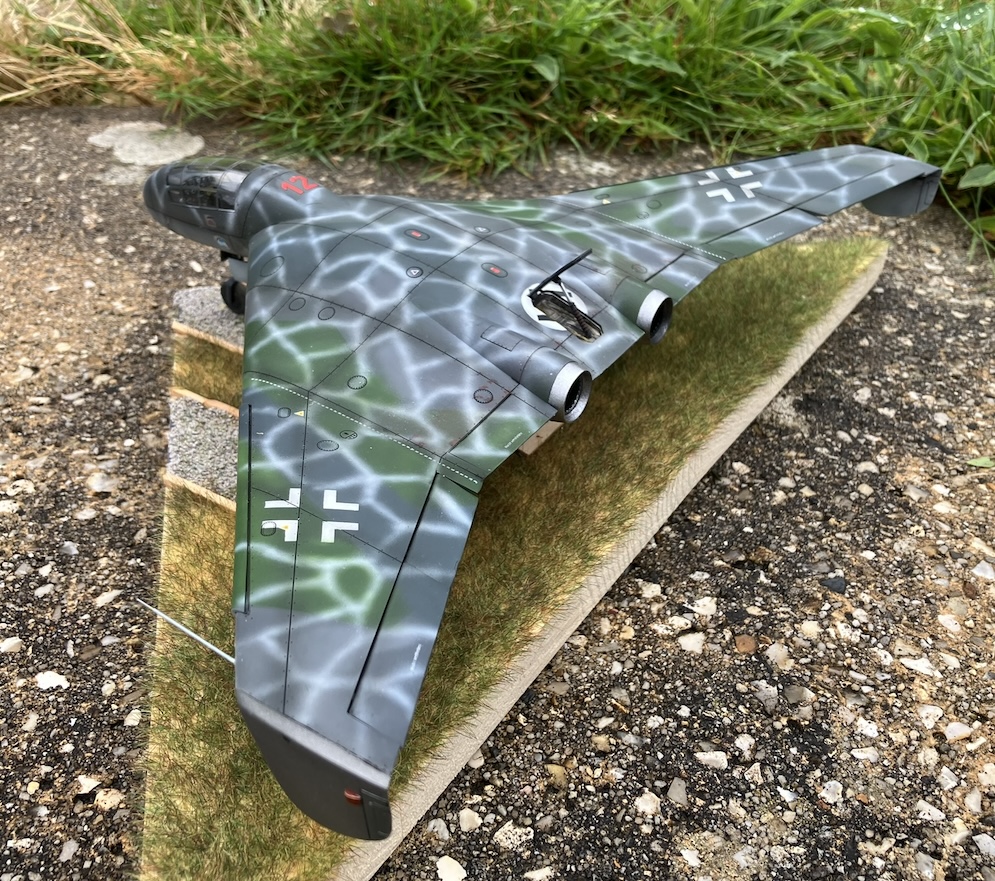
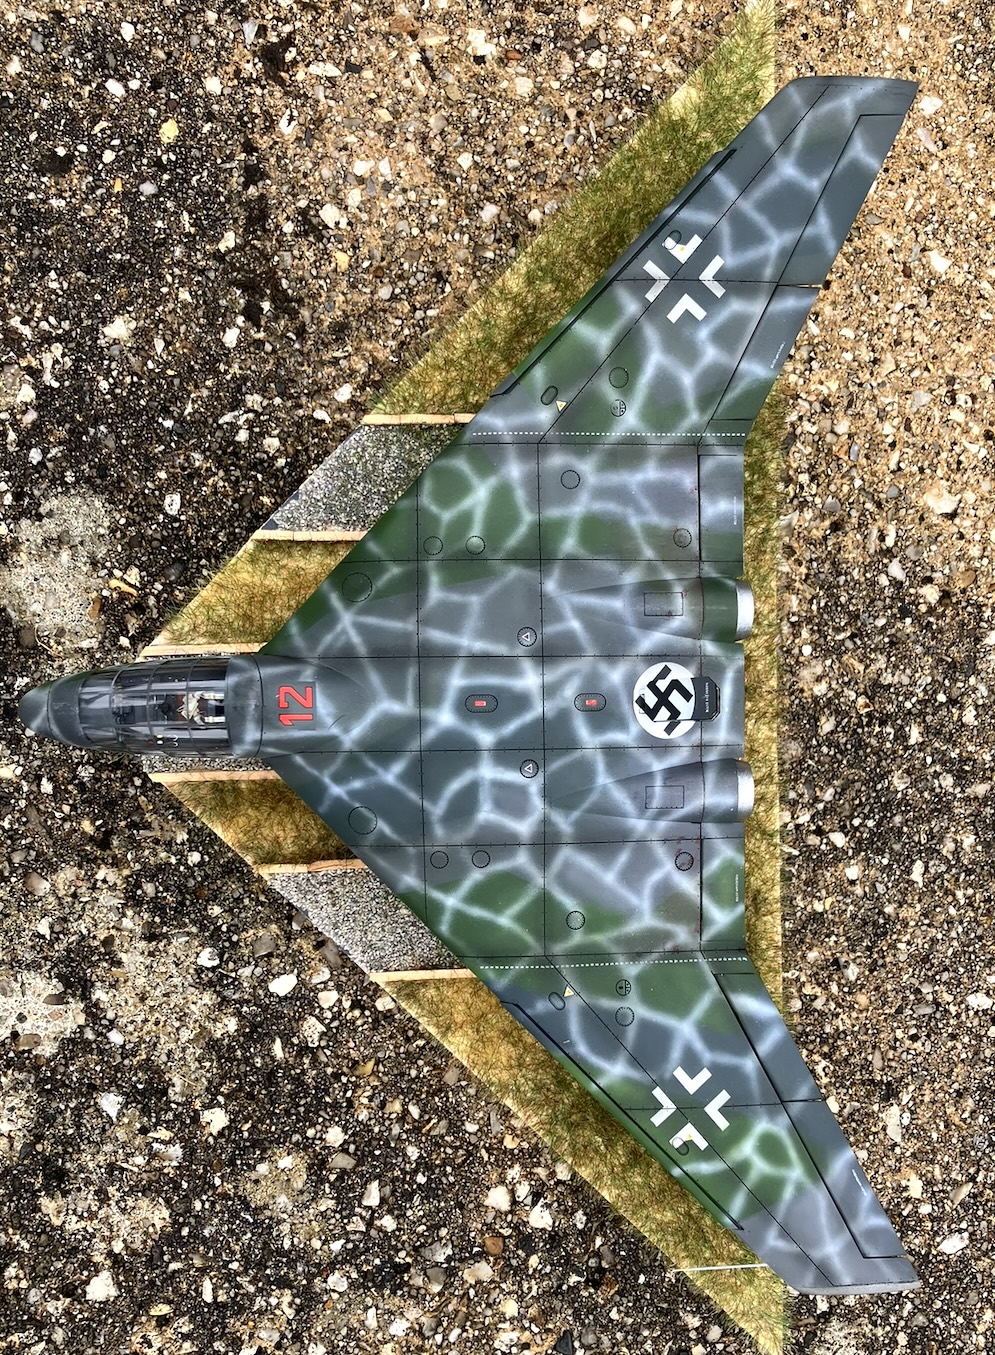
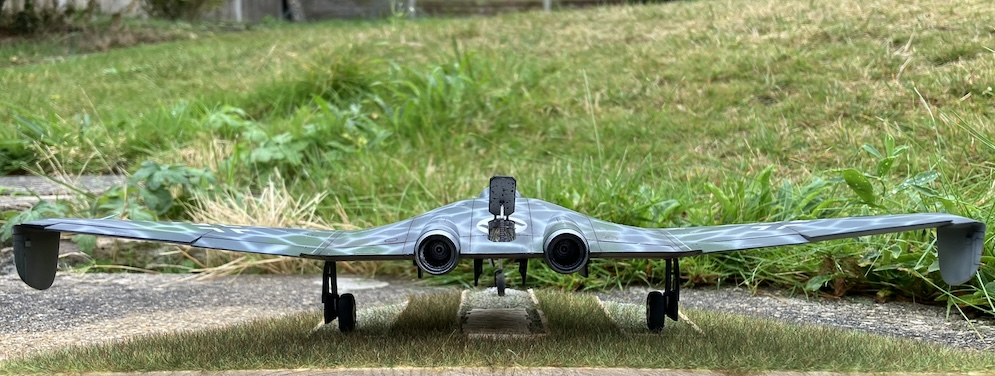
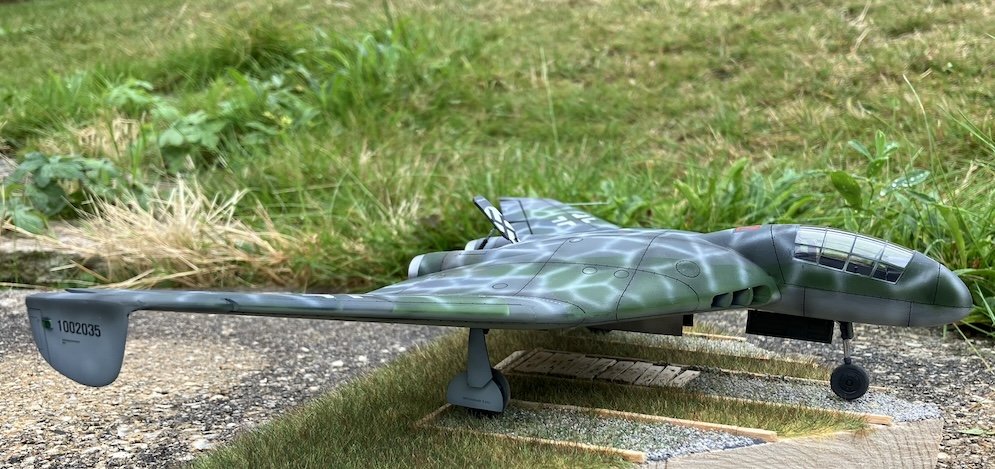
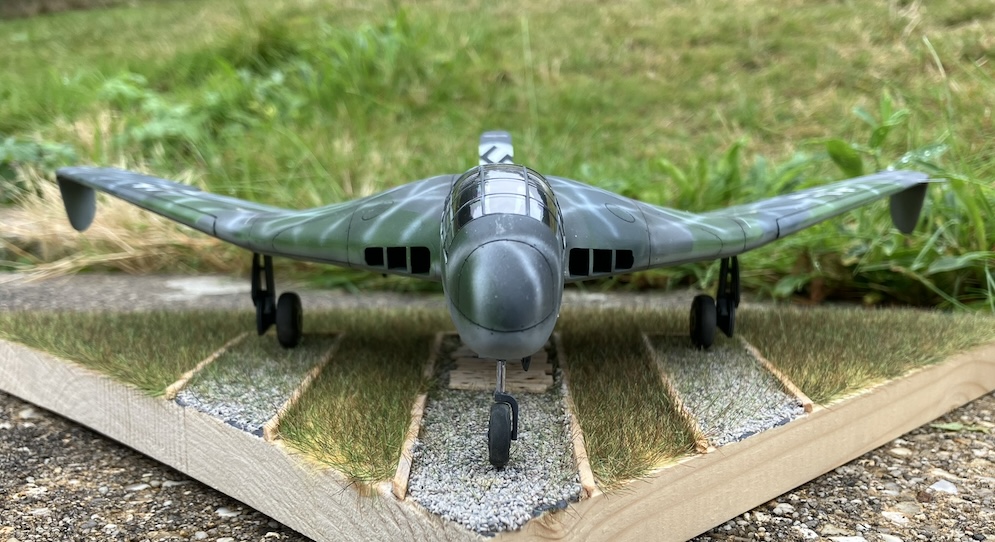
The intention was to make this 1:48 model from the Dragon kit with a standard camouflage pattern, with minor weathering showing the original wood.
Being encouraged by a friend of mine (almost being challenged) I made a fictional version of the Ta154, where the aircraft wouldn’t have been painted before going into operation. Only some essential parts were painted by its own crew.
The painting process was long. The base paint (after Vallejo’s primer) was nitrocellulose lacquer to give the basic color of the wooden boards. Some panels had a slightly changed tone with coats of other colors, but everything between ochre and beige. Everything was lacquered with nitrocellulose varnish too. The masks were made, panel by panel and applying a shade of oil paint with flat brush, always varying shades between the panels. The oil paint takes a long time to dry (a few days). Metal parts were painted with a few shades of Alclad II. Some parts were blackened with bitumen. I Applied Future (Johnson’s Klear) on the whole model and used a matte acrylic varnish to finish.
Gino M.
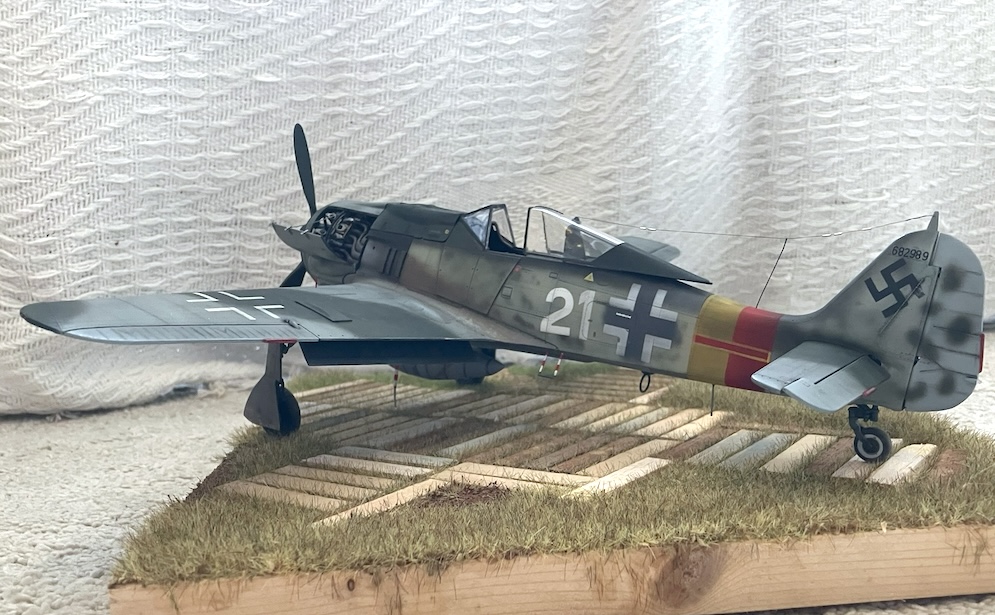
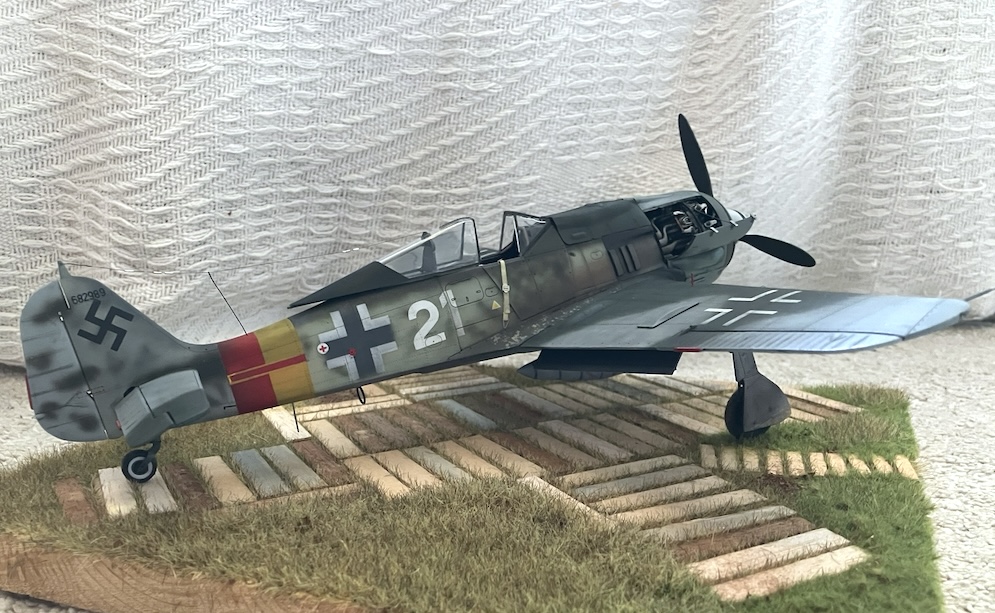
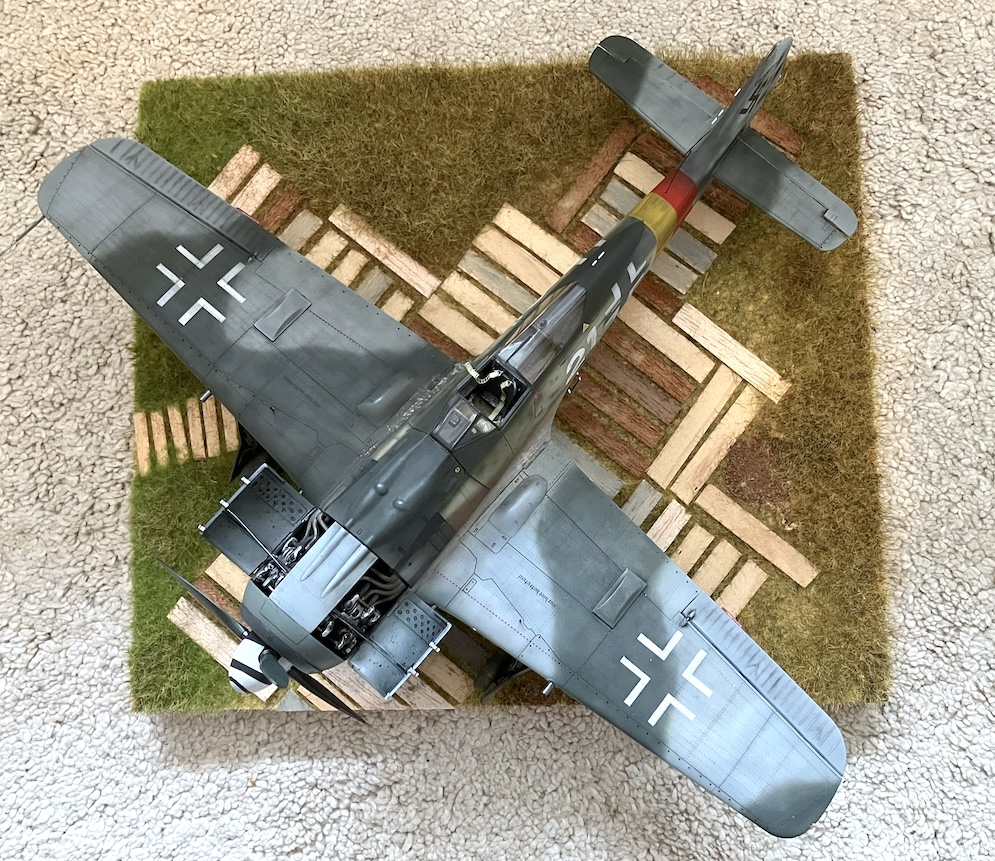
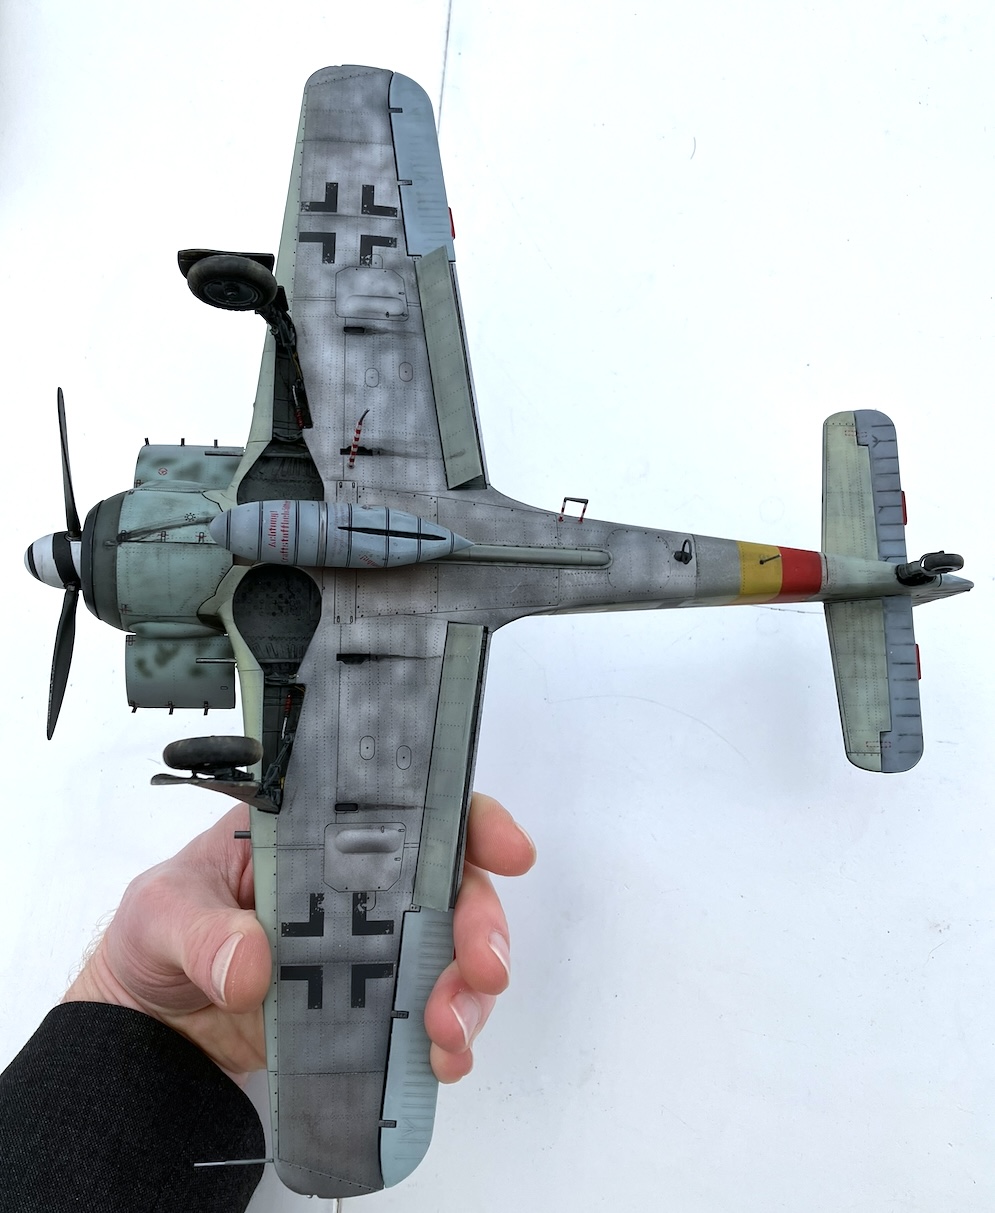
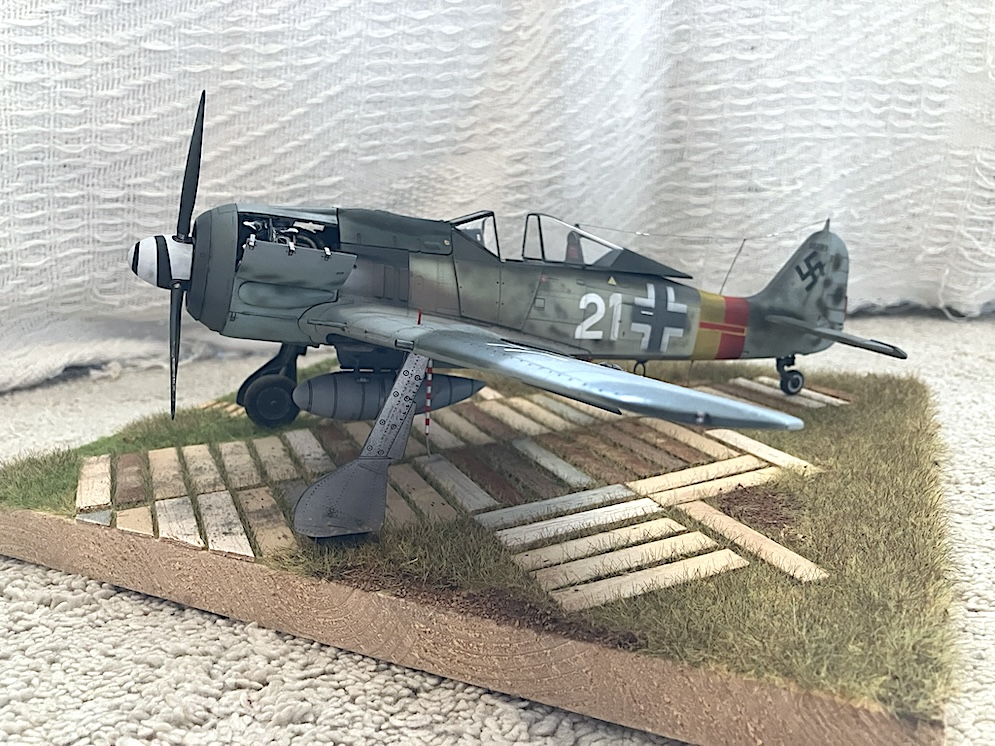
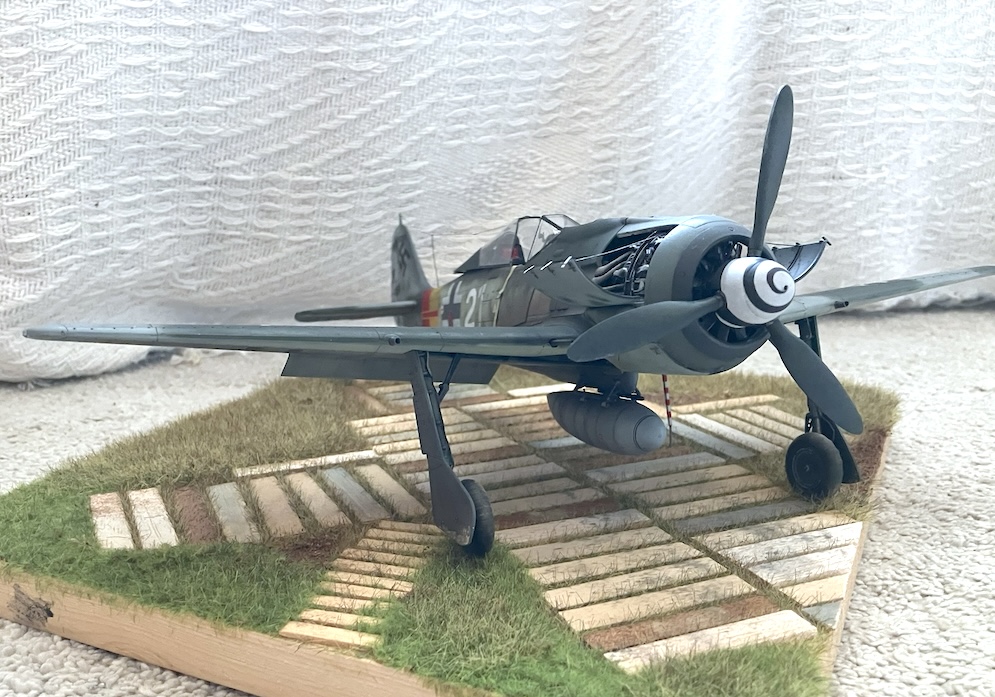
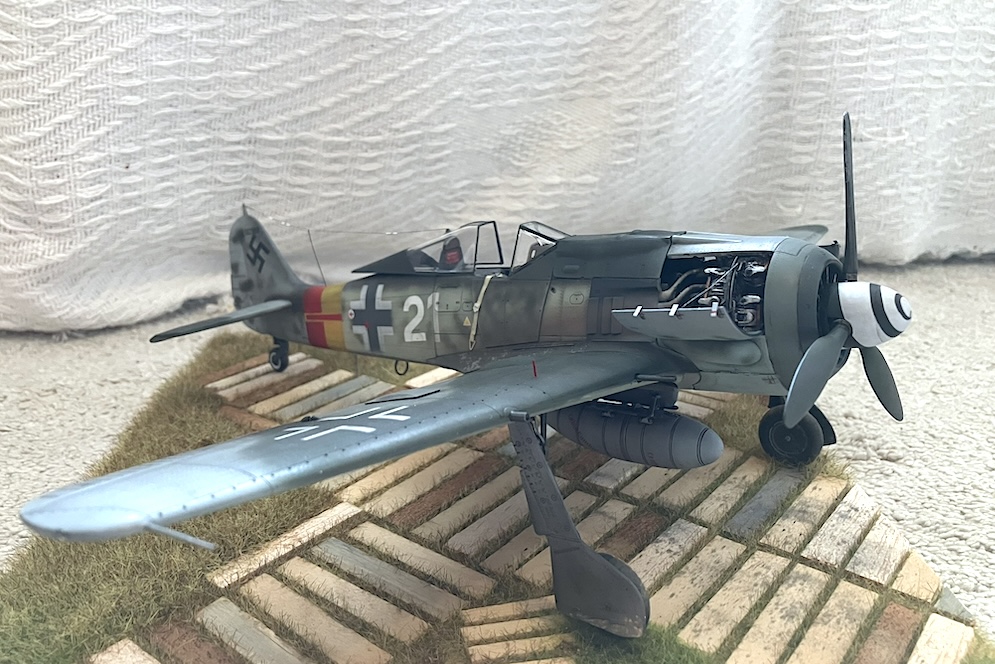
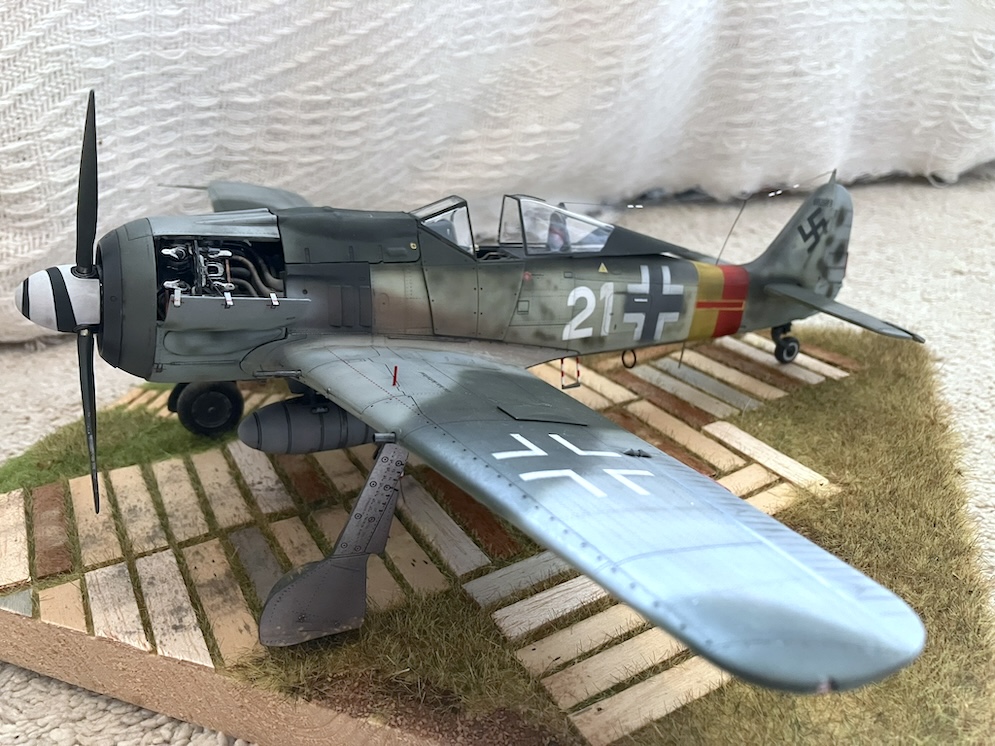
This was my second recent 1:32 Revell kit and my second proper attempt at riveting. Overall I’m pretty pleased with how it turned out.
The aircraft is the well known ‘White 21’ WNr 682989 (I’d love to do it again at some point with the sheep!). All markings and most stencils were masked and sprayed. I bought the One Man Army set for the stencils and was impressed with the ones they included, but mystified by the absence of some which forced me to resort to decals (which I hate). The 21s are fractionally too small, but the closest size and shape mask I could find. I’m not 100% happy with the spinner, and of course no-one knows if it was white and black, or black and white. I suspect the step and the Morane aerial are both too stripy, and I couldn’t get the rearmost insulator to move further along the aerial wire towards the fin. Grr.
Finally the underside should possibly have the NMF covering only the aft part of the wing, but I was at least pretty happy with the weathered finish.
Craig W.
Really enjoyed this one – a fantastic kit that’s genuinely no more difficult to build than on in the smaller 1:48th scale. Eagle Parts resin cockpit and tail wheel; Decals: Eagle Strike Rammjager Part 2 (32062); Fabflight Fw 190A-8/R8 Rammjager resin conversion (DET 32006); Eduard etched Fw 190A-8 Exterior Set (32 132); Eduard etched Fw 190A Landing flaps (32 130). Xtracolor enamel paints airbrushed with Badger 200 and 150 airbrushes.


Graham T.
Basically the model is re-scribed, scratched items in the cockpit, main gear legs modified to make them weighted and the decals from the Eagle Strike decal sheet for the ‘D’s.


Camo is Xtracolor enamel RLM 76 sprayed on the under surfaces; thinned with cellulose thinners to shorten the drying time. 74 and 75 sprayed by hand using a Badger 150 airbrush (at that time). The paint goes on beautifully, drying to a super-smooth gloss finish – great for taking decals. Before decaling though, the white squiggles were added, this time using Humbrol white (for no other reason that it was already open!). The white needs to be very well thinned to a thin, milky consistency. I still managed to get a bit of over spray on the surrounding paintwork but this was easily remedied when the white was dry. I simply came back in with each of the main camouflage colours, spraying close to, but not right up to the original demarcation line. The white over spray disappears. It’s important when adding the white to intentionally slightly spray over some edges of the markings as this white paint was applied in the field and some markings were intentionally or otherwise ‘clipped’ during the process.
The panel lines were enhanced using Rust ink from Citadel Colour and the final finish achieved using Polly Scale Satin varnish. Much of the paint chipping is created using a fine brush and RLM 02. Boot scuffs and other ‘metallic’ chipping using an ordinary graphite HB pencil tip.
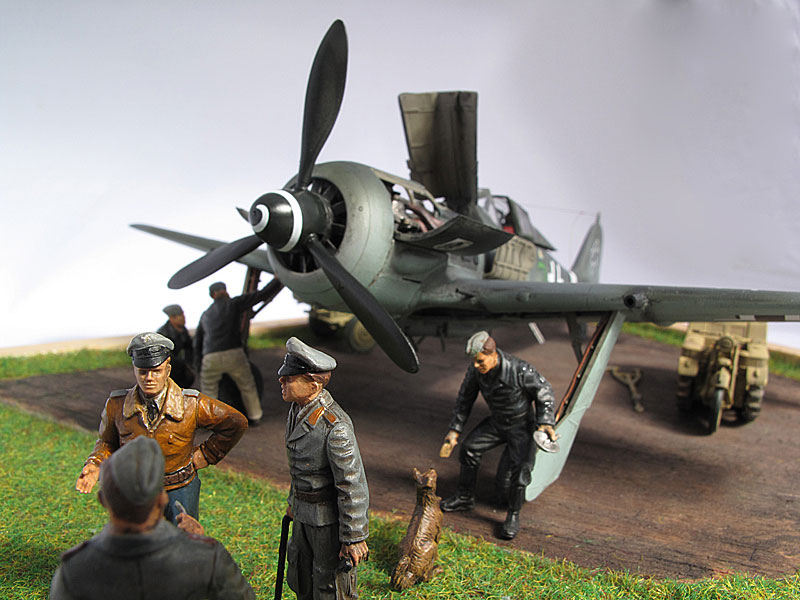
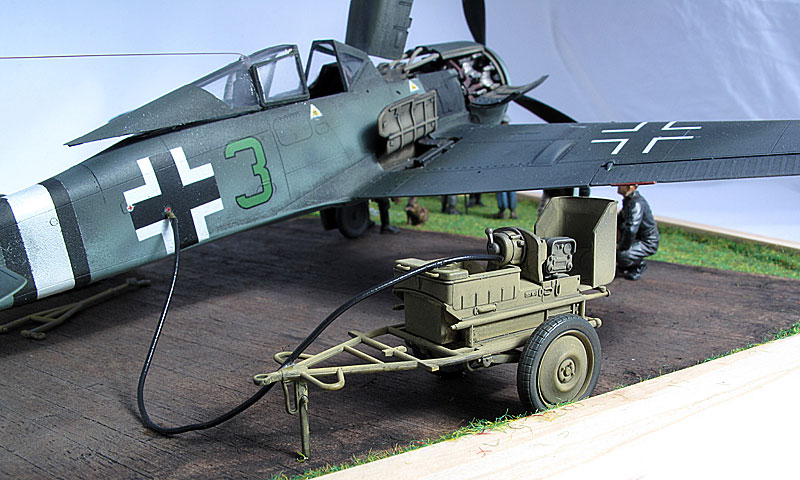
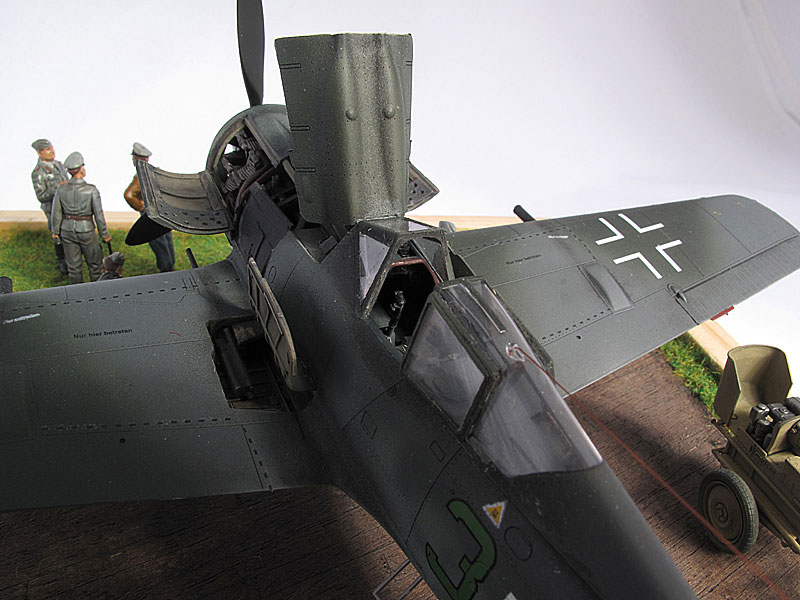
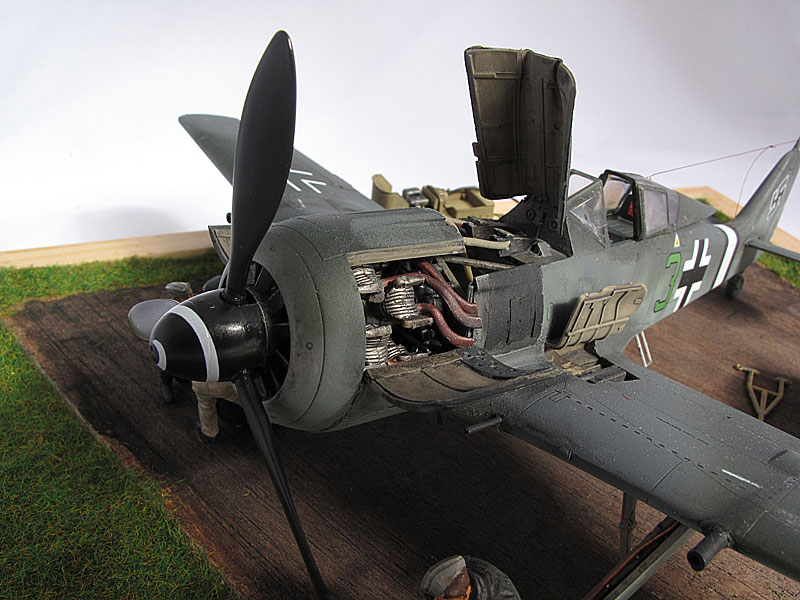
This is one of the new wonder kits from IBG, that really throws down the gauntlet for other companies to follow. It has glorious but restrained rivet and panel detail. You can see the rear of the engine on looking into the undercarriage bay.
My only struggle was with the brass with the kit in the undercarriage bay. The barrels are from Master. The markings are from the kit for JG.54 in December 1944, I think the first unit to operate the aircraft.
This is a Noy’s Miniatures hanger and figures are Gunthwaite RN gun crew in overalls. They were the nearest I could get for Luftwaffe ‘schwarzmanner’. To try things out I used some oil brusher colours from AMMO to dry brush the exhaust and wear on the wings, which maybe went OK.
Hope you like the pictures?
Andrew J.

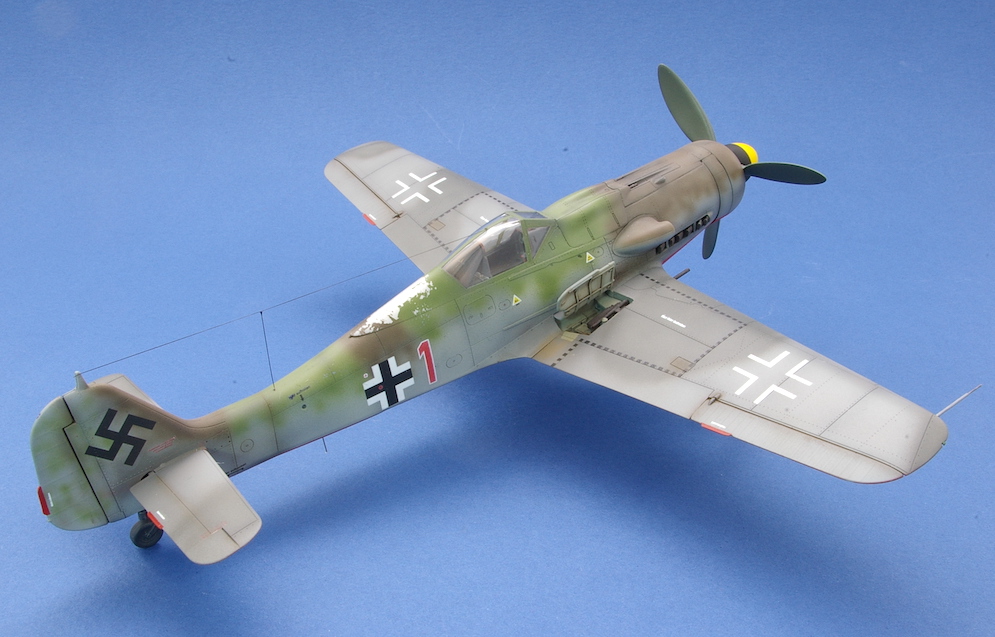
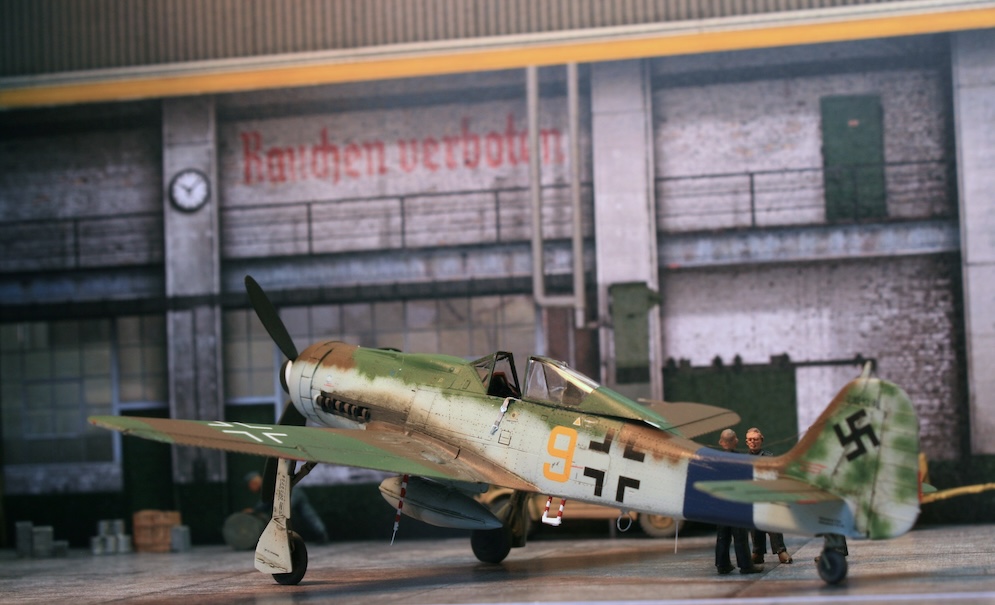
This kit has been around since 2010 and despite its age I think that it is still one of the best kits of the aircraft in this scale. This release from 2021 is a ‘Weekend’ edition (though good luck with building and painting this in a weekend!).
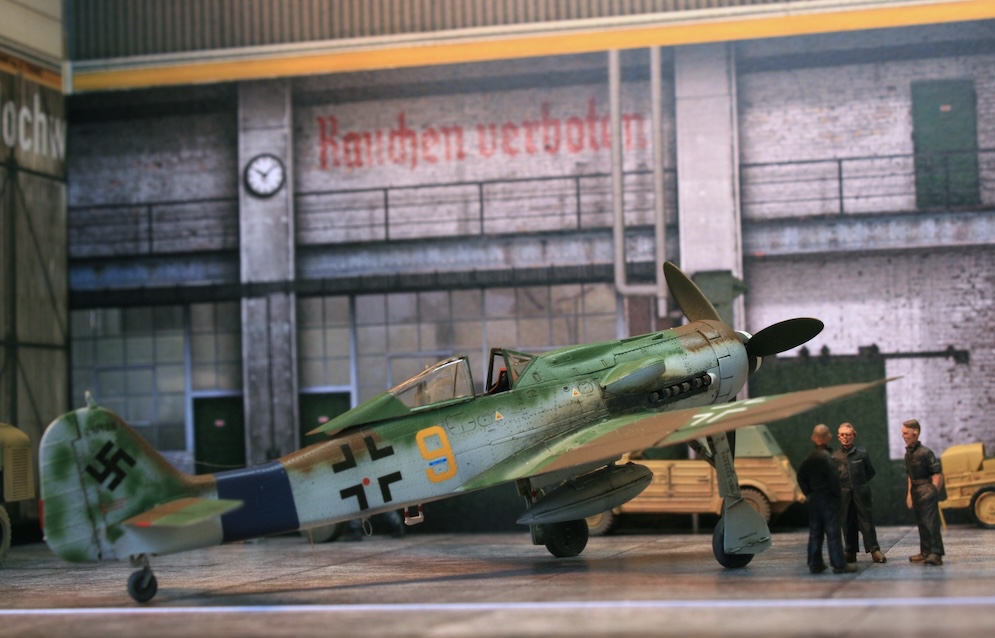
The kit comes with four marking options and includes transfers for a very colourful aircraft from the JV44 unit which was charged with providing cover for Me262 fighters. These early jets, whilst very fast in the air, were slow during take-off and landing making them vulnerable to the allied aircraft targeting German airfields. The aircraft from JV44 were therefore required to deter these attacks.
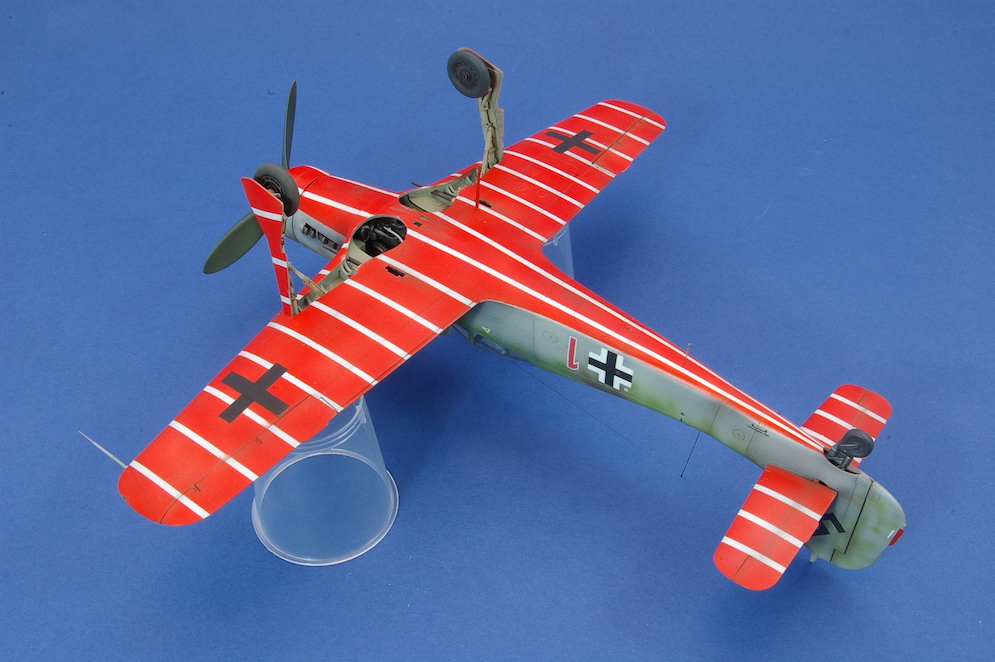
The aircraft in this unit had their undersides painted bright red with white stripes. This was to make them more recognisable to over enthusiastic German anti-aircraft gunners to avoid ‘friendly fire’ incidents.
The kit is fairly easy to build though it does not come with the etched brass set provided in the more complete releases. The modeller will therefore need to find a set of seat belts from an after-market source if required. On the plus side the rear of the engine which is visible through the open top of the wheel wells is provided. Parts are also provided for the machine gun bay in the upper front fuselage and the cannon bays in the wings should the modeller wish to leave these uncovered.
The only problem that I found with the kit (in common with many aircraft kits) was the gap between the lower wing and fuselage which needed to be filled using a piece of thin card. I also found that lining up the ejection chutes from the ammunition boxes for the fuselage guns with the openings in the lower fuselage was ‘fiddly’ to say the least.
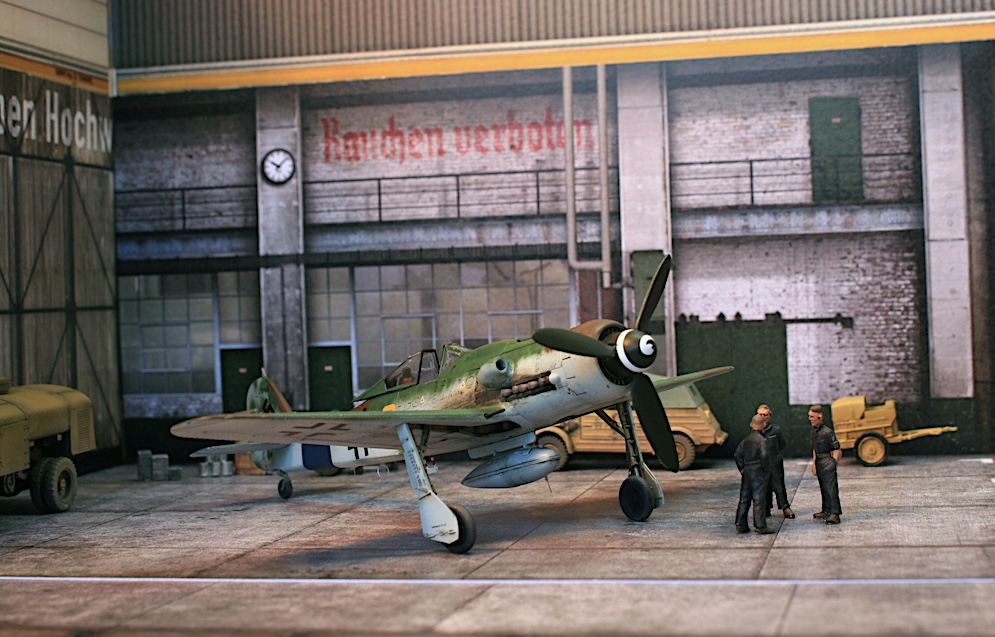
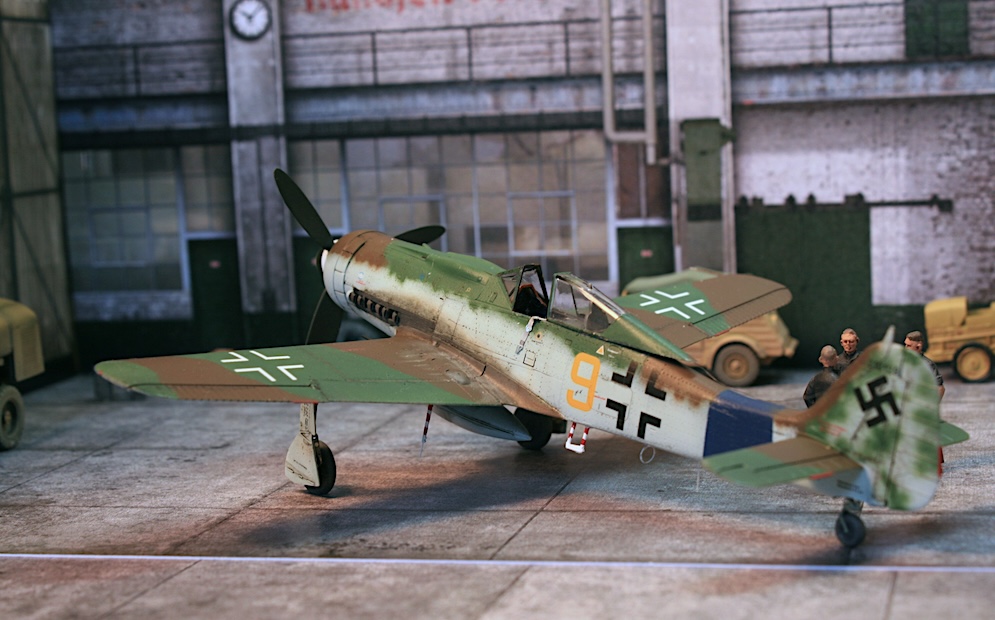
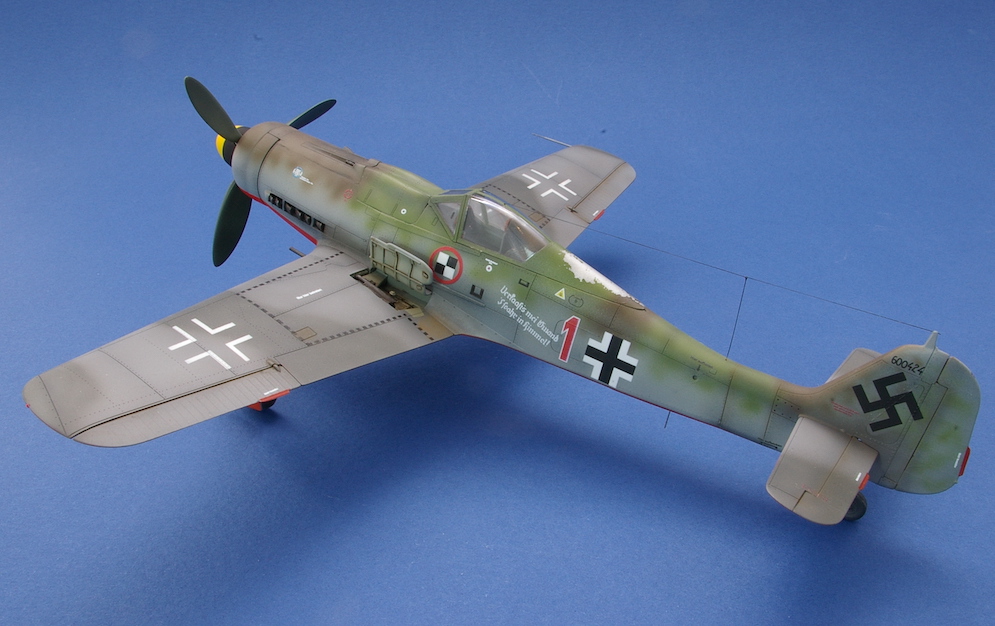
The Fw190D was apparently built by several manufacturers towards the end of the war with different factories using different paints and colour schemes. I found some colour profiles of aircraft from this unit showing the fuselage painted with colours different from those used on the wings – though the colours shown in the profiles seemed to differ. I suppose that in the final chaotic weeks of the war an aircraft might have been pressed into service painted using whatever dwindling stocks of paint might have been available?
I therefore chose to use a little poetic license and paint the wings and elevators in RLM74/75 with the fuselage in the later war colours RLM 81/82. On reflection perhaps grey along with one of the later war greens such as RLM83 on the wings might have been more appropriate. I could find no colour photos of aircraft from this unit to confirm the colours that were actually used or whether my chosen variation was actually correct.
The sides of the fuselage were painted using RLM76 and mottled with the upper fuselage colours, though I suppose it’s possible that the unnumbered blue / green colour used on other late-war Fw190s could have been used?
Anyway, my chosen scheme looked reasonable to me and whilst there may be Luftwaffe camouflage experts out there tearing their hair out and / or rending their garments at this point, I’m sure we’ll all get over it eventually with the continued support of our families and friends.
I painted the model with a mixture of Mr. Hobby and Tamiya acrylic paints. There does not seem to be any problem spraying one type of paint over the other as can sometimes happen with other paints and the two can even be mixed without any issues.
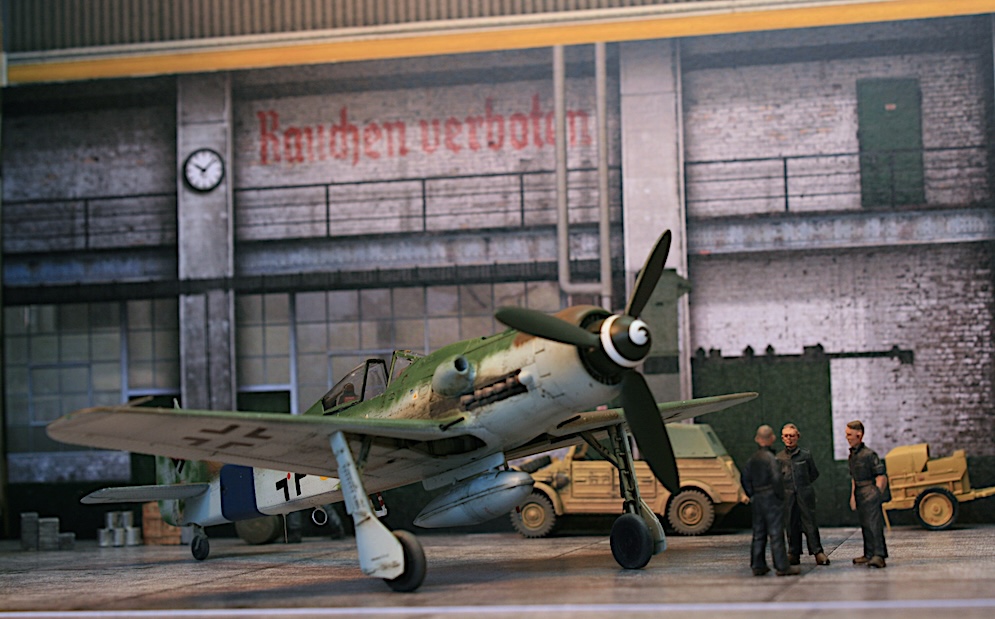
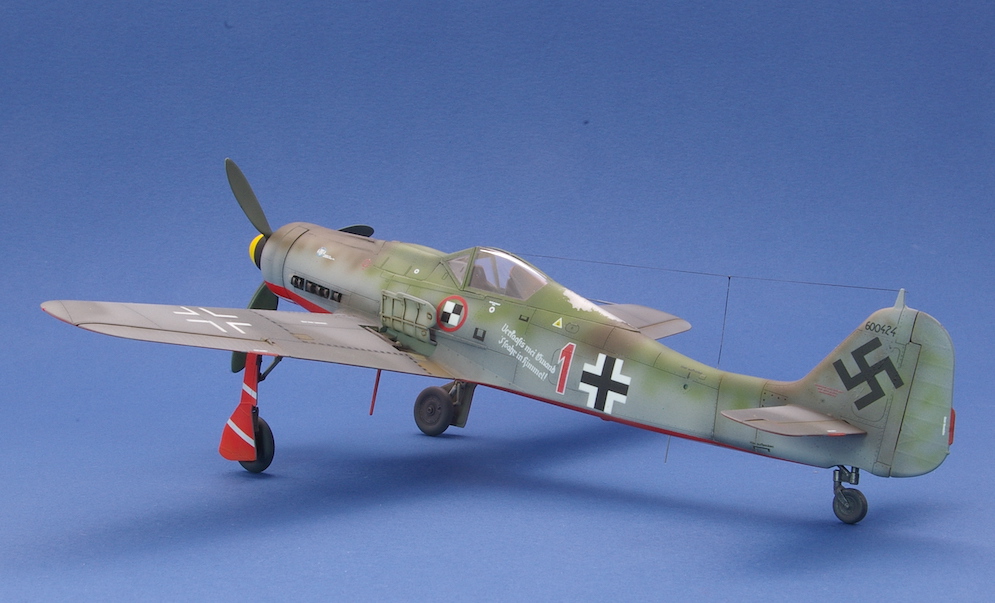
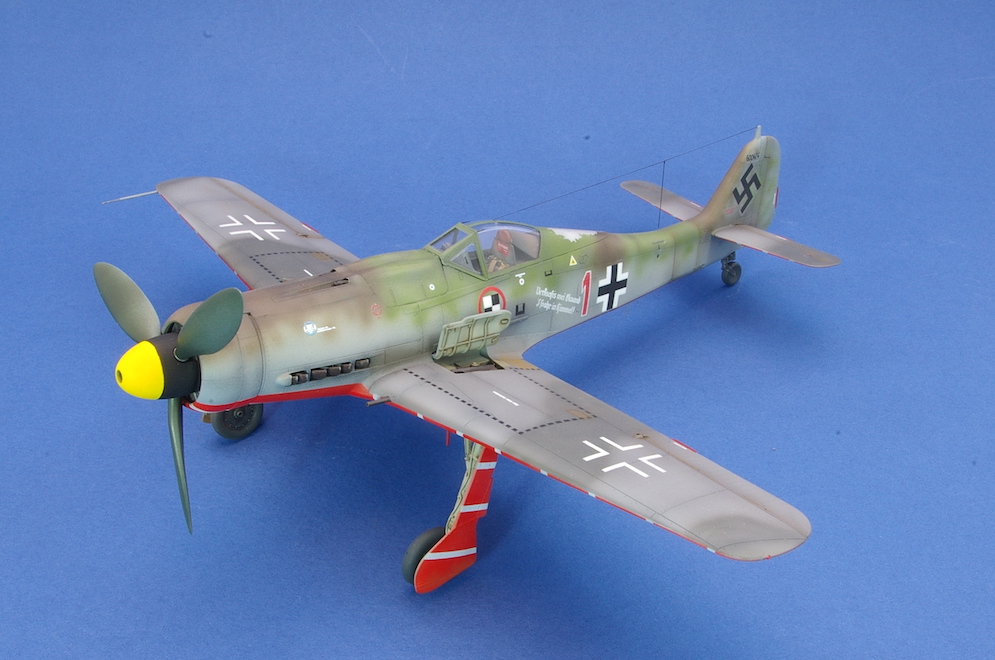
The kit’s transfers looked very good to me, but as ever I thought there may have been problems with potential silvering of the transfer film particularly with the open crosses on upper wing. The national markings and the wing walkways were therefore masked and sprayed. The kit’s transfers were used for the smaller markings and the surprisingly large number of stencils carried by these aircraft.
It appears that early versions of the aircraft had a weight attached to the aerial wire keeping it taut when the cockpit canopy was opened. This was not present on the later aircraft and the loose wire often caused damage to the paintwork on the rear of the canopy. This was replicated using Alclad Aluminium sprayed on before the main camouflage and masked using masking fluid dabbed on with a piece of torn sponge.
The aerial wire was made from thin elastic rigging thread with the lead in wire made from a piece of suitably thin surgical steel wire. This was rolled straight under a steel ruler and placed into a small pre-drilled hole in the rear fuselage. It was then joined to the aerial wire with a dot of white glue and painted black to match.
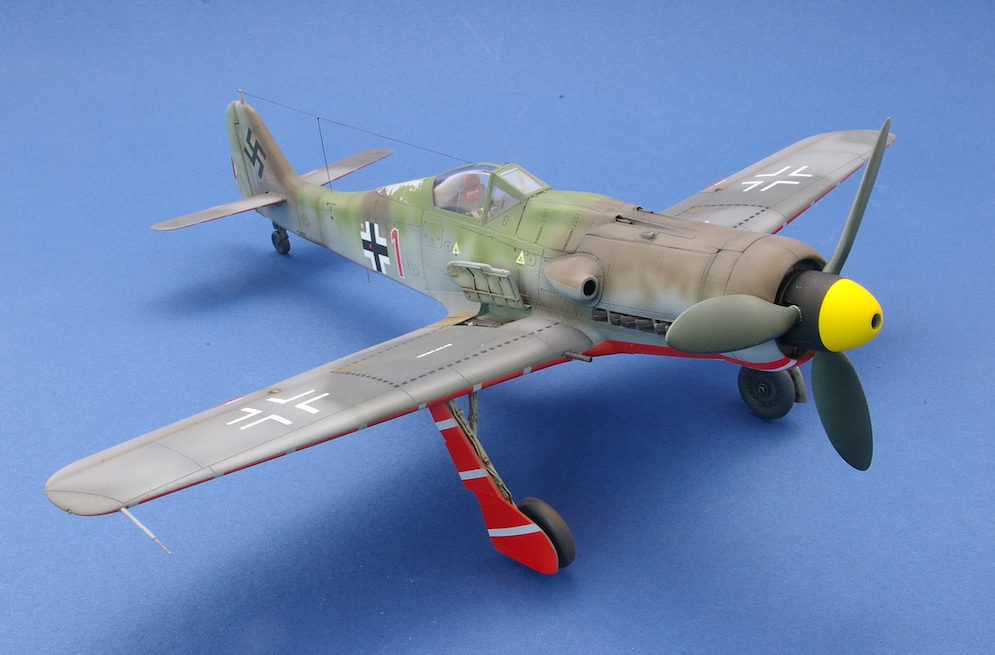
All in all, this was an enjoyable project, and this interesting colour scheme along with the spraying of the markings can be recommended to all those with a profound love of masking – lots and lots of masking!
Dai W.


As is to be expected with Eduard kits, the engineering of this superb but could possibly be a little complex in some areas. To portray the gun bays closed took a minor amount of fettling but this is well illustrated in the instructions. The area rear of the engine, visible through the wheel wells, is well catered for but could be a bit fiddly.
Vallejo Model Air acrylics were used throughout, and sprayed beautifully to allow me to complete my first ever attempt at mottling. Cartograf decals behaved as you would expect them to – flawlessly. Weathering consisted of tinting of the base colours and a panel wash. A thin black / brown mix was used to represent exhaust and gun gas staining. The slack aerial wire is fine copper wire taken from a car wheel speed sensor – never throw away stuff like this!
This kit was good fun to make and I enjoyed every step of it, especially when my mottling turned out as well as it did. I hope you enjoy the finished product too.
Andy G
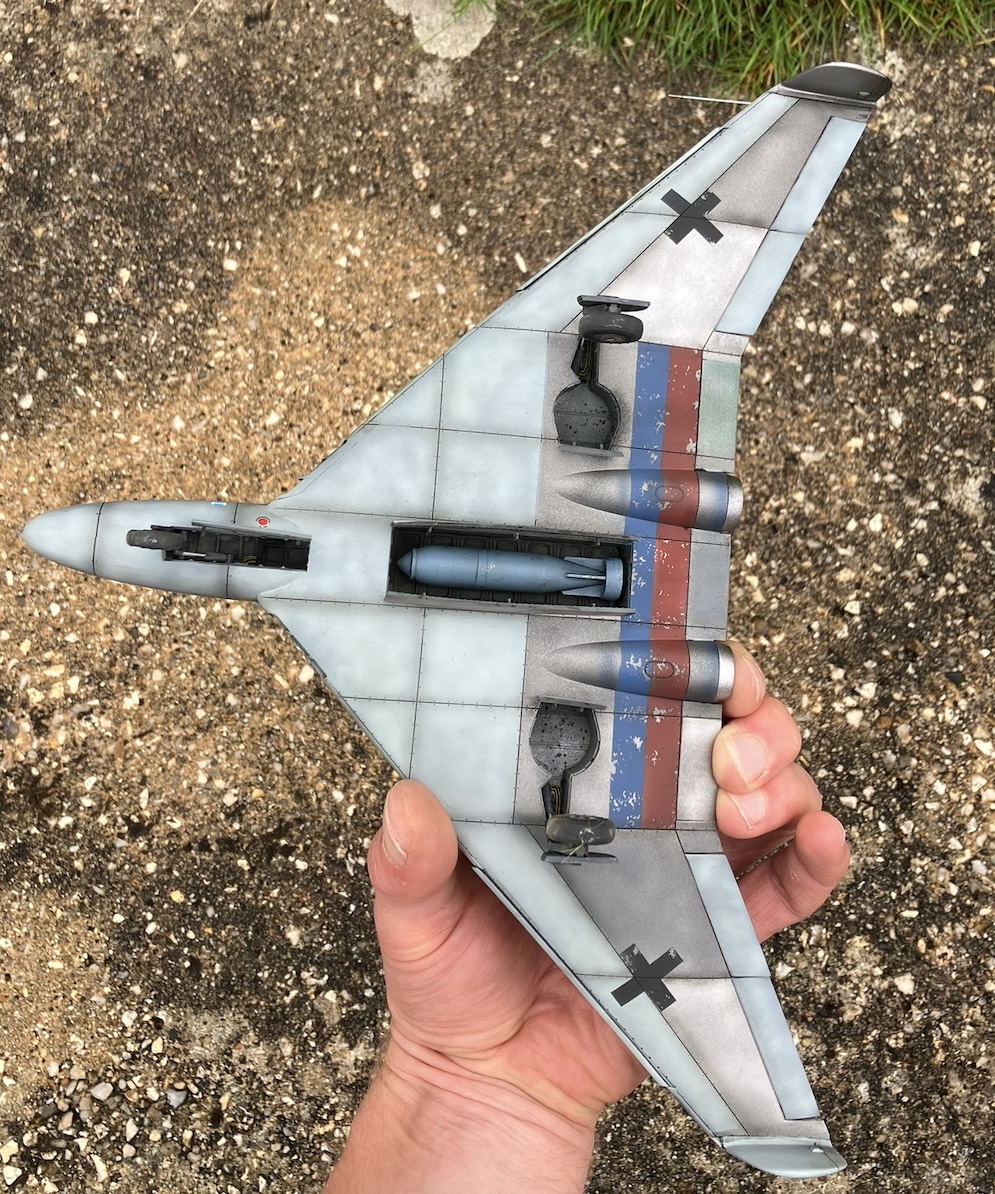
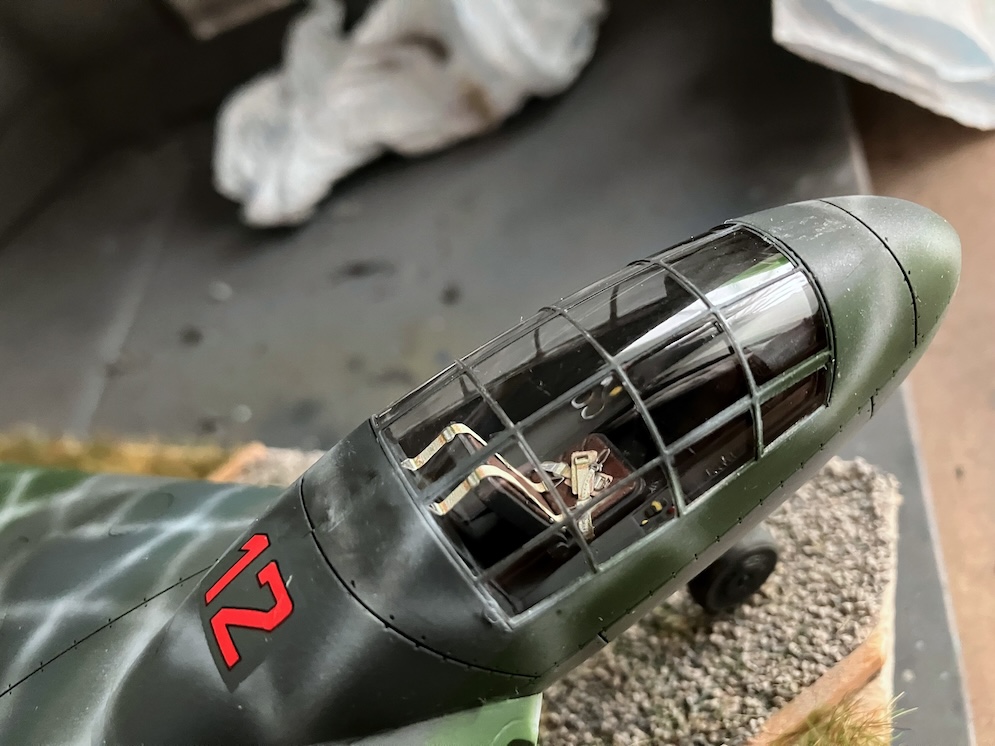
I wanted to use this model to try out a few ideas, some of which have worked, some of which have disappeared in the process. Overall this was a straightforward model with no vices, other than that fitting the fuselage to the wing needed a fair bit of brute force to get a good join. The canopy seems wonderfully clear, possibly due to the large amount of light which can enter the cockpit. As usual markings were masked and sprayed as far as possible, including the wing dashes and the stencils on the flying surfaces (actually 1:32 but I think they look fine), with decals used only for the fuel triangles and other stencils (from the spares box). Eduard belts were used.
The idea was for an 83/75 scheme with Reich Defence Bands (I know it’s a bomber, but this is Luft 46 licence) top and bottom, which meant that the hackenkreuz was placed in a white circle over the top of the band. The band on top was then painted over as too visible. [That was done in slightly mis-matched colours to the original 83/75, but that’s hard to see. I also chipped through [using my go to of sponge-applied copydex] to the underlying red/blue, but you have to look very carefully to see it.] The aircraft was making long flights over water (perhaps from Norway?) and having so much 83 was deemed too bright so some was overpainted in blue [I chose Luftwaffe blue, but again, that is hard to see as it looks almost the same colour as my RLM 75.] Finally the scheme was broken up further using white. Before doing so the stencils and aircraft number were roughly taped over [see the photo of the Me 109 from the Malta air museum. Again, however that barely shows, and I really struggled to reduce the spatter despite thinning the XF-2 heavily. Next time I will use a different paint, or my RLM 76 mix, which seems to thin better.] Finally I wanted to try post-shading for the first time. This has worked fairly well, but is a bit heavy on the white balkenkreuz.
Craig W.


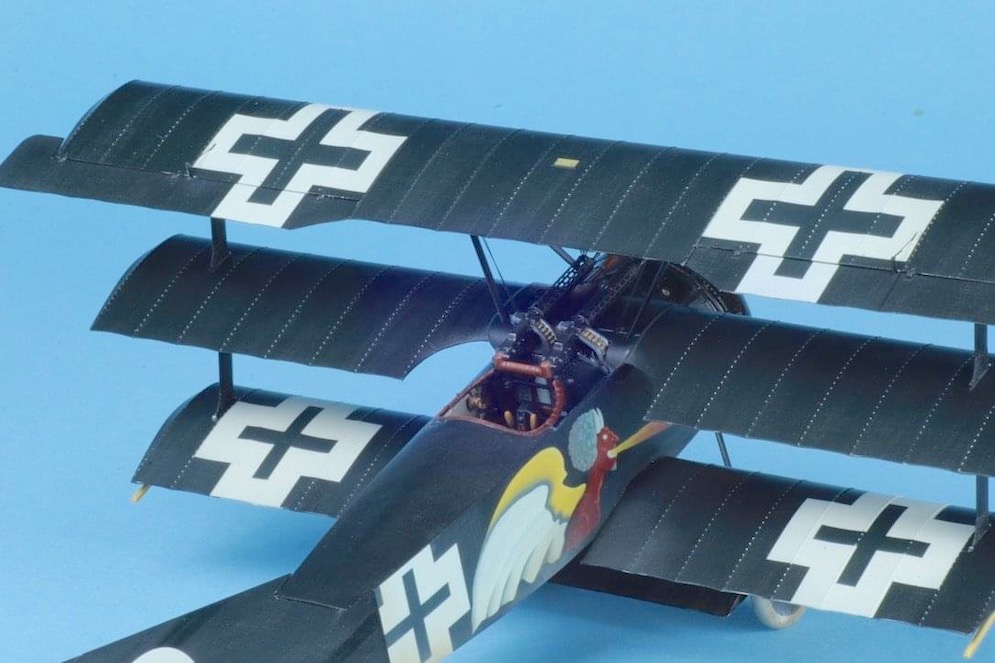
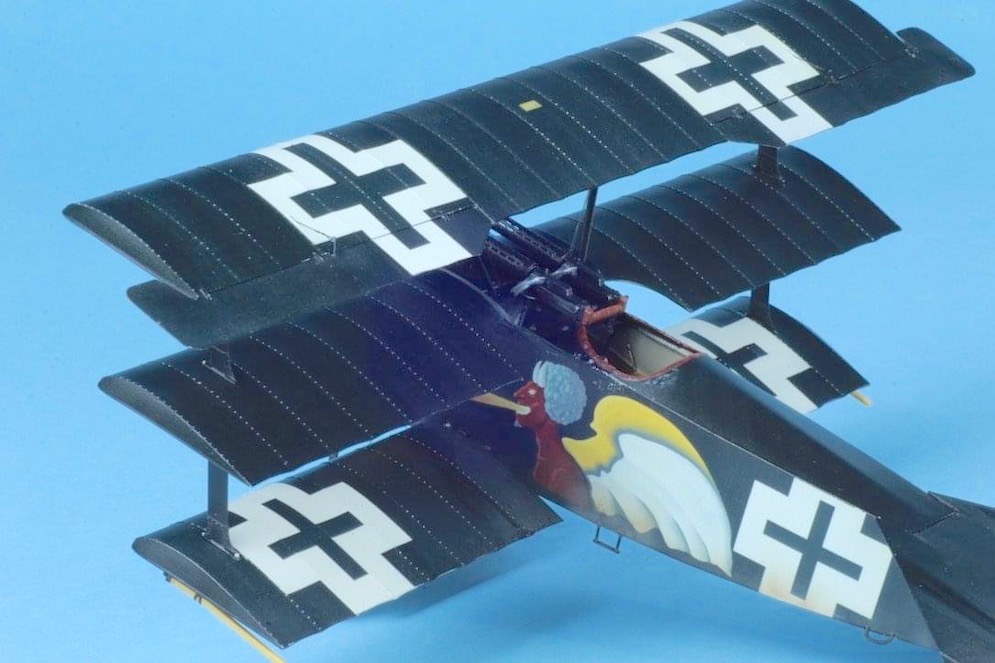
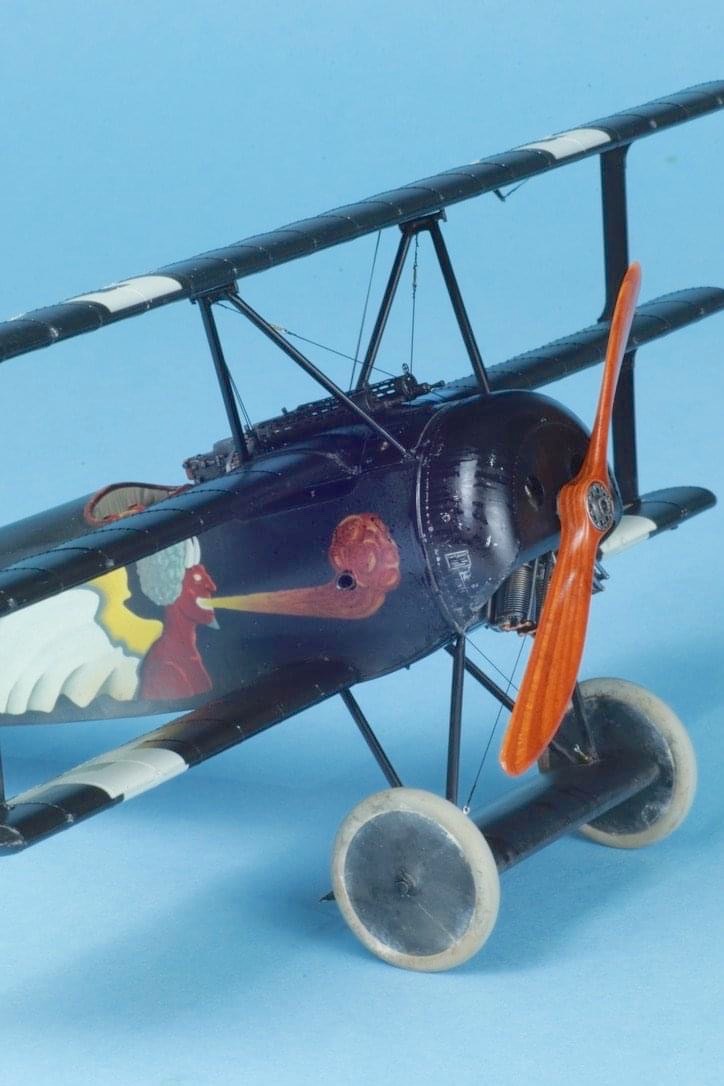
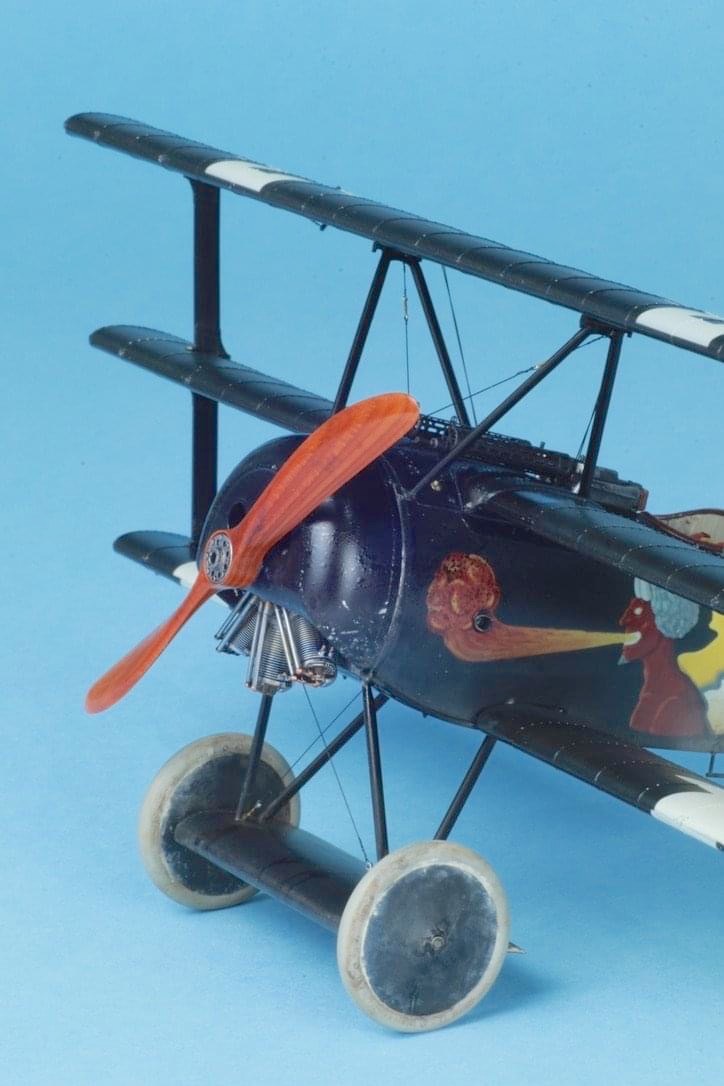
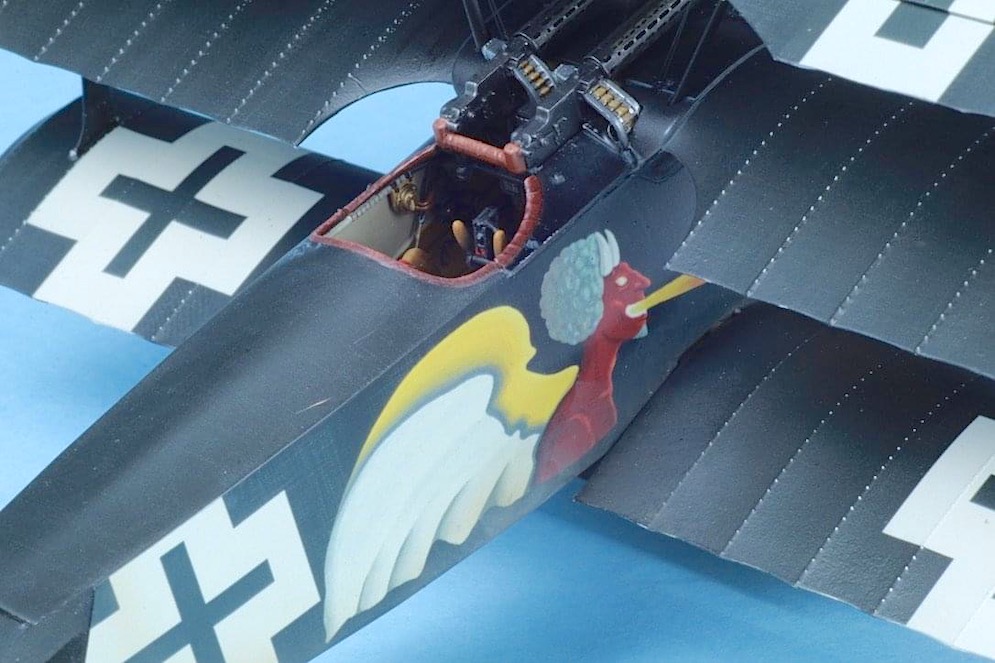
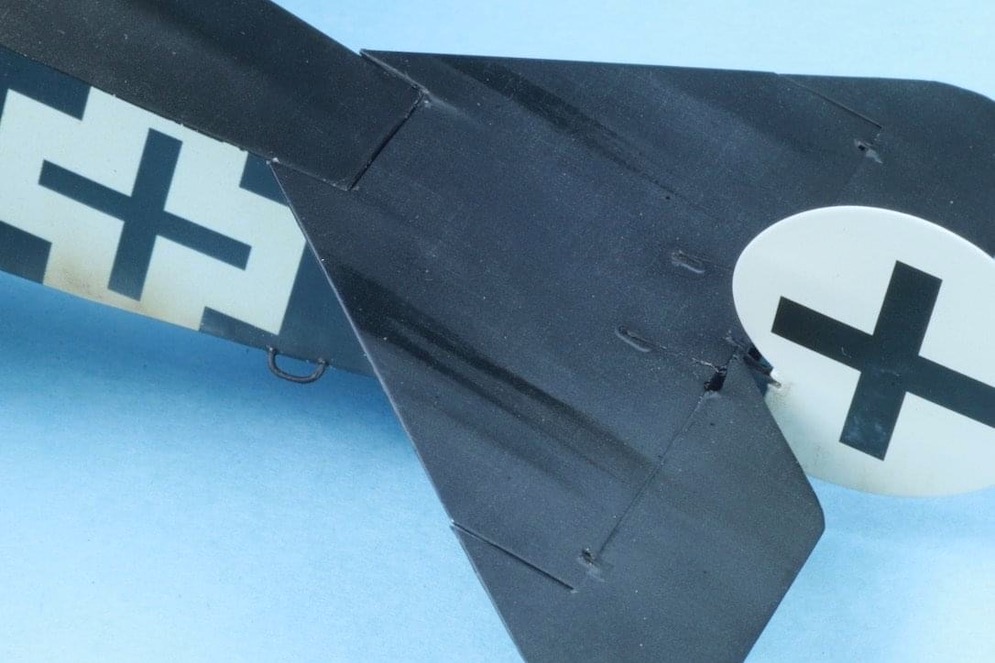
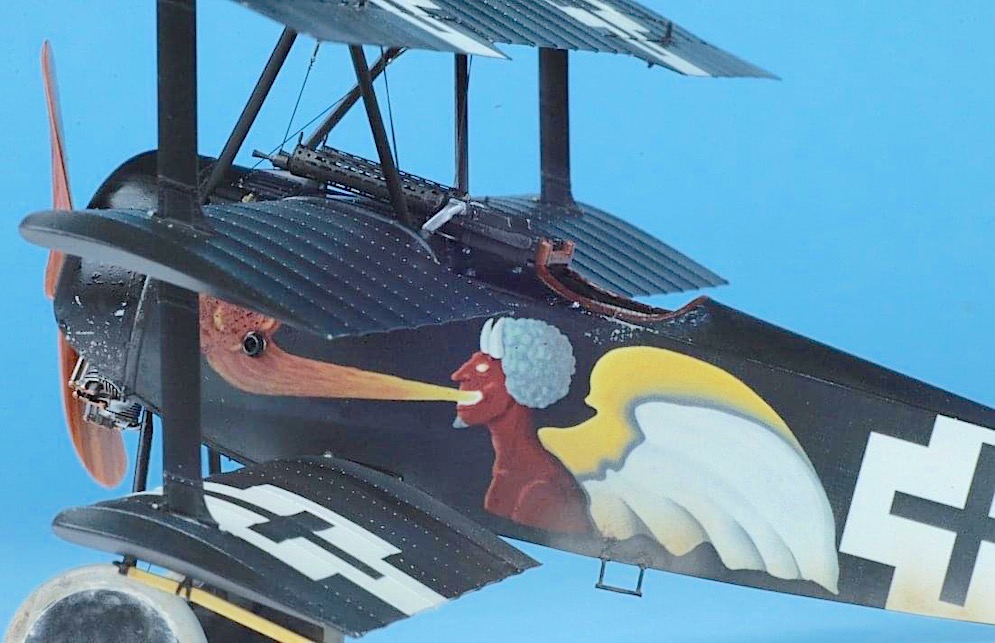
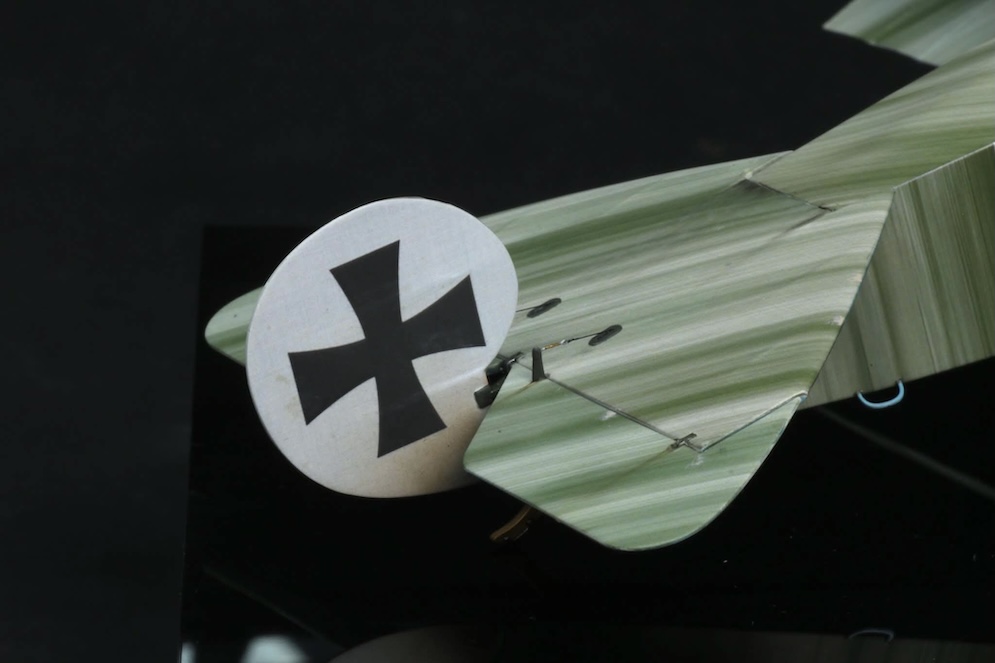
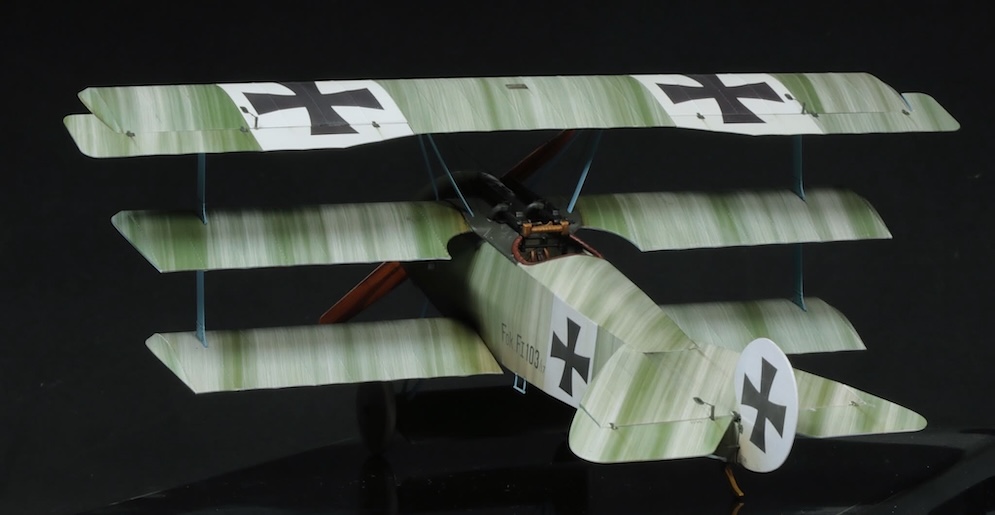
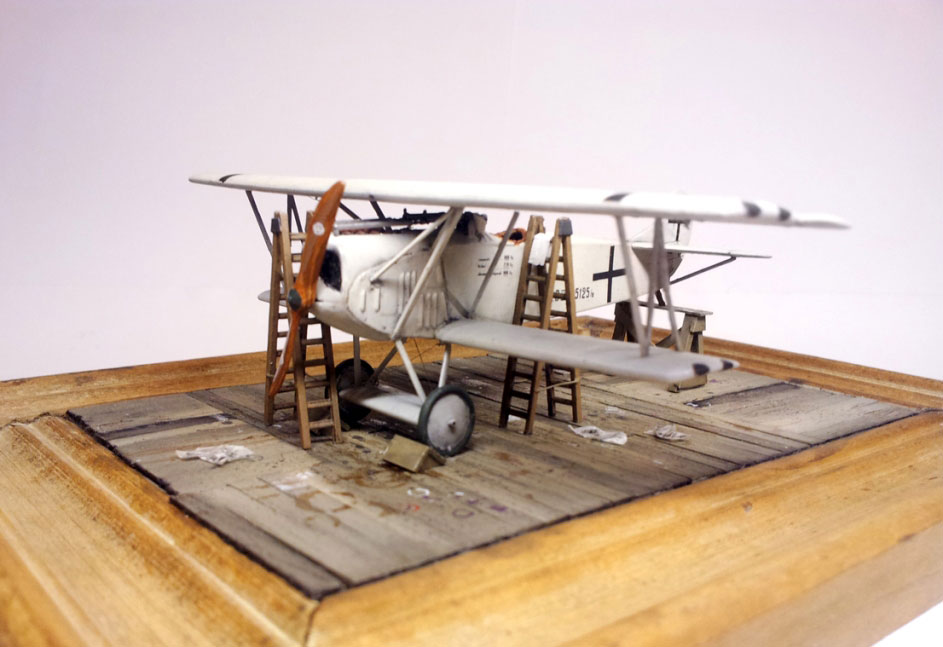
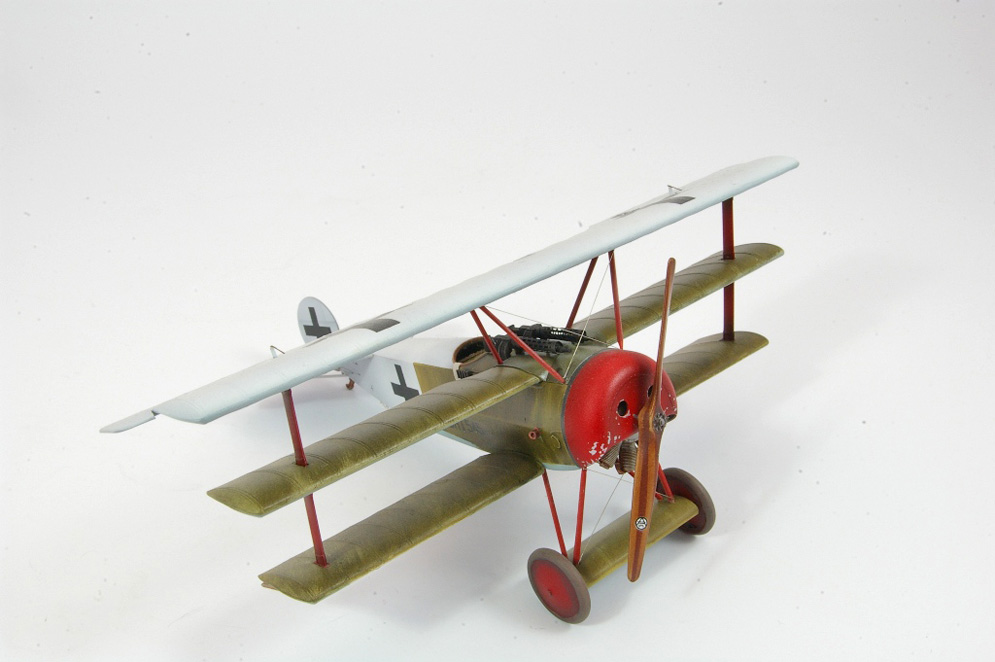
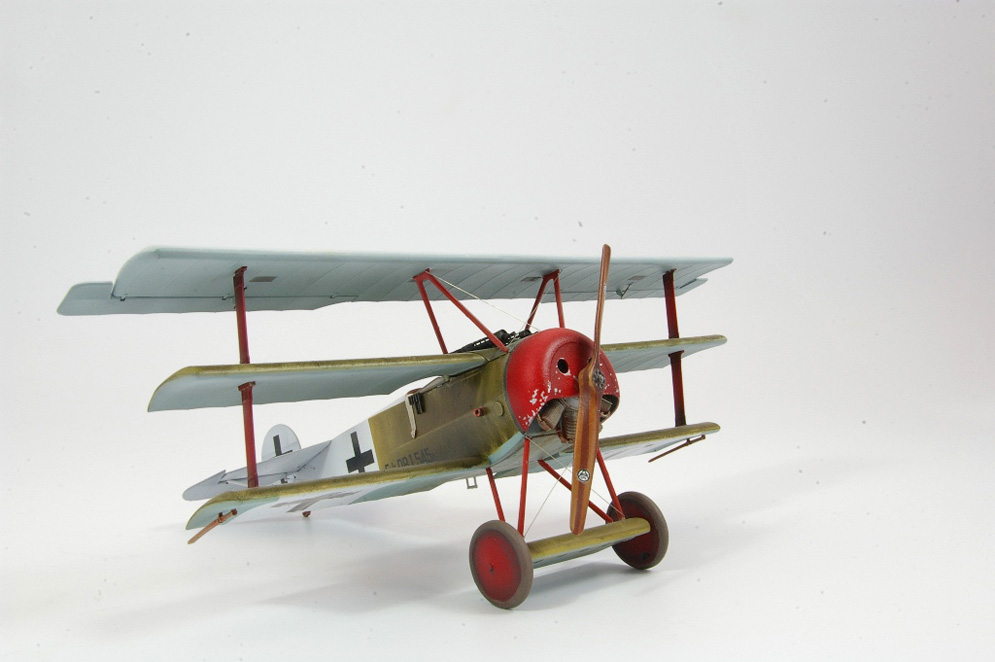
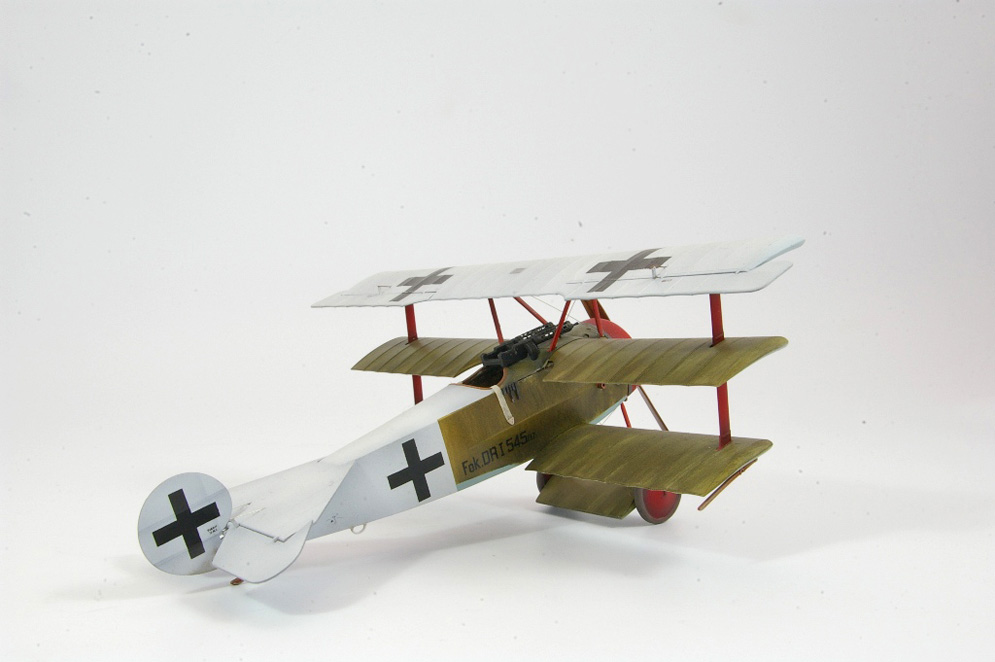
Joseph Jacobs Fokker Dr.1
Aviattic decals
Properplane prop
Pics over exposed to show the fabric effect.
MENG 1:32
David G. Lane
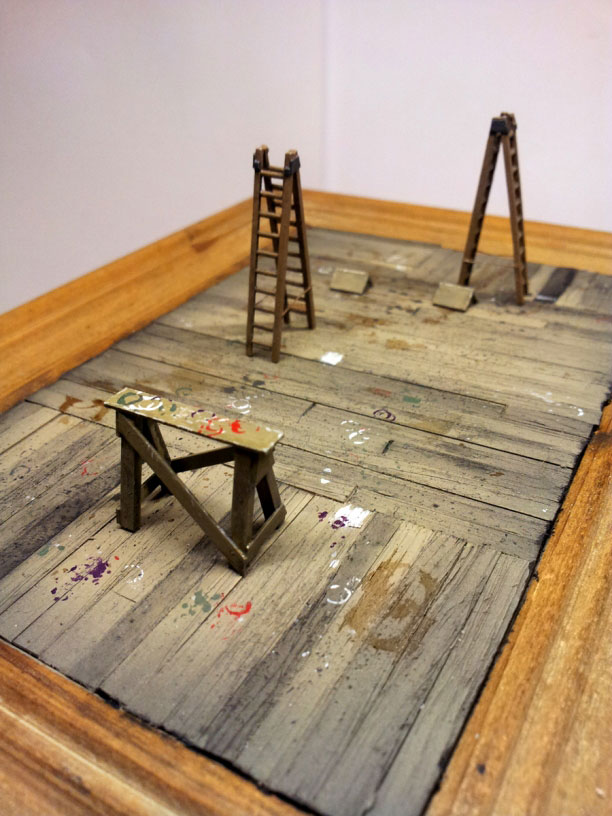
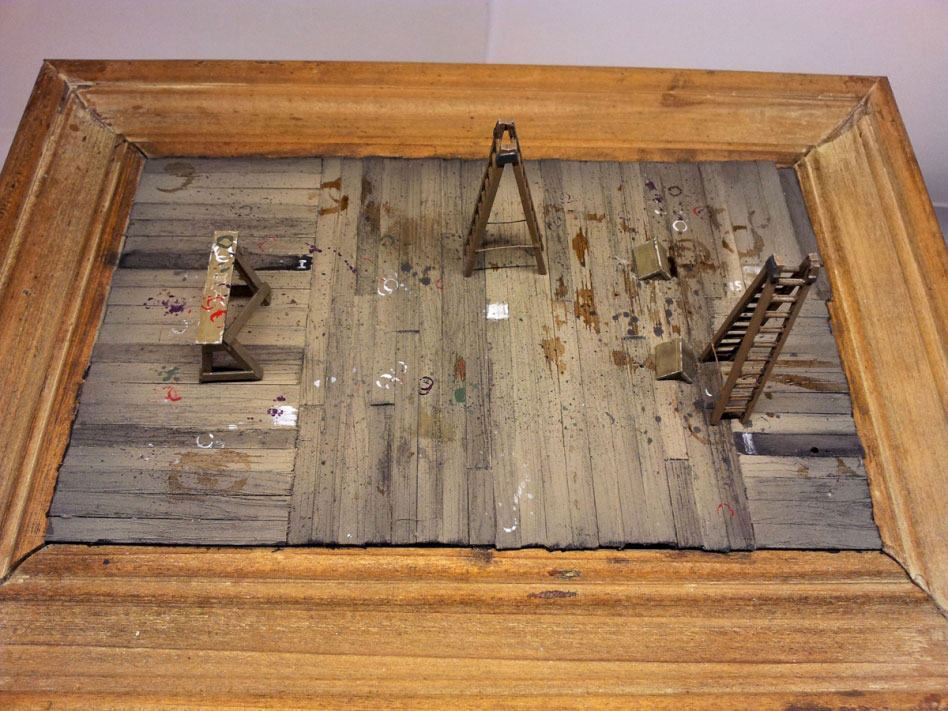
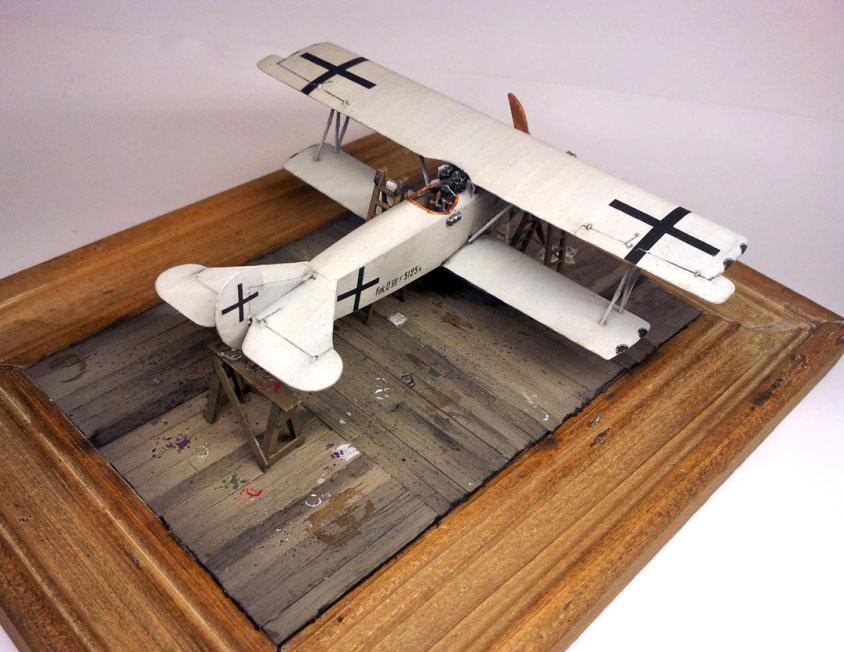
The hangar floor, stand, blocks and ladders were made from styrene; painted in Tamiya acrylics and stained with black oil paint. I finished with weathering products from AK interactive, Humbrol paints and oil paint. The dirty rags were made from cigarette paper. The paint stains on the floor are in every color used by the famous Flying Circus and if you connect them with a line you roughly get the silhouette of an Albatros D.III.
Robert Blokker
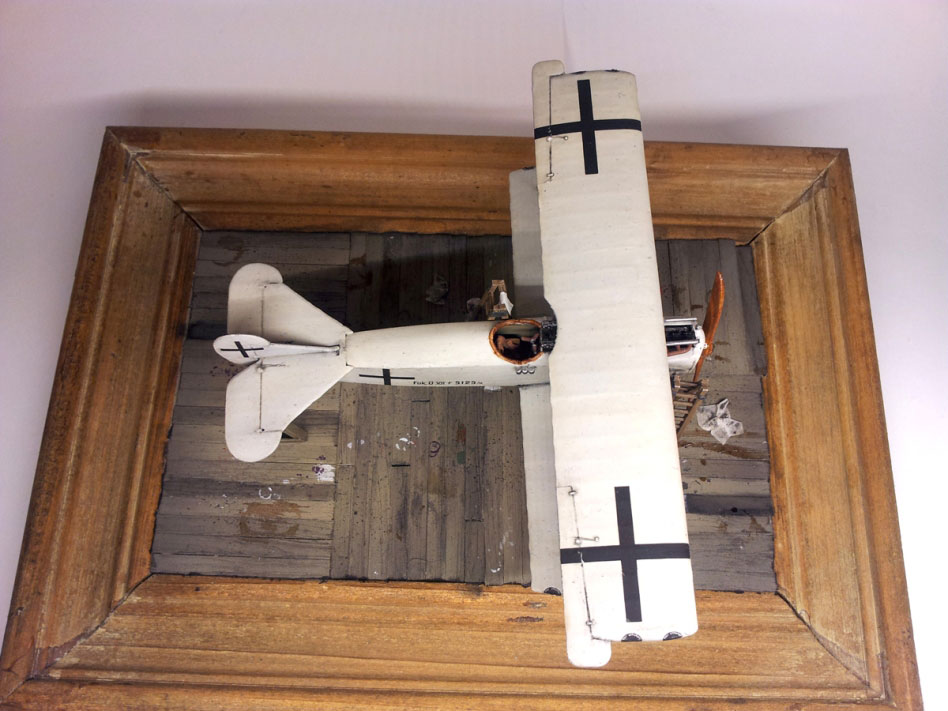
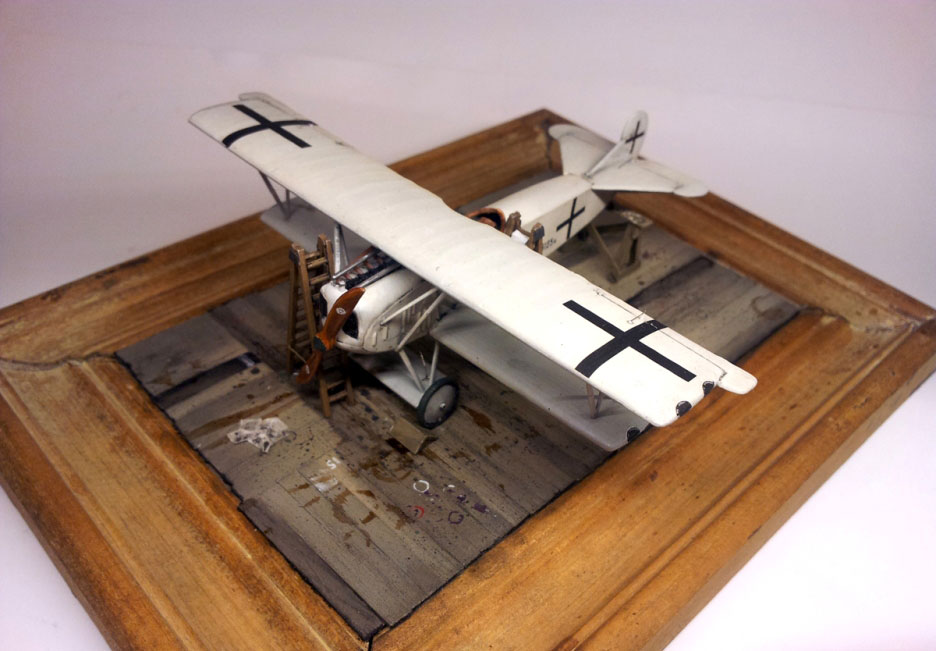
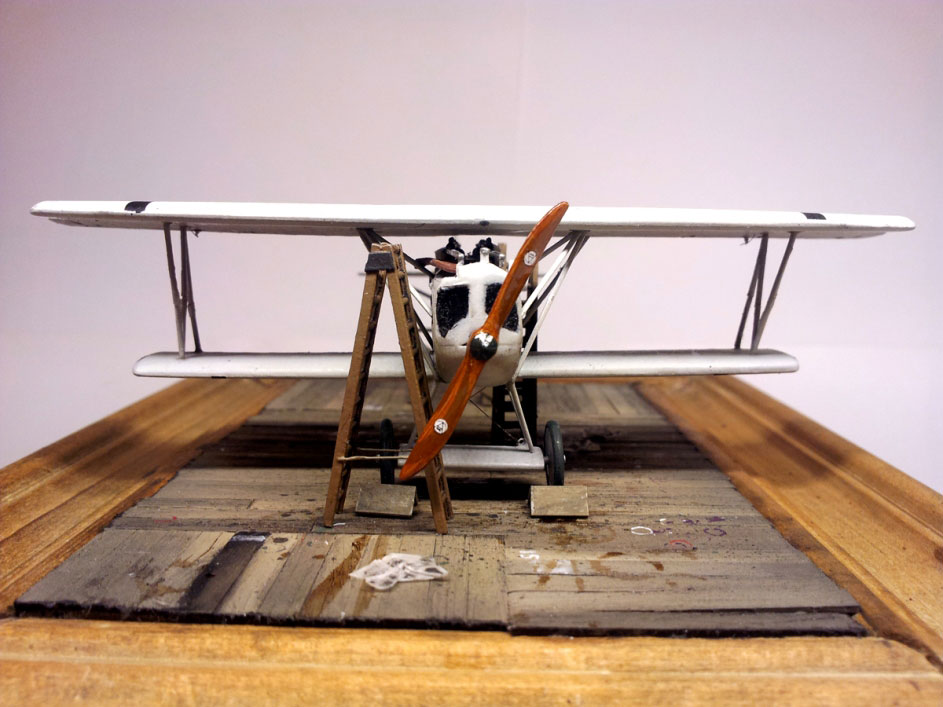
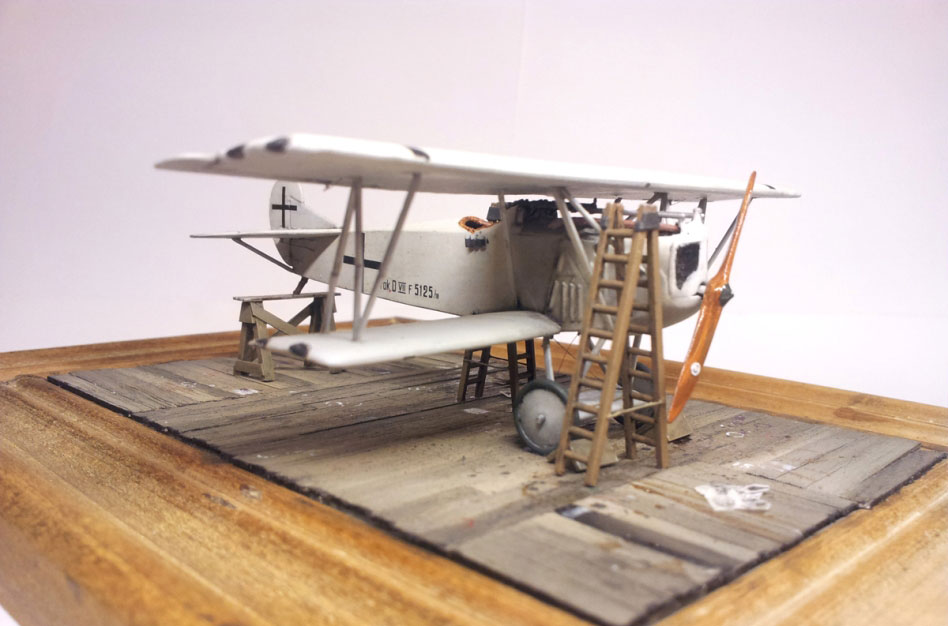
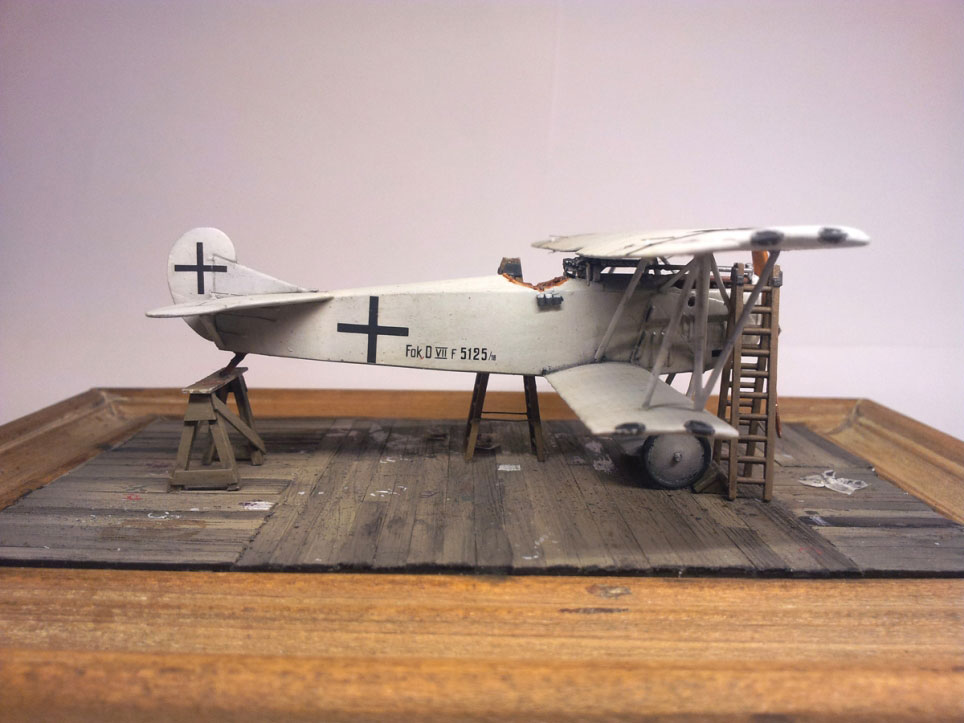
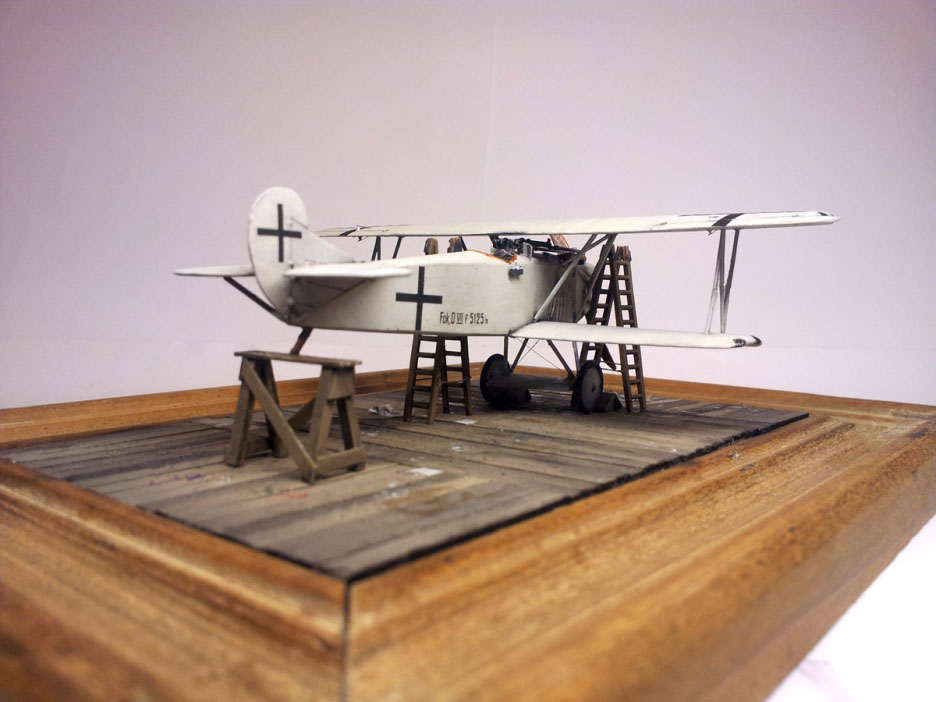
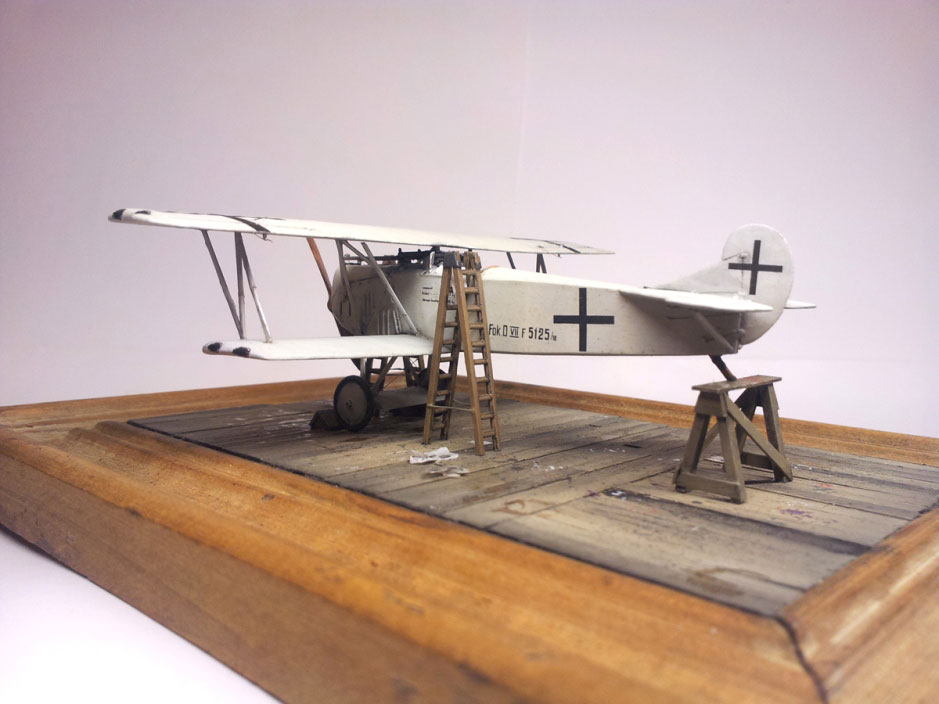
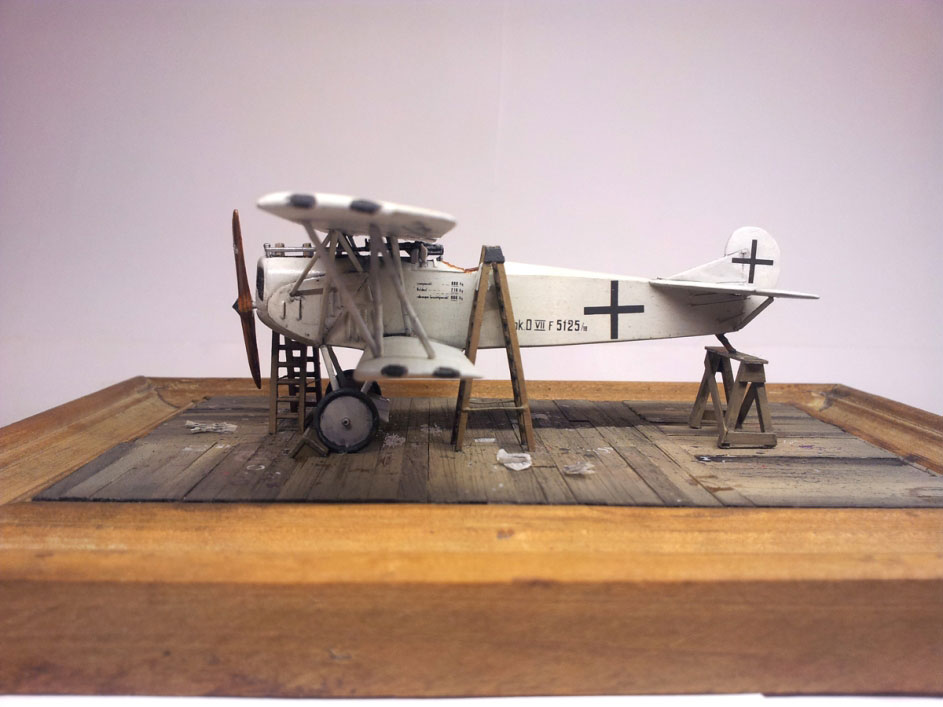

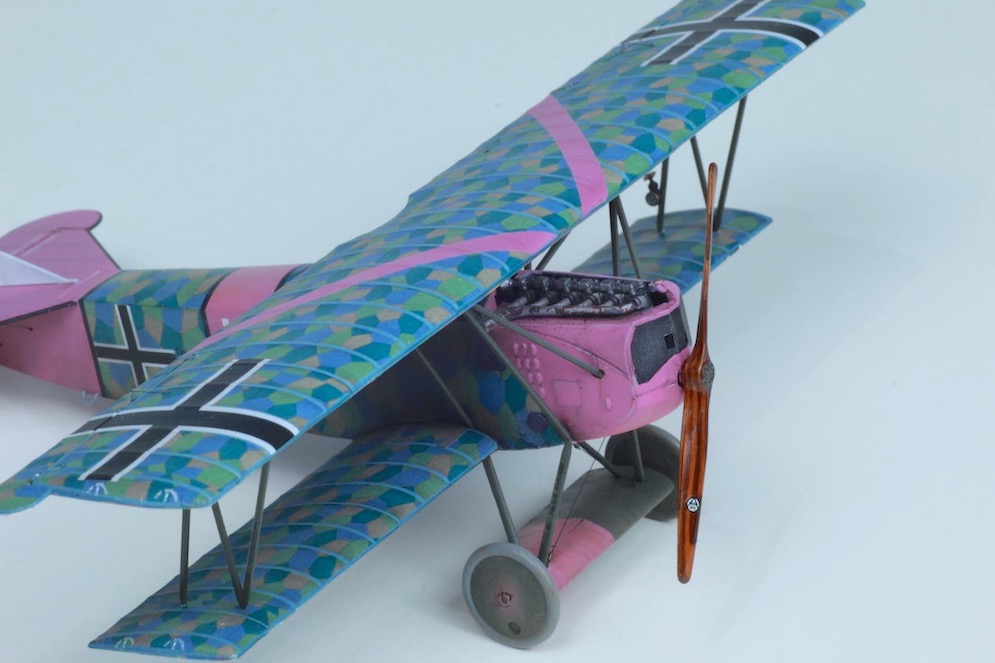
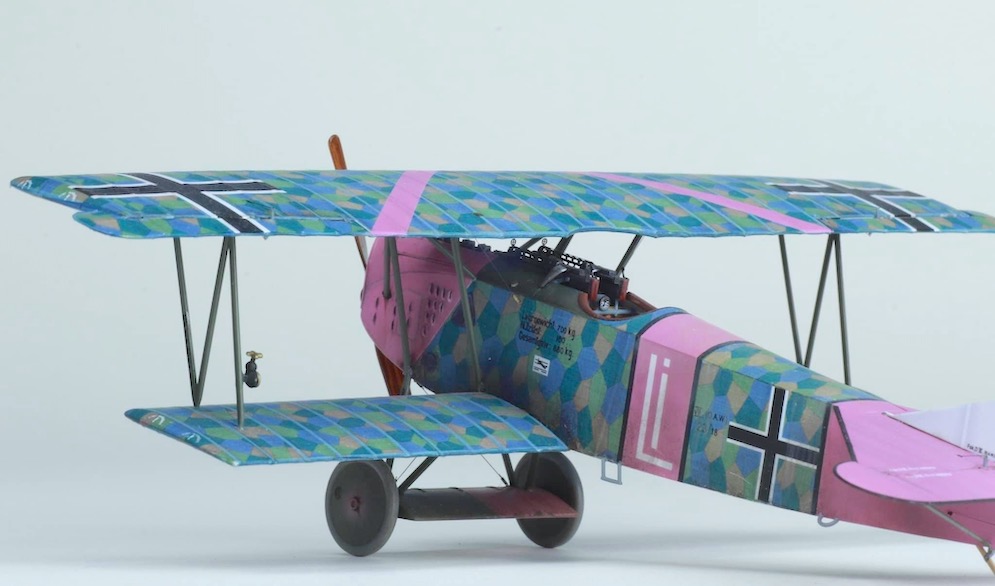
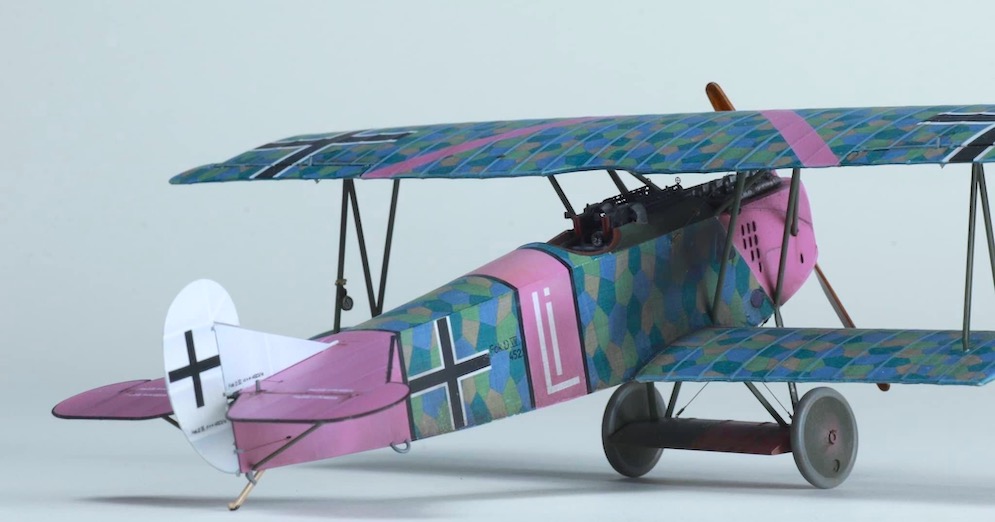
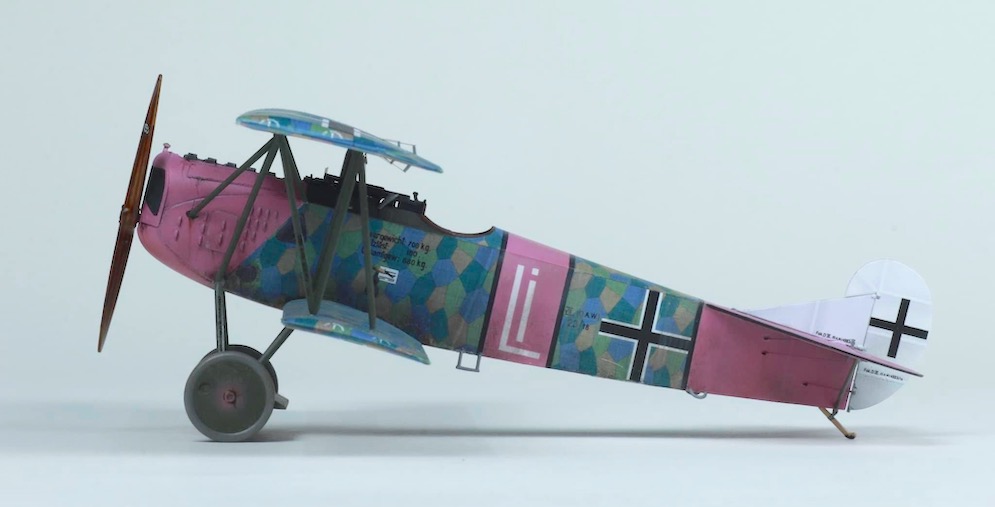
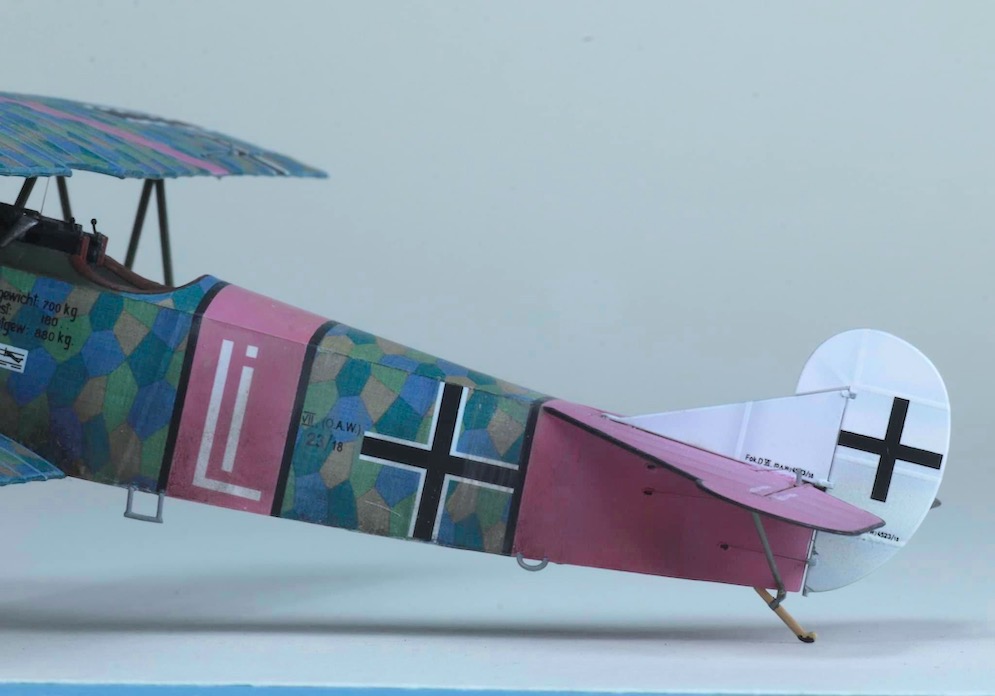
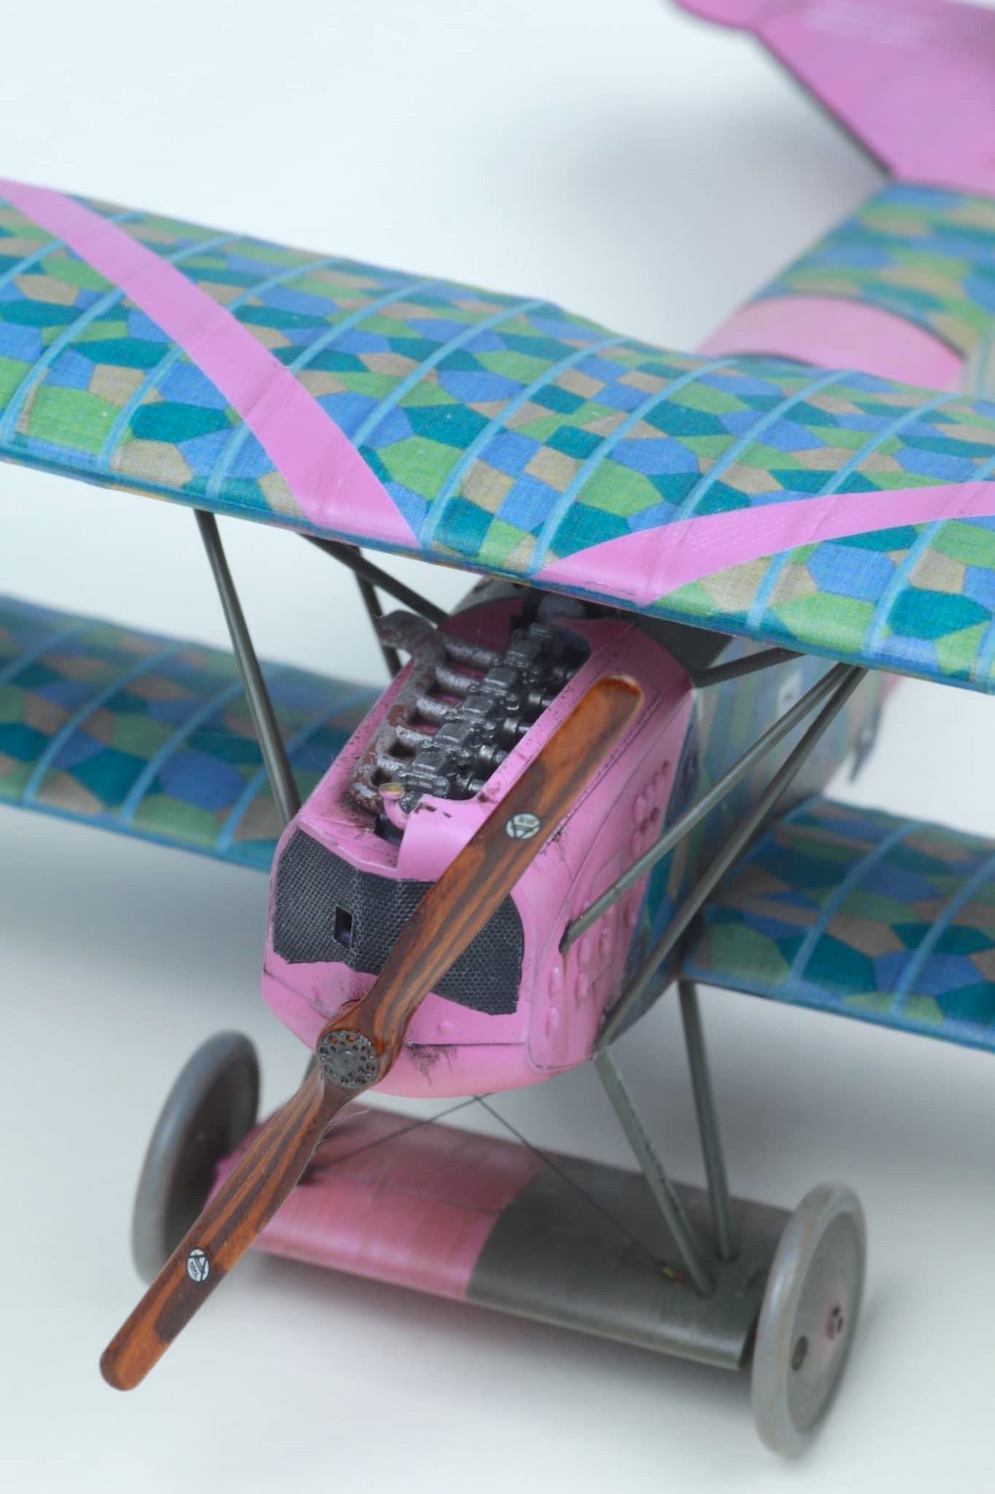
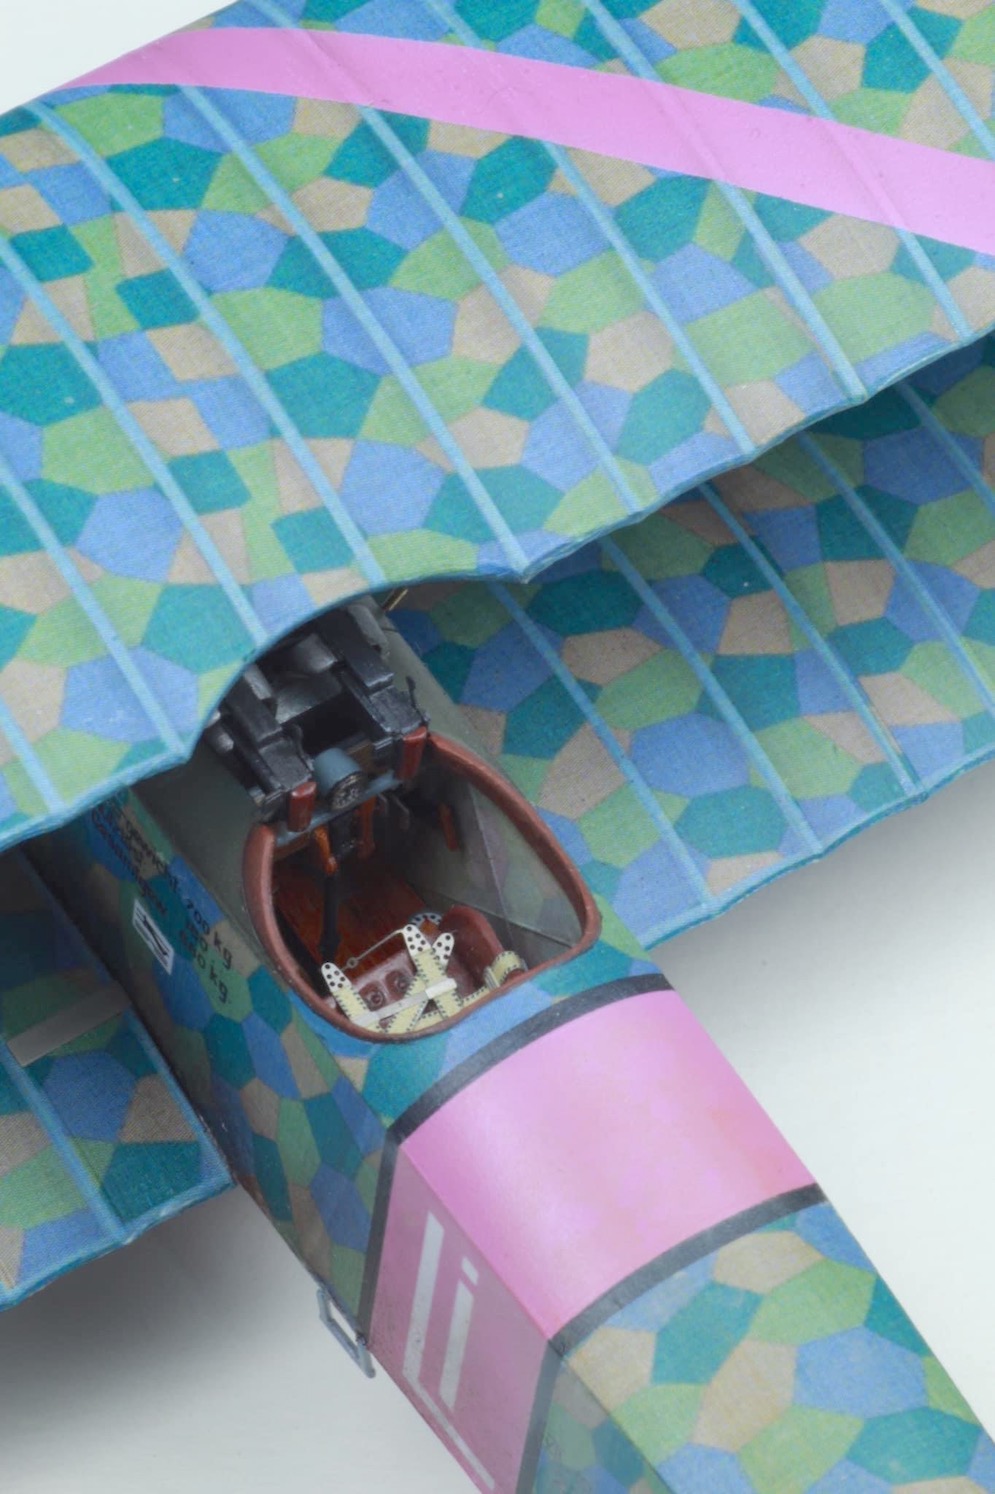
Fokker D.VII
Rudolph Stark
David G. L.

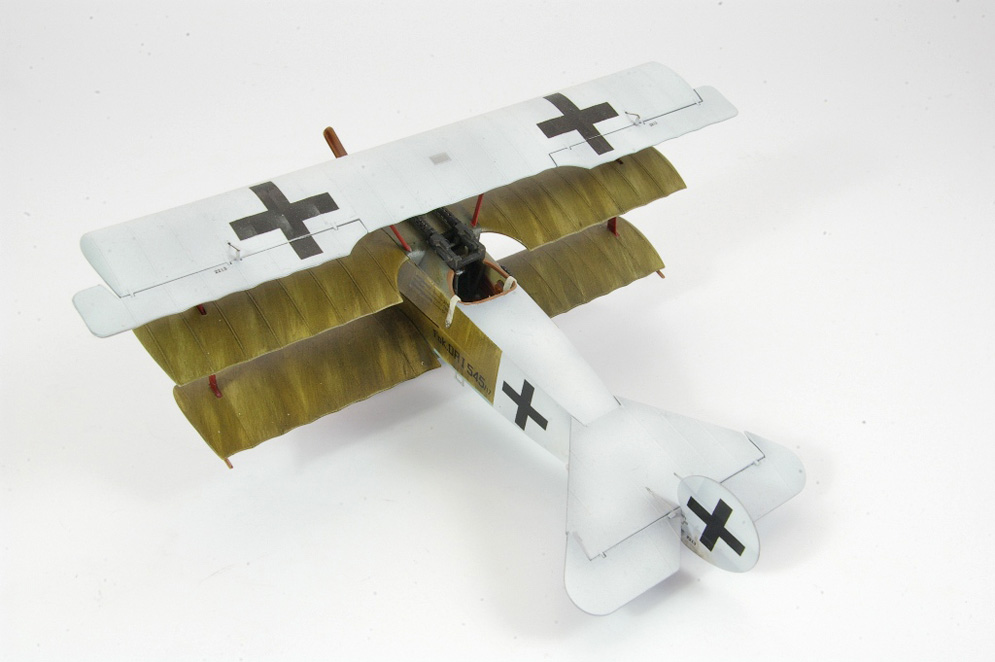
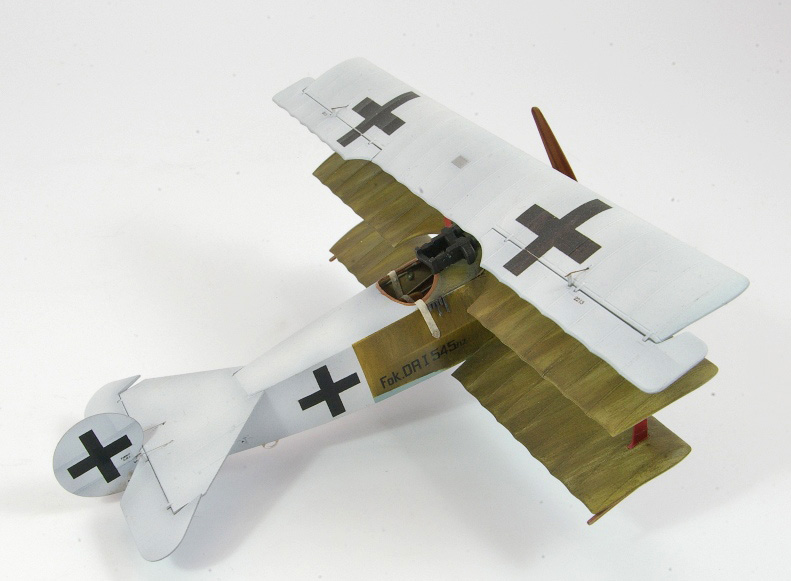
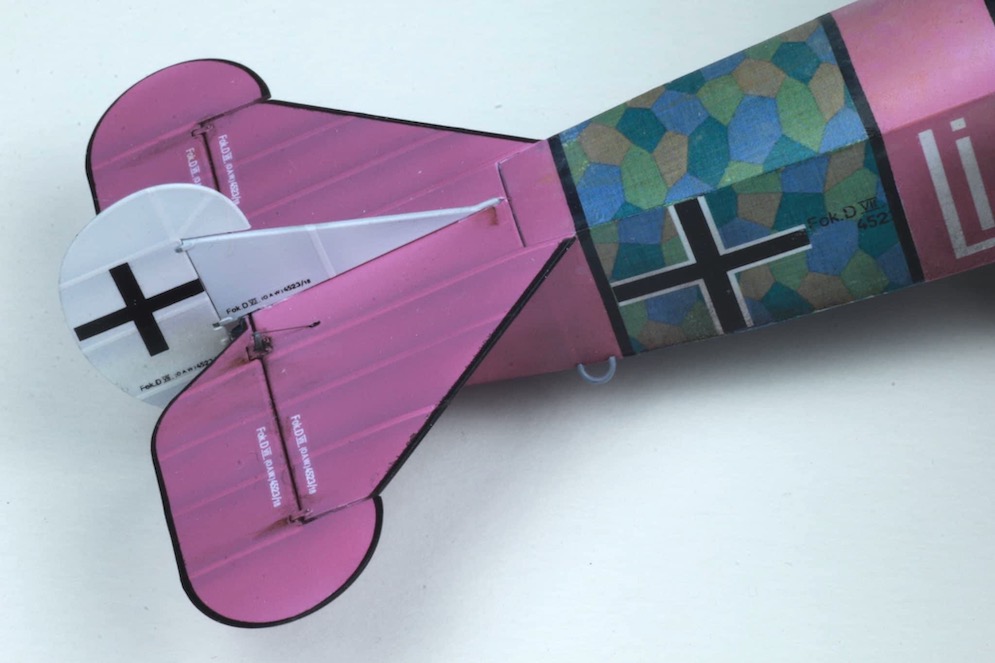
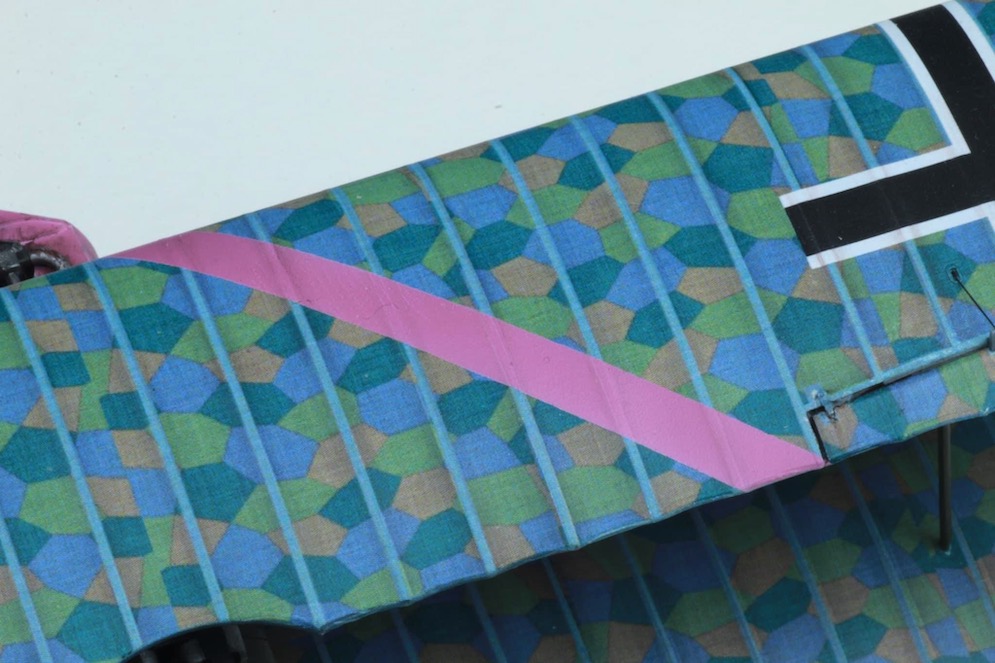
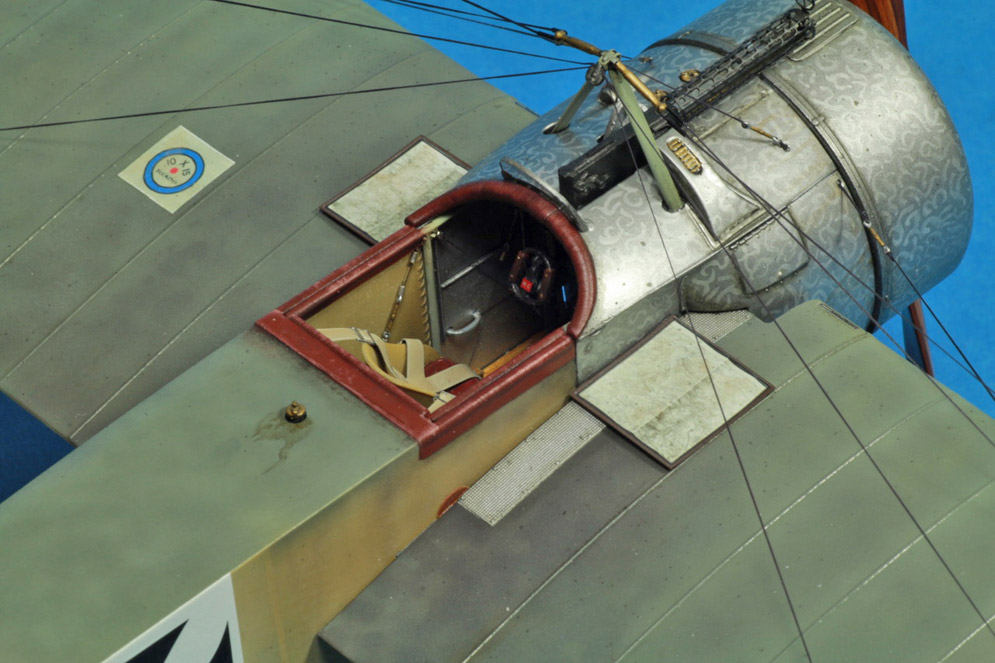
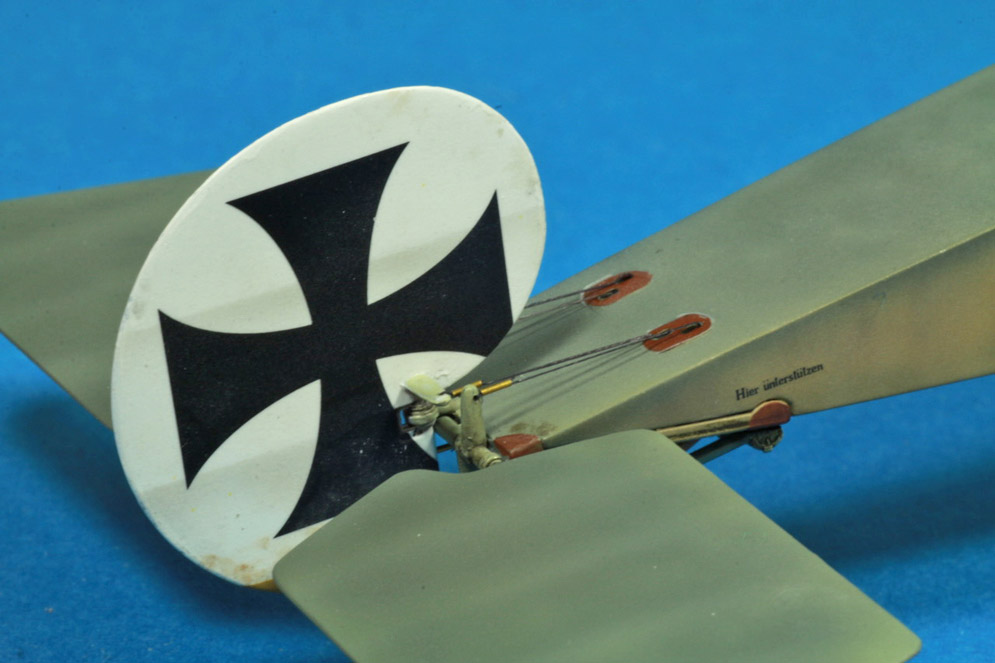
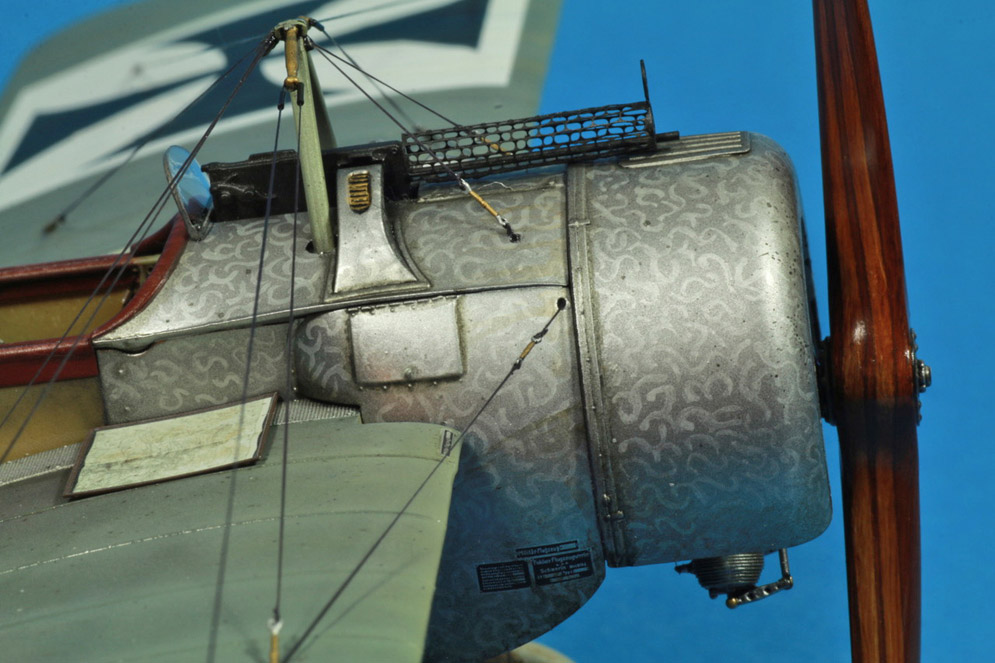
This kit is the Weekend Edition of the Eduard 1:48 Fokker Dr. 1. This model represents yet another of my experiments. This time I attempted to use oil paint to replicate the streaked camouflage applied to these machines. The paint seems to have been applied diagonally across the wings and at 90 degrees to the line of flight across and down the sides of the fuselage. The oil paint was applied with an old stiff brush over a gloss varnished acrylic base coat. I believe that there is some debate as to whether the base coat on the upper surfaces was bleached linen or the same turquoise blue applied to the lower surfaces. In this case I used a bleached linen undercoat – this may be wrong however.
I must admit that while I find rigging 1:32 scale W.W.1 aircraft relatively easy (if a little tedious) using commercially available turnbuckles and elastic thread, I am a lot less confident when rigging 1:48 subjects. Here I have simply used steel wire rolled straight under a steel ruler on top of several thicknesses of printer paper and stuck to the bases of the struts with white glue. The Fokker Dr. 1 carried only a few bracing wires and control wires, so I felt I could get away with this. I don’t think that this will suffice for models with more complex rigging though – especially some of the rather terrifying looking aircraft with two or three bays of struts or some of the British subjects with doubled up bracing / flying wires. I think that a little more experimentation will be called for here before I take another look at my Bristol Fighter or a DH2!!
Rigging was done with GasPatch turnbuckles and EZ line, and the seatbelts are from HGW. The wings are solid slabs of plastic and are pretty heavy, so they sag when installed. I didn’t want to try to correct that with the rigging, so I carefully bent the mounting tabs that insert into the fuselage. This is really a fun model to build and I’d recommend it to any and all.
Jim C.


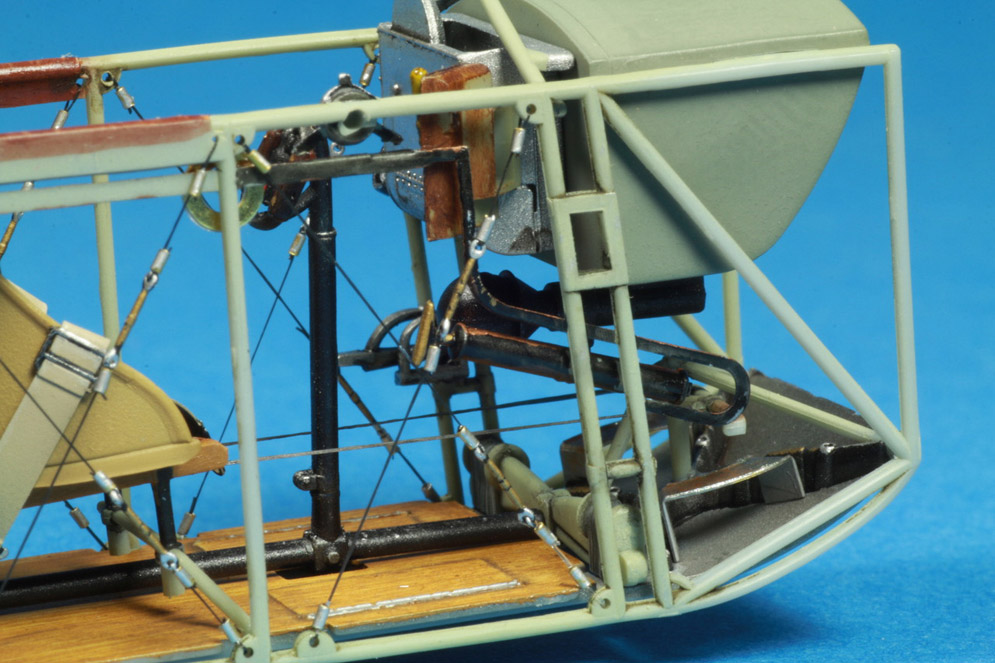
I wanted to beef it up a little bit, but as you can see things get out of hand. A little, in fact most detailing is pure old fashion scratch-building. Only wire wheels, steps and Spandau jacket is etch; spares left out of earlier project.
Carpet monster took original Spandau box-like sight so I had to make new one from sheet metal. Paints used are mostly Tamiya acrylics airbrushed but on weathering I used also thinner/water mixable oil paints.
Images of the build in progress:


Added many little detail bits and kit is all hand painted, including markings. Seat bottom is real leather.
I hope you like it
Marc R.
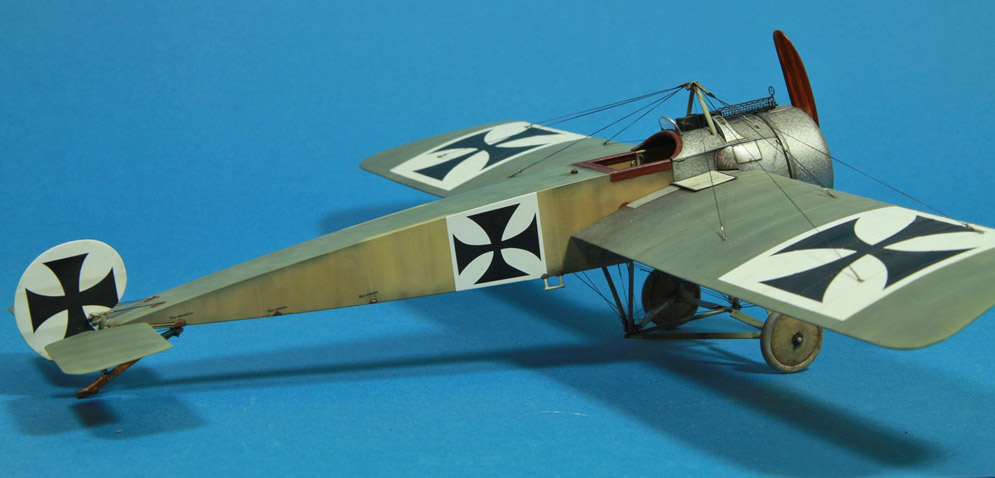
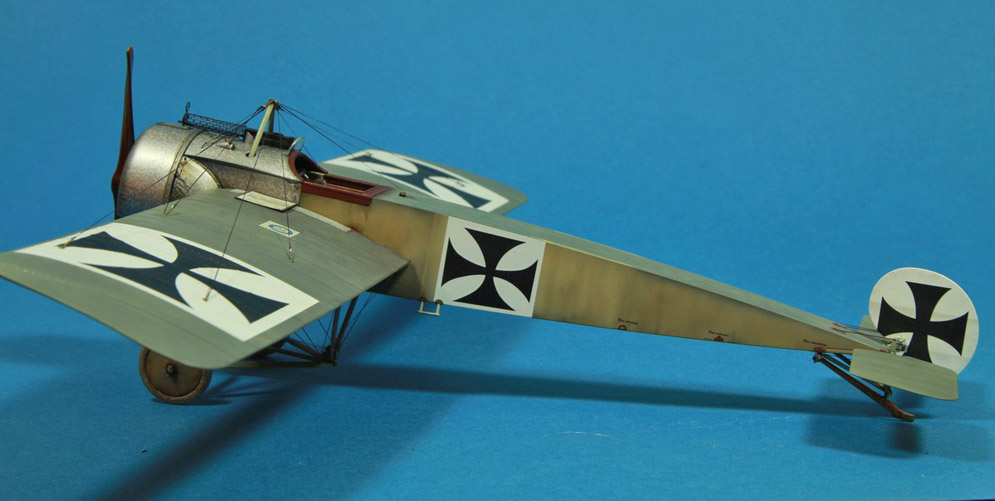

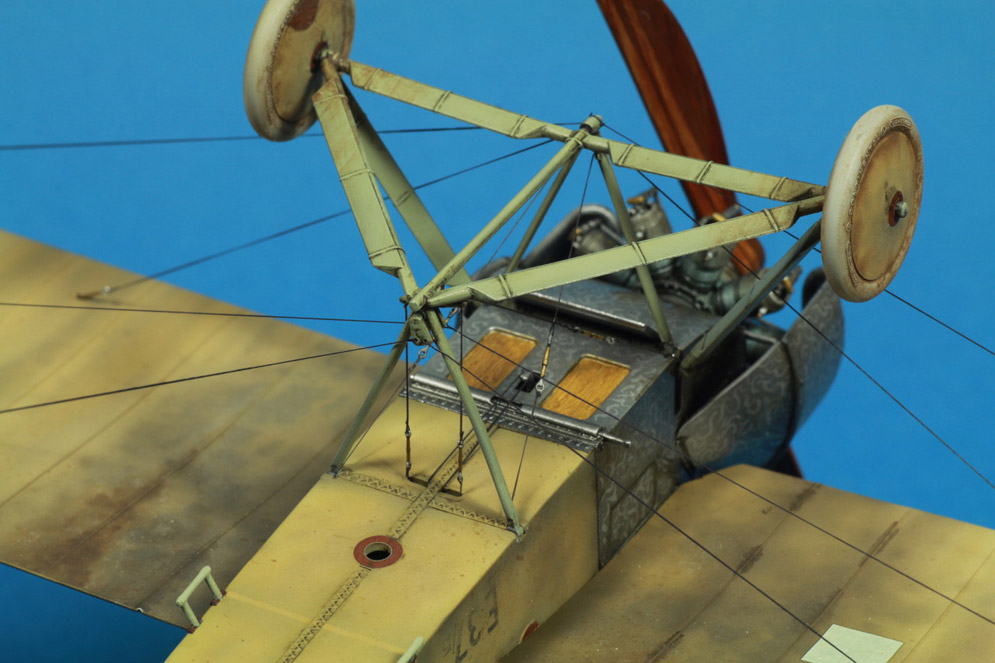

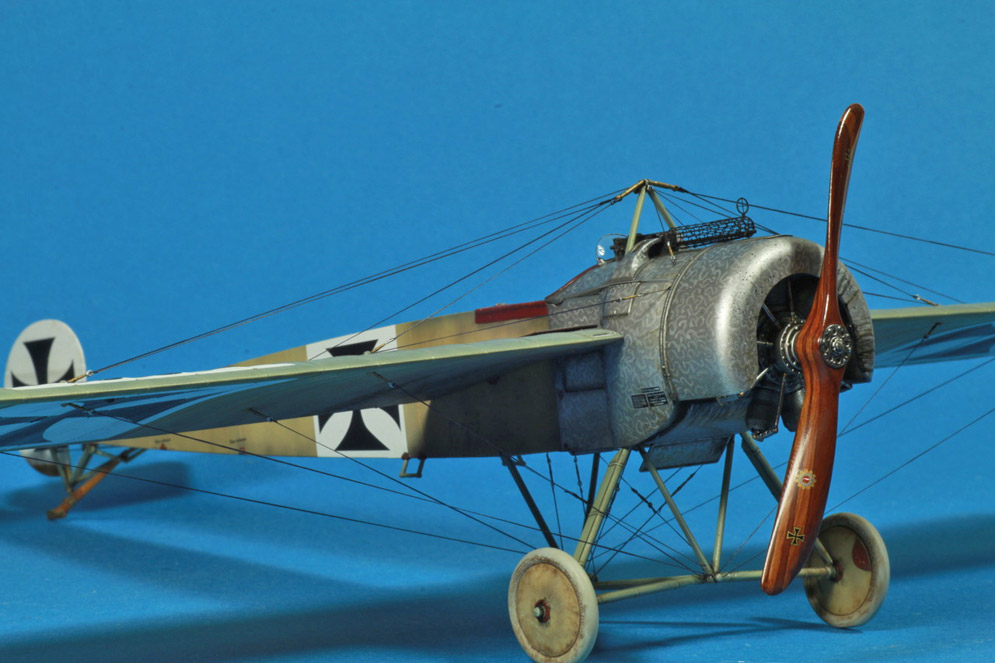
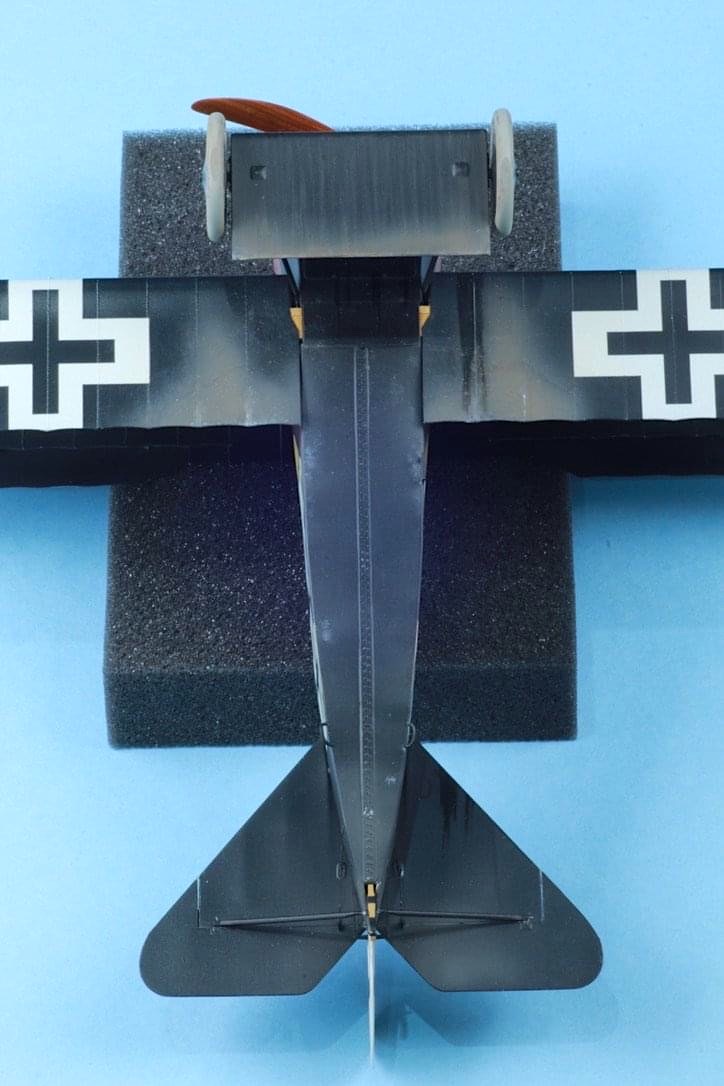
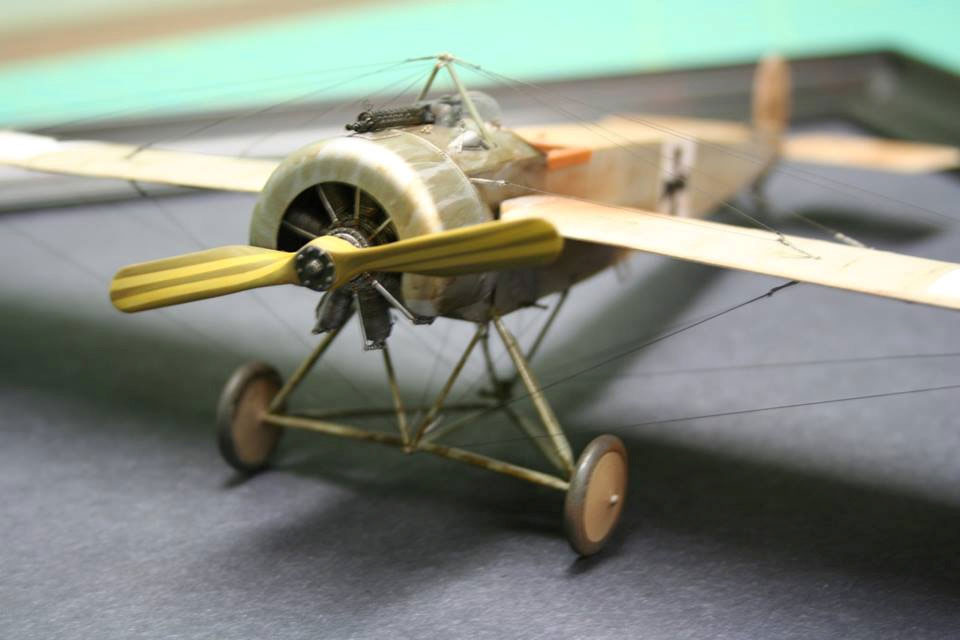
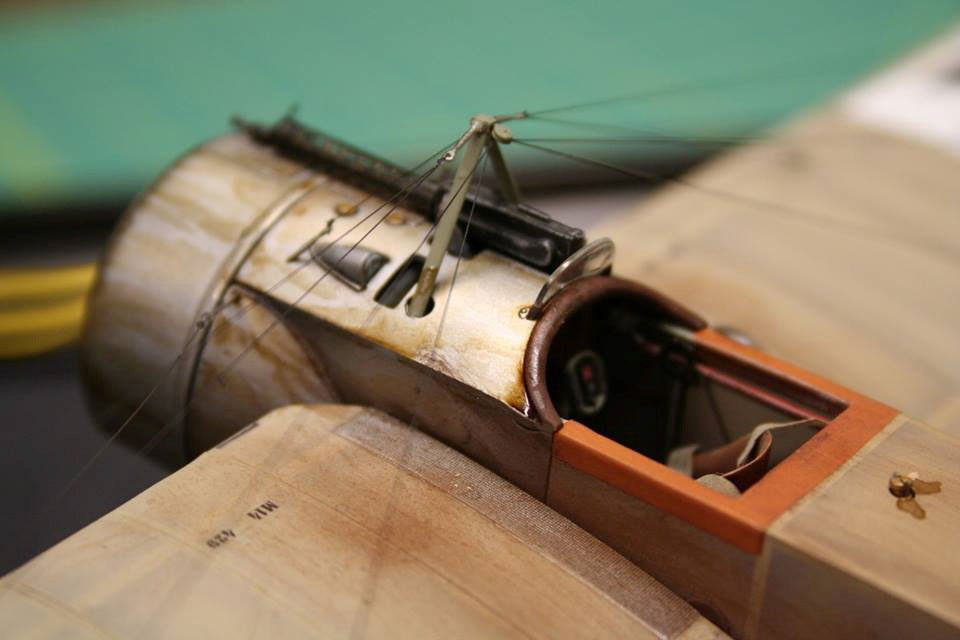
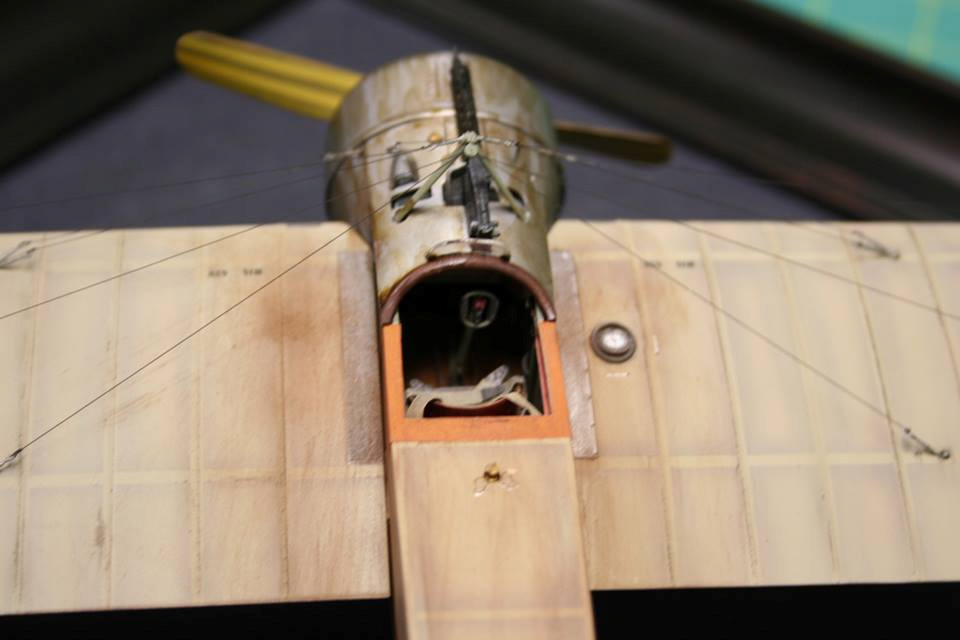
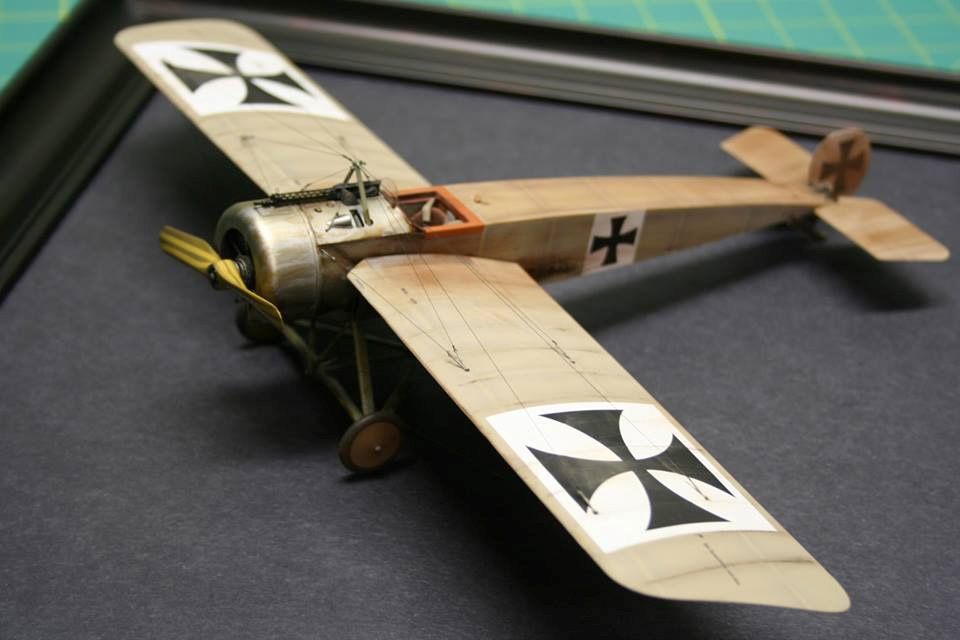
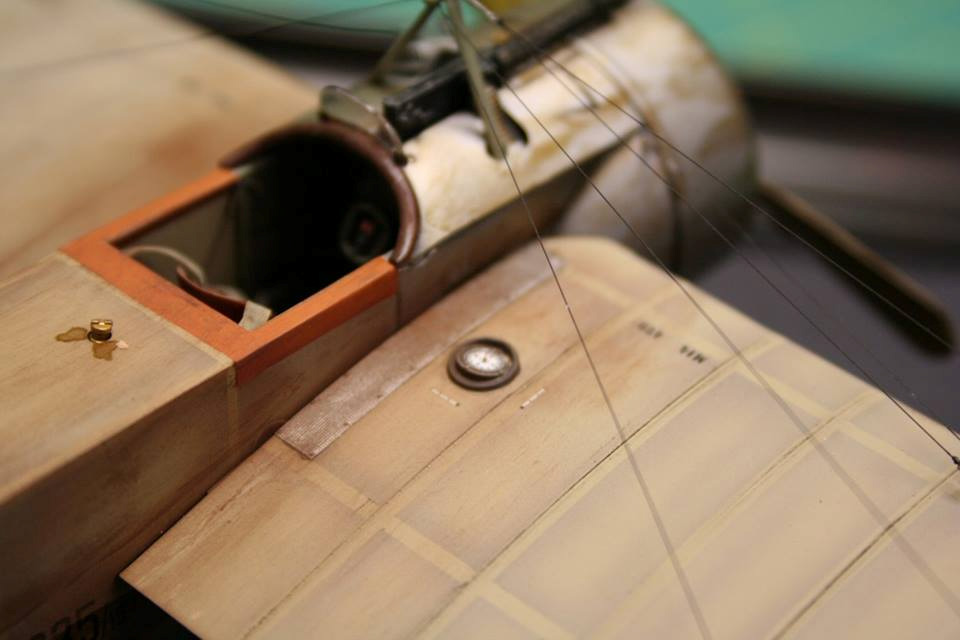
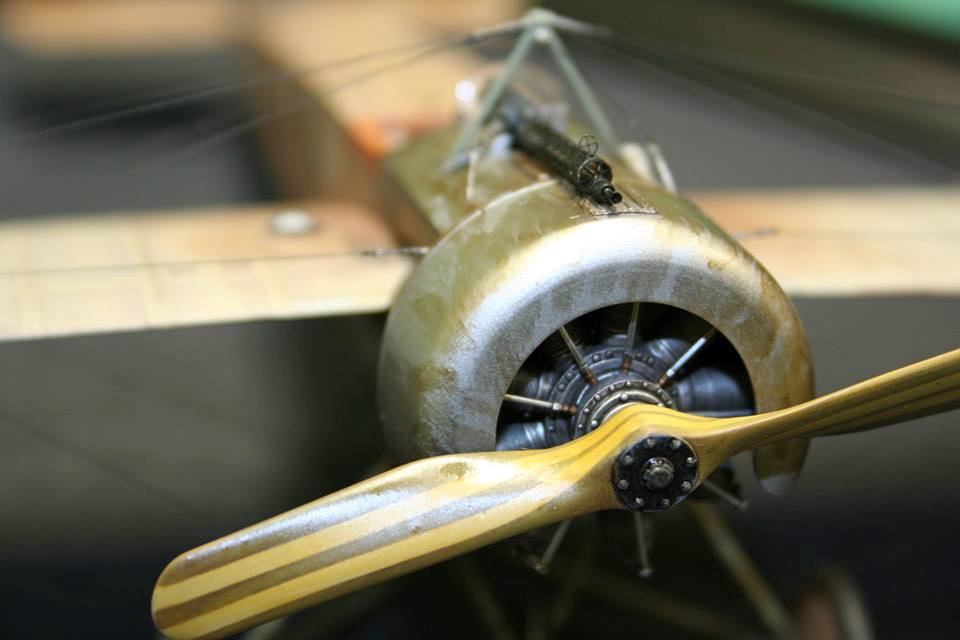
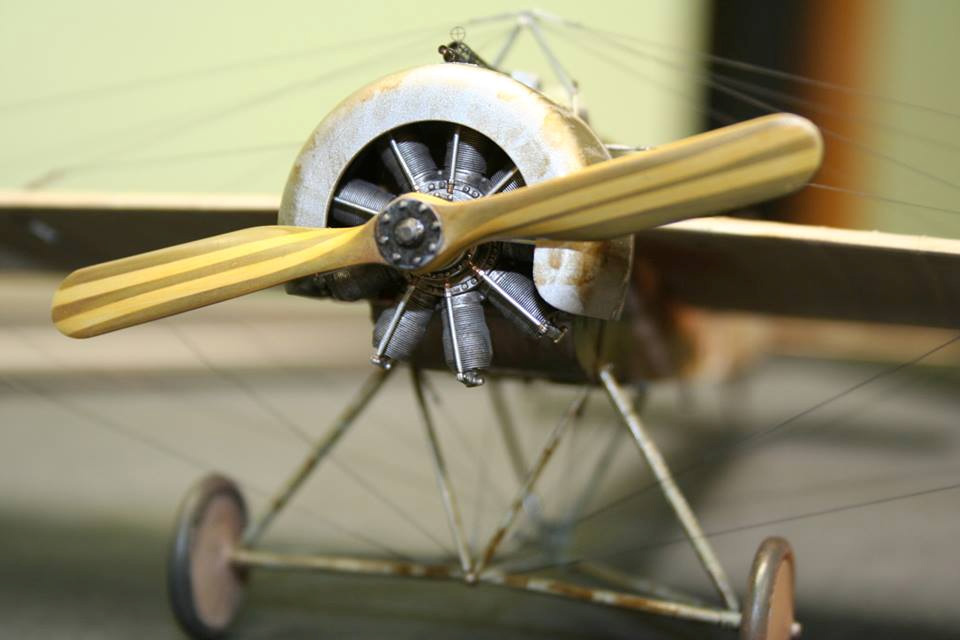
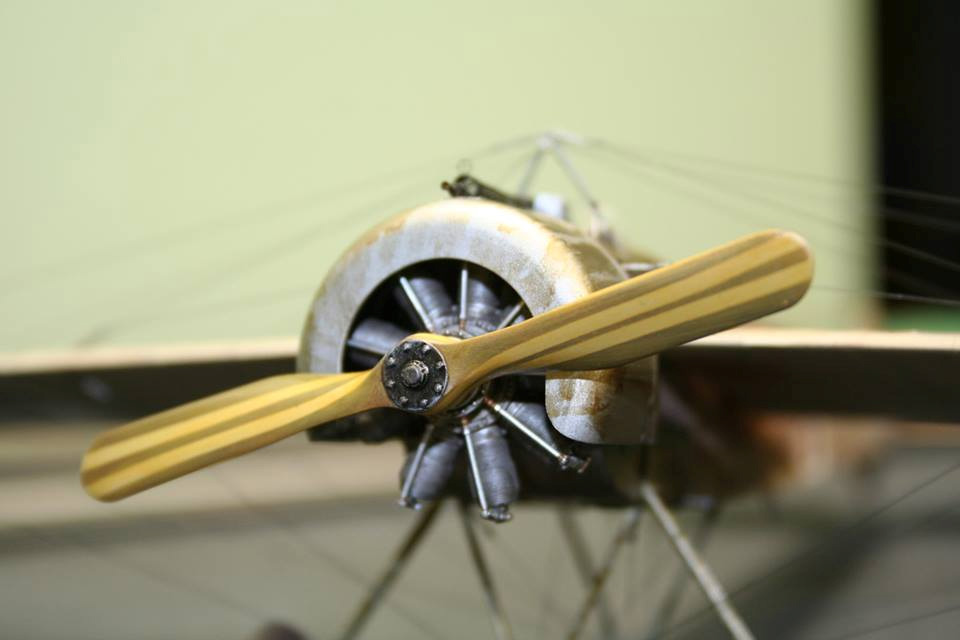
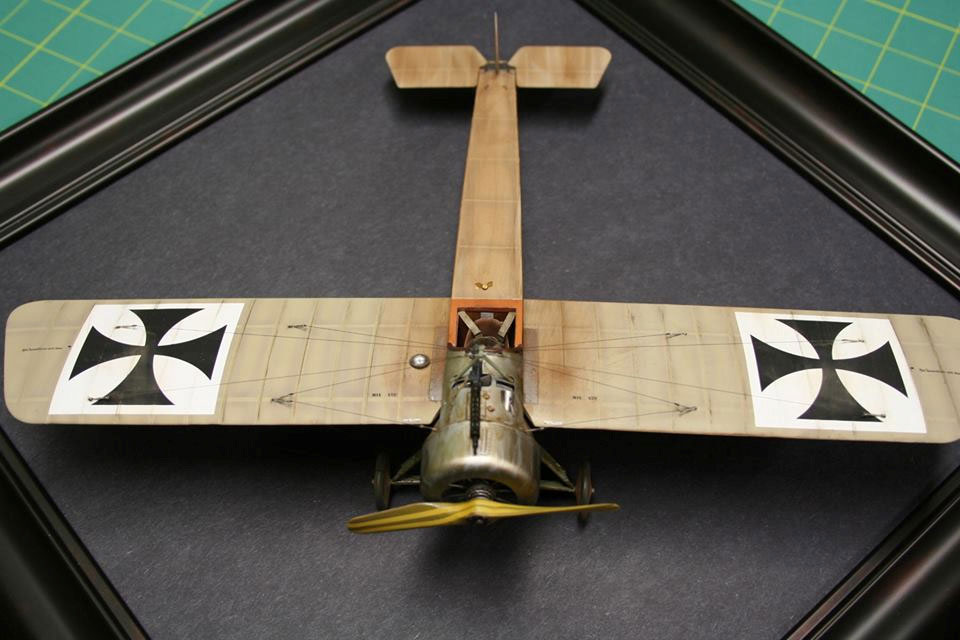
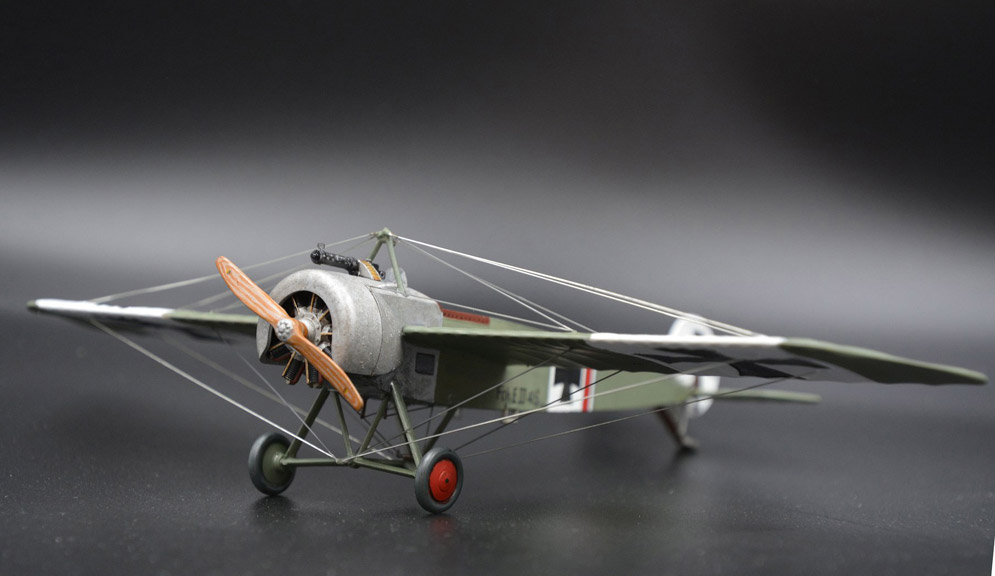
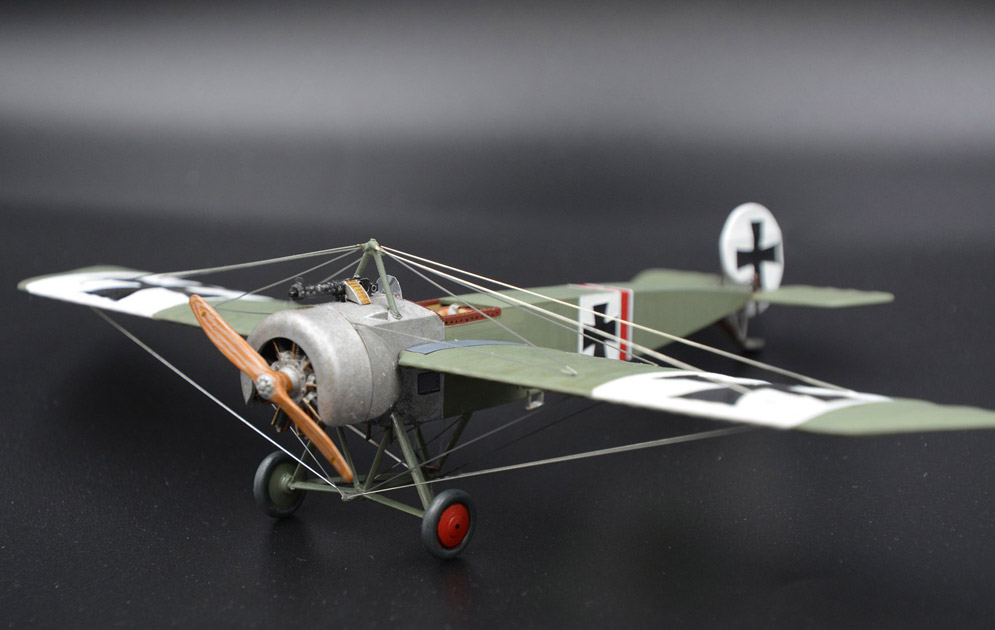
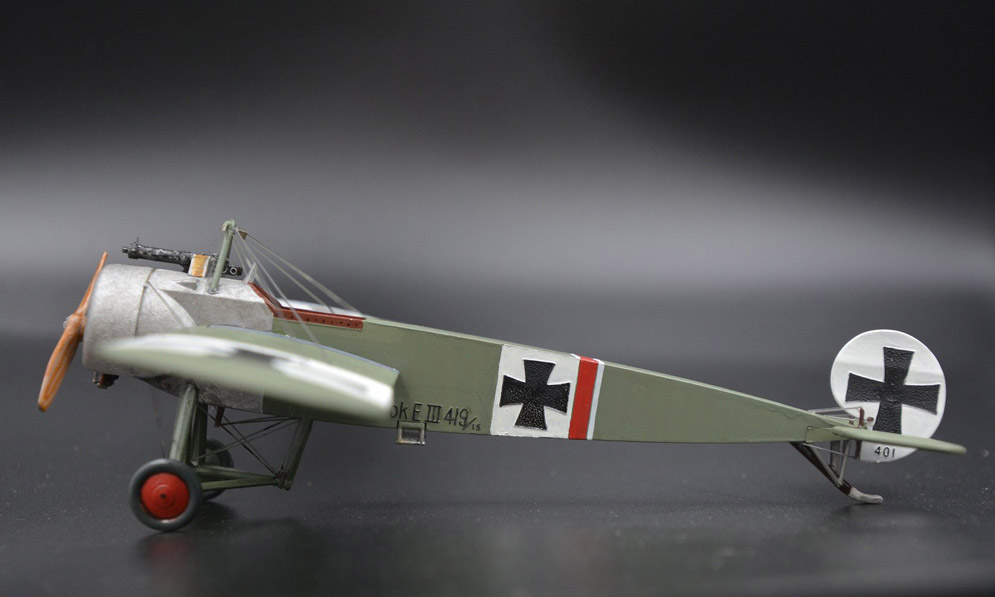
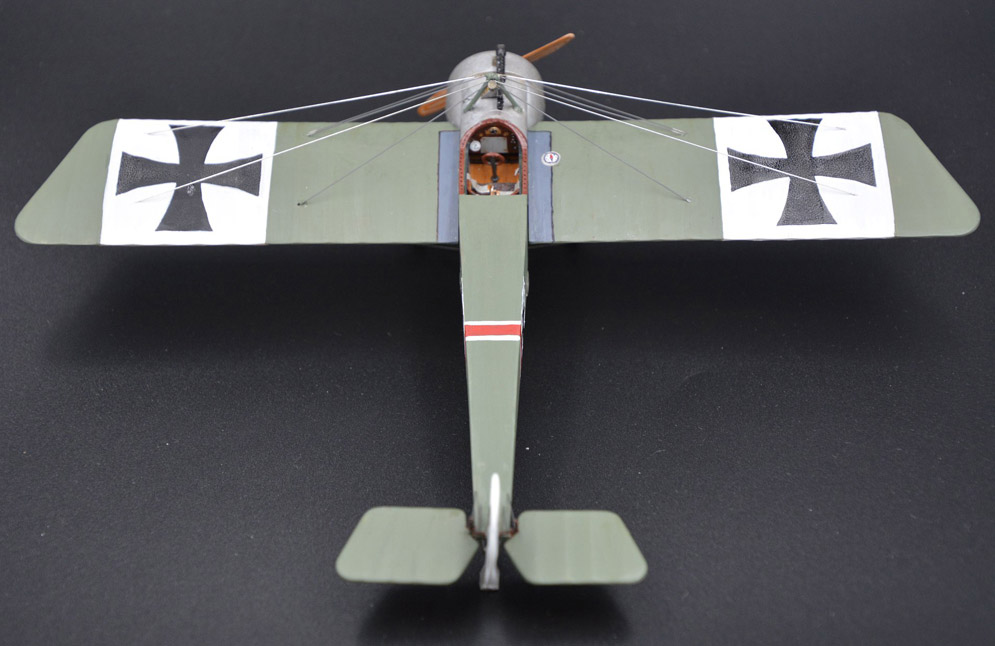
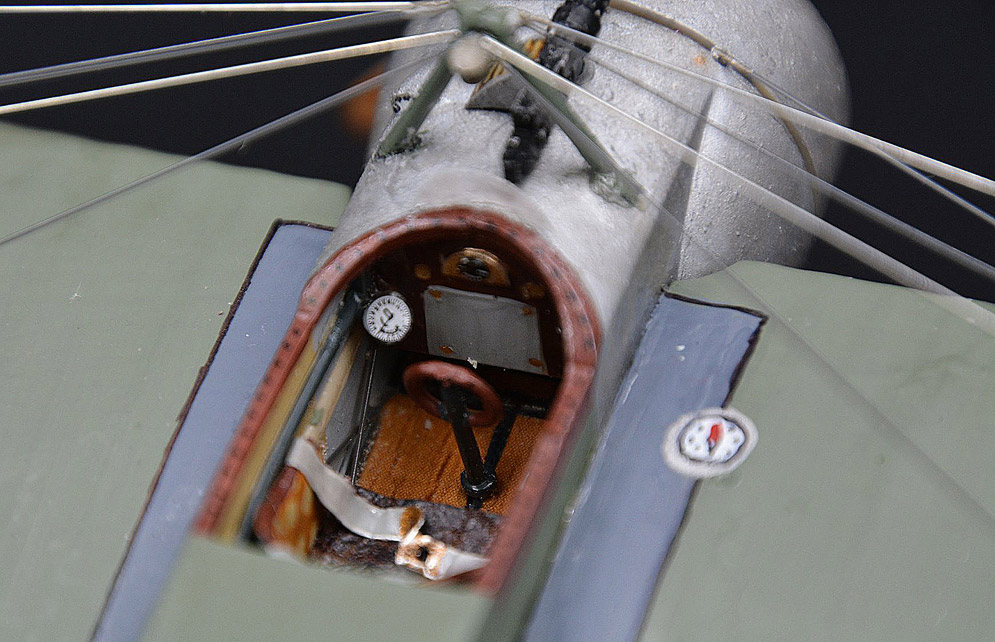
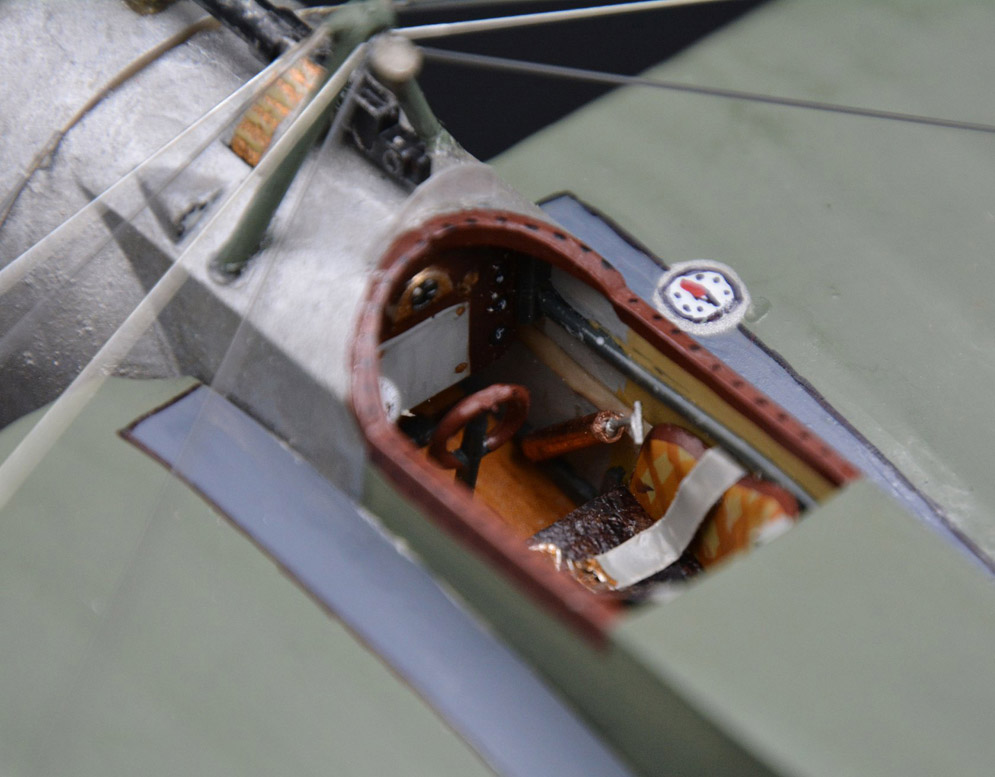
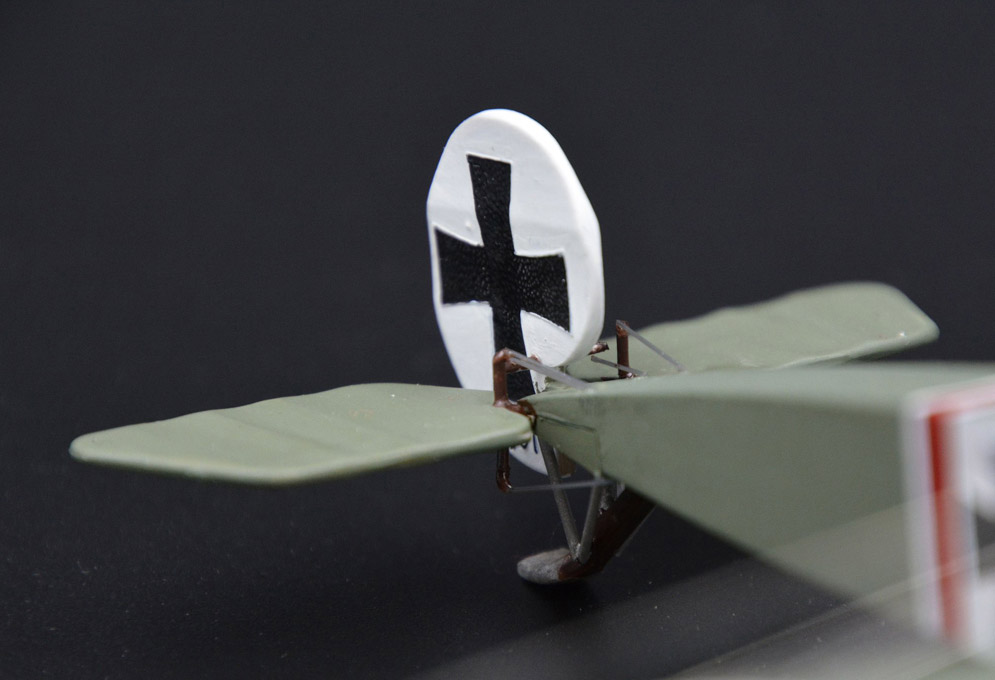
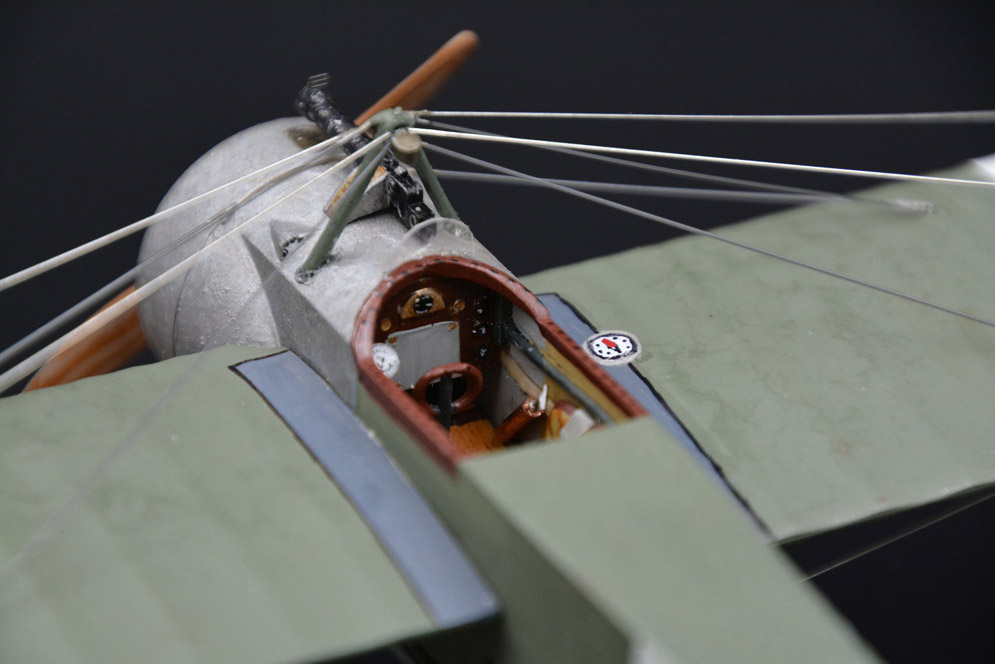
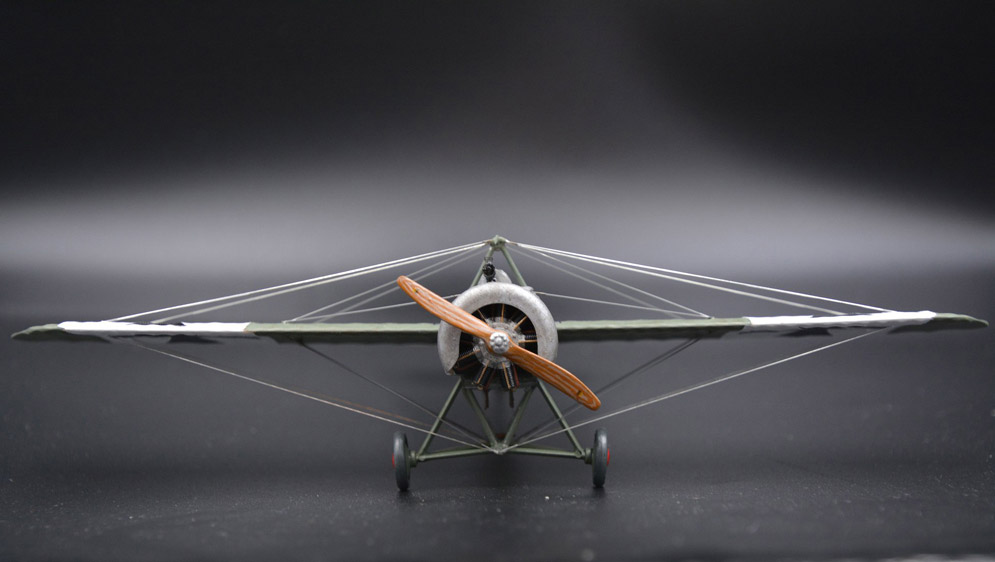
Fokker Eindecker E.ll 37/15
Max Immelmann
Feldfleiger Abteilung 62
Oct-Nov 1915 (15 victories)
Tamiya acrylics
Gaspatch turn buckles with Uschi thread
Prop acrylic brush painted then oils over the top.
David GL.