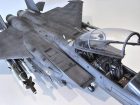
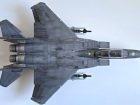
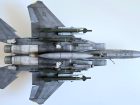
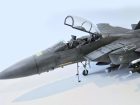
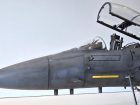
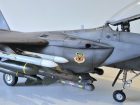
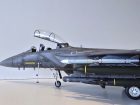
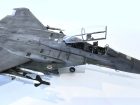
The kit is built out of the box except for a Red Fox 3D cockpit set and some Eduard seat belts. The Red Fox cockpit set is really nice and is a worthwhile investment for a 1:32 scale model.
The kit is excellent with no real fit issues at all that I came across and I would highly recommended it. It builds into a large model at approximately 62cm long and 42 cm wide, so you’ll need plenty of space available to display it.
The only fit issue I had, that wasn’t self-inflicted, was a small gap between the fuselage and wings, but this was easily sorted with some filler and a bit of re-scribing.
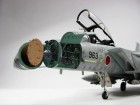
The kit offers the ability to build and display a detailed radar in the nose cone and an electronics bay in the front fuselage. It also comes with two crew. However I just wanted to build mine with clean lines as if it were just ready to undergo a mission.
I bought my kit second hand and sadly the decals must have got damp since they absolutely refused to part with the backing paper without tearing, so I bought a replacement set through the official Tamiya UK route for, what I think, is a VERY reasonable price…the service I received was excellent and the replacements arrived quickly.
I’ve seen pictures of F-15Es in both very clean and fairly heavily weathered states…I wanted to go with the latter.
All in all, this is an great kit and I really enjoyed building it…very highly recommended!
David A.
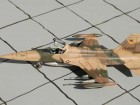
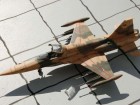
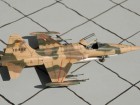
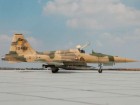
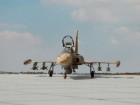
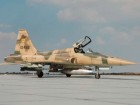
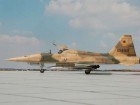
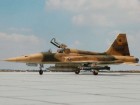
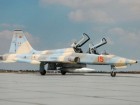
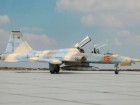
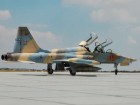
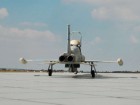
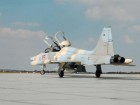
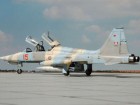
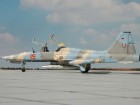
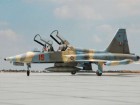
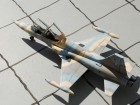
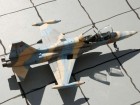
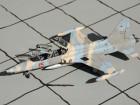
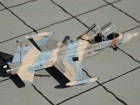
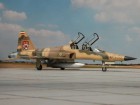
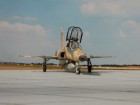
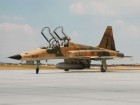
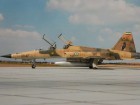
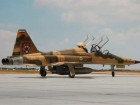
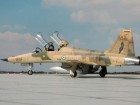
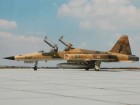
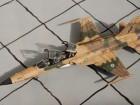
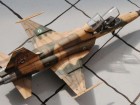
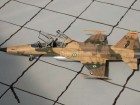
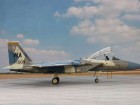
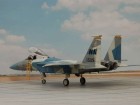
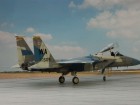
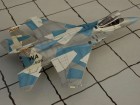
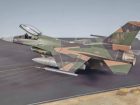
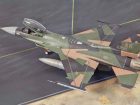
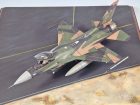
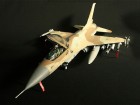
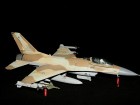
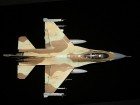
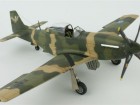
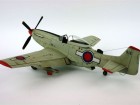
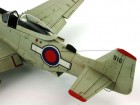
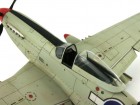
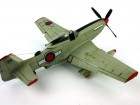
It is a former Iranian Aircraft being delivered to South Vietnam still in its desert camouflage and used in these colours. The scheme was taken from the book “Fall of the Flying Dragon” from Harpia Publishing.
See you! Jürgen Jaacks
After having a bunch of F-5 kits laying around in my cellar for some years now the release of the wonderful AFV Club F-5 E/F in scale 1:48 triggered me to start an F-5 series; and here is the first one. It is an F-5B in a Canadian Aggressor scheme, which is included in the kit. The kit is no longer available, as Classic Airframes unfortunately disappeared from the market last year or so. Whereas the basic layout of the kit is more on the basic side, the resin parts included really make the difference and make effectively almost as good as the new Kinetic kit. Assembly took some dry-fitting of the parts, especially the resin parts. The colours are rather odd, but exactly that makes the difference of the scheme. I used Xtracolor paints: X39, X107 and X133.
After all the work invested was honoured by a medal from the folks from IPMS Winnipeg at SMW 2012. Thanks!
Jürgen Jaacks
Hi all,
Here is another of my recent Kinetic builds. This is the 1:48 F-5B in VNAF markings.
The mechanism to open/close the canopies were completely scratch built. A pair of resin ejection seats and photo etch mirrors were the only aftermarket parts I used.
The model was painted with Hataka paints from the orange lacquer based range over a black primer from Alclad.
Again the kit decals are very good and gave no problems at all.
René VDH.
This is another bird of the 5 F-5s I managed to finish last year.
The kit is the one from AFV Club, which has just fantastic detail and is pure joy to construct. I can only fully recommend it.
The finish is with a decal set from HDL, who are always good for some exotic schemes and recently have concentrated on Iranian aircraft.
Colours are enamels from Xtracolor; a bit post-shading for subtle weathering was applied.
Painting was done using Vallejo Model Air acrylics with no shading or tinting. Future was used before decaling, and the kit decals (Cartograph) worked beautifully. I must have used too much Micro-Sol though because the Future layer was attacked and left looking quite cloudy and sorry for itself. A brush applied coat of Future sorted this out (luckily!) before a final coat of Model Air Flat varnish.
Weathering was carried out using the Filter method. Basically, “dirty” white spirit was brushed lightly over the entire model in thin coats to build up the affect. This toned down the paintwork and had the added effect of emphasising the panel lines. Exhaust staining was airbrushed on with a highly thinned Black/Brown acrylic mix.
This was a highly enjoyable kit to make, and coupled with the bright scheme makes an attractive model. I hope you think so too? Andy G.
My example is built out of the box other than the addition of some after-market seatbelts and some thin wire that I added to the engine to represent the ignition leads. The kit was very well engineered and I had no fit issues to talk of – I didn’t even use any filler!
I decided to show the plane as a well worn example. I didn’t use any primer and just sprayed the blue paint onto the grey plastic. I then polished the paint with a very fine sanding stick, which had the effect of exposing the rivets and also gave the effect of worn and faded paint.
The kit was excellent and I thoroughly enjoyed the build. I can highly recommend it.
David A.
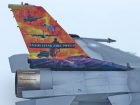
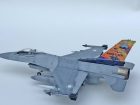
Thought I would do something of a different scheme and decided to go for the colourful Anthony Bekesi Detroit Air Races variant.
Built 100% out of the box….really nice kit which went together well. Decided not to go too heavy on the weathering as these machines would have been pretty well maintained, hence also no heavy Matt coat at the end, instead going for a Semi-Matt/Satin finish.
Used my favourite MRP paints for the whole project.
Turned out pretty well I think, although as usual lots to learn and take away from the build.
Hope you guys all like…?
Anthony B
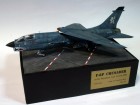
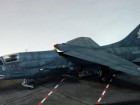
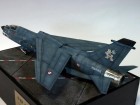
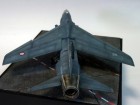
Here is the Academy 1:72 F-8E Crusader. This is a really charming kit to build, neither too complex nor over simplified. The only problem I had was somehow getting the undercarriage bay out of alignment with the fuselage. I only discovered this once everything was buttoned up and I popped the wheels on, result one drunken Crusader! Answer was to drill a new hole and re-connect one of the undercarriage legs, a working solution and no harm done.
Being myself, the aircraft is loaded with an Aires resin afterburner, resin air scoops (Quickboost), Master pitot tube, eduard sidewinders (which went a bit wrong), Aires resin ejector seat, eduard PE set and Aviprint decals.
VF-162 was embarked on USS Oriskany and with her A-4 Skyhawks undertook some of the most dangerous missions of the Vietnam air war. Regular missions to Haiphong and Hanoi took a steady toll of aircraft largely to AA and SAM missiles. The Commander of VF 162, Dick Bellinger, used this aircraft to down a Mig-21 in October 1966. In that year the carrier groups were running short of ordnance, so F-8 aircraft frequently launched with only two sidewinders rather than four. In the evening, helicopters would ferry sidewinders to carriers in the most need for the next day’s mission! The courage of the aviators on USS Oriskany can be read in the book ‘Bloody sixteen’ by Peter Fey
The figures are 3-D printed by Reedoak.
Hope you like it…
Andrew J.
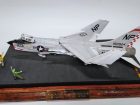
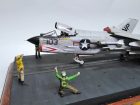
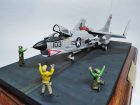
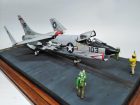
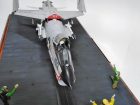
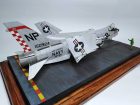
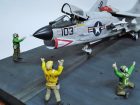
The diorama shows a scene set on the USS Hancock, June 1966 off the coast of Vietnam. The F-8 is being guided into position on one of the ship’s catapults, where it will be “hooked up” to the cat and the F-8’s engine shut down until called upon to assist aircraft already in the air over Vietnam. The cockpit canopy is open to allow some ventilation to the pilot strapped in.
The diorama is in 1:48th scale using the Hasegawa F-8 boxing built out of box with pilot and deck crew coming from Hasegawa Deck Crew boxing. The flight deck was made from plastic card and strip and the deck tie-downs from White Ensign Models.
Ian R.
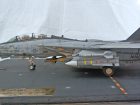
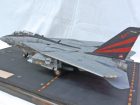
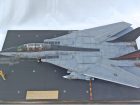
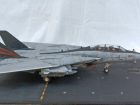
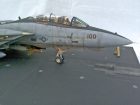
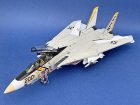
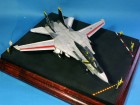
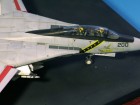
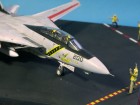
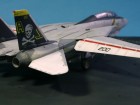
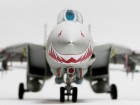
Finished in the markings of VF-101 NAS Oceana in 1982 in the short lived ‘Heater Ferris’ splinter scheme.
The markings came from Furball Aero Design decal sheet 4815 ‘Colors and Markings of US Navy Tomcats Part III’.
Extras used were:
• Quinta’s 3D decals
• Master Pitot tube
• eduard Brassin resin wheels
• eduard PE grill set
• ACMI pod from Bandit Factory.
For this kit I kept any weathering to a minimum as reference pictures showed this particular aircraft in quite a well kept condition. I kept the armament to a minimum with just an ACMI pod and 2 X AIM-9 Sidewinder drill rounds and no external fuel tanks or Phoenix pallets.
Dave C.
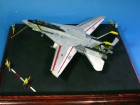
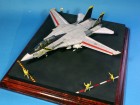
In some of the most famous Tomcat markings of VF-84 of the 70-80’s is brought to life with the excellent Fujimi kit. The model was built out of the box, the only extras being the deck crew figures which came from a Fujimi US Navy deck crew set. The deck was made from plastic card.
Glad you like it! Ian R.
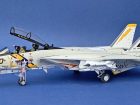
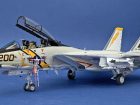
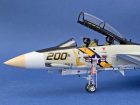
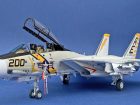
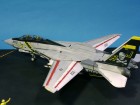
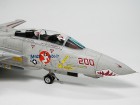
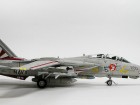
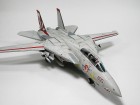
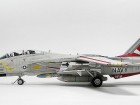
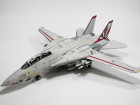
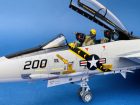
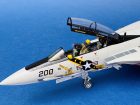
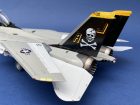
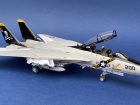
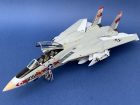
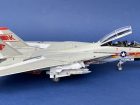
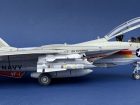
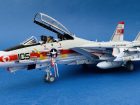
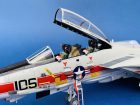
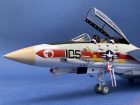
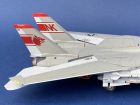
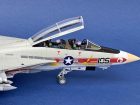
VF-84 “Jolly Rogers”, 1:48 scale Tamiya kit.
Details:
Eduard Colour PE for the interior and seats
Brassin resin wheels
Decals from the kit – these were actually very good and surprised me as Tamiya decals have a reputation of being very thick and not settling well. I think they’ve finally got the message and sorted them !!
The helmets are the kit ones that have been drilled out to remove the head/O2 mask. Great kit – I just love them !!!
Dave C.
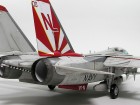
Thought you might like these VF-1 pictures for the Gallery.
Info VF-1 DXM decals – performed very well
Phase Hanger early resin early gun vent and beaver tail – decent fit
Eduard Colour PE Interior and seat detail
Brassin Resin Wheels.
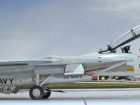
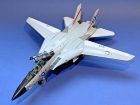
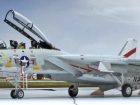
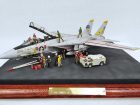
Typical Tamiya F-14 build – no issues – one of the best kits out there.
Dave C.
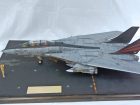
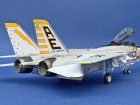
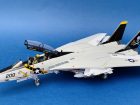
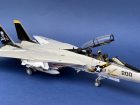
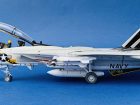
Finished in the markings of VF-41 ‘The Black Aces’ as seen in 1976 on the USS Nimitz.
The markings came from Furball Aero Design decal sheet 4801 ‘Colors and Markings of US Navy Tomcats Part III’.
Extras used were:
• Quinta’s 3D decals
• Master Pitot tube
• eduard Brassin resin wheels
• eduard PE grill set.
For this kit I kept any weathering to an absolute minimum as these early F-14’s were generally kept in immaculate condition, especially when shore-based. I also omitted all armament including the wing glove pylons and external fuel tanks to show the sleek lines of the Tomcat.
Dave C.
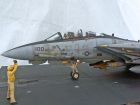
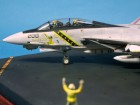
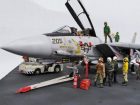
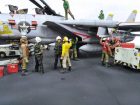
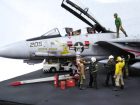
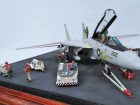
“Pre-Flight Checks”
F-14A Tomcat, VF-21 on board USS Constellation.
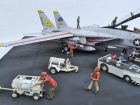
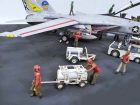
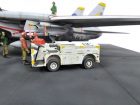
One of my favourite jet aircraft! The model is one of the Hasegawa boxings in 1:48th scale.
I used the Aires updates on cockpit and undercarriage bays.
The Flight deck I made from plastic card, the figures and deck equipment came from various sources, Verlinden, Kinetic and Hasegawa.
Ian R.
Attached are some photos of an F-15 in Digital Flanker scheme I finished this winter.
This model is the result of a somehow VERY long build – it took some 3 years from start to finish. And this model had a first life during these years.
My first try was for an anniversary scheme of the JASDF with some fairly old decals from Hasegawa with the Hasegawa kit; be aware of old decals from Hasegawa. I had to learn the hard way how they behave. They are disintegrating into something in between 50 to 1000 pieces! 50 pieces still can be handled, but a thousand pieces? That’s where I gave up.
The second try started with the Digital Flanker Decals from TwoBobs. Nice stuff in good quality. For this I sanded the whole model to get rid of the cracked decals and some paint.
Next step was to re-scribe the recessed lines wherever necessary.
The paint scheme involved some serious work for masking the whole thing, no guts – no glory.
The decals were pure fun this time and the whole thing was finished doing SOME weathering. Perhaps the weathering was still a little bit too much considering pictures of the real thing, but this last step of finishing a model is always the most enjoyable one!
Jürgen Jaacks
By Dennis Deagle
I was inspired to build this kit because of observing the “combat” approaches made by the pilots returning from their daily patrol to Hickham AFB on the island of Oahu, Hawaii – whilst on one of our regular February escapes from the Edmonton winter. Then I saw the kit featuring the Hawaii ANG markings in a hobby shop over there. I didn’t buy it there because of a lack of luggage space but in fact ordered the kit at a lower price from Hannant’s. Go figure. It turned out that the HI ANG aircraft were repainted from the scheme depicted in the kit in 1994 or so, I am told, to a low visibility scheme. The last F-15A flown by the HI ANG is on display in the low vis scheme in the Pacific Air Museum on Ford Island at Pearl Harbour.
The HI ANG flies F-22’s since 2010 but I have not been fortunate to see any on approach or flying over the beaches – and I am not going to be there this year, sadly.
The build of the kit went smoothly enough and incorporates some aftermarket cockpit details such as colour etch and the ejection seat.
The finish is Model Master enamels – I was worried that there was so little distinction between the light and dark ghost greys but I see the contrast does show up on the photographs.
The jet nozzles, linkages, etc were finished following steps and the paints recommended on a Japanese video on the subject:
http://www.youtube.com/watch?v=p9k7BP9lEbw&feature=related
The markings are entirely the kit decals. The stencils were a bit of a chore to put on but the carrier film toughness worked to advantage.
The model took First Prize for 1:48 Multi Engined Jets at the Northern Wings Contest, a local show held in Edmonton in 2010.
Dennis D.
I have to say that the kit was a bit of a pig to fit together but after filling and smoothing down the fuselage and nose joint the kit started to be a joy. The Eduard extra parts included the exhaust cans, ejector, seat and wheels. I decided to have this Eagle sitting on the ground with FOD covers to give the whole model a bit more colour and to provide another point of interest.
The front intake covers were again Eduard etch and the rear ones were scratched from a vinyl glove cut to size and stuck into place with cyano. The kit included Cartograf decals and enough stencils to make you go cross-eyed. After being choosy with the stencils I displayed this Eagle as 173rd Fighter Wing Oregon ANG based at Kingsley Field because the tail decals add a lot more colour. Paints were Xtracrylix but I only used these as a base and added colour and white to make a better shade to match the real aircraft. For the metallic areas, the exhaust cans and tailpipes I used Model Masters buffable metalizers. Once everything was weathered and bleached back I added Eduard’s new Fabric RBF tags.
Lastly, I decided to sit the model on a scratch built base to add more interest.
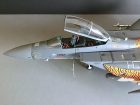
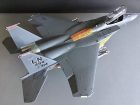
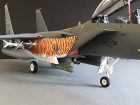
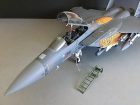
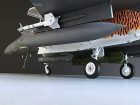
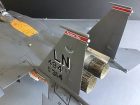
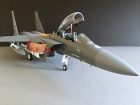
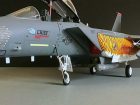
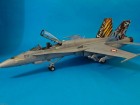
Here’s my Tiger Meet F-15E Strike Eagle, based on the Tamiya 1:32 scale kit.
The kit itself needs no introduction but I decided to use aftermarket decals (Two Bobs) for their excellent Lakenheath-based options.
Adding to this, a ‘Tiger Meet’ scheme was applied as seen on a photo of a 494th. ’Panthers’ FIS aircraft in previous years.
She’s painted in Mr.Color acrylic lacquers: Gunship Grey, Orange/Yellow and White and AK Extreme Metal enamels for the NMF.
Humbrol enamels were used for all the finer detail work including the hand-painted ‘Tiger Stripes’.
The model was finished with a light coat of Mr Superclear matt and satin varnishes straight from the rattle can.
I hope you enjoy viewing and thank you for doing so.
Paul. A
This is my 1st effort at a diorama. 30 months in the making, a 1:32nd Tamiya F-15E Strike Eagle.
The quality is nowhere near what I usually see on the site, but with more experience and lots more patience hopefully I will reach the standards associated with your regular contributors.
With such a large scale, the decals are huge and I have yet to overcome the silvering problem. Build errors are also magnified at such a large scale.
You may notice some abnormalities, like a towing tug from an aircraft carrier and some fuel & oil drums, and jerry cans from WW2. With aftermarket kits almost impossible to get in South Africa, I have to troll the internet and import what I can, that is allowed to be shipped here. Import duties and taxes make it frightfully expensive and the exchange rate doesn’t help either.
Hope you all like it…
Trevor W.
Extras include a reshaped HARM pod to represent a Pave Penny pod (from the Monogram F-16C kit), and 600 gallon underwing tanks from a Hasegawa F-2B kit. The laser guided bombs are the spares box.
I used Humbrol and Model Master enamels for the paint scheme (Hu121, Hu 119, and Model Master Sky Type ‘S’ for the upper surfaces, and Hu 127 for the lower surfaces and weapons). The decals are from Isradecal. The pilot figures are from a Hasegawa accessories set.
Albert M.
F-16C 1:72 scale from the Hasegawa kit
Quick and easy build. It was a commission job. I did one tail art in 1:48. Someone loved it so requested to do it in 1:72
Colour scheme is from Pakistan Airforce C-130 award winner at RIAT 2016, I have also done that C-130 in 1:72 scale as well. Tail art is designed on computer then printed my own decals.
For paint Mr hobby Color 307 and 308 were used.
Enjoy the build…
Imran A.
Academy – Nr. 1688 1:48 scale kit F-16A/C
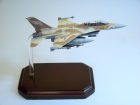
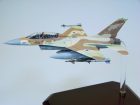
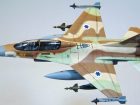
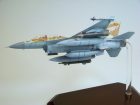
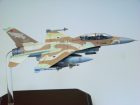
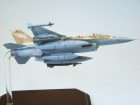
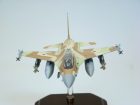
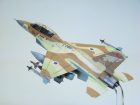
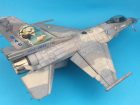
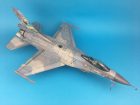
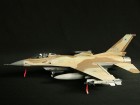
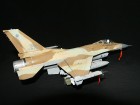
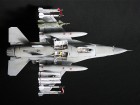
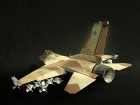
This is my fourth model. We have limited equipment in my country; for example we haven`t any materials for weathering models. I made this model during about 15 days. I am still an amateur. This model is 1:48 scale. I made December in 2012. This model is with IDF (Israeli Defence Force) camouflage. We Don`t have any decal for IDF, but I tried painting some places.
In my country is lack of buying facility results in boycott. The boycott is unfair because that causes hurt to all people not to government. (Especially artists)
Thank you. Mohammad Adl from Iran | sm_adl@yahoo.com
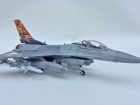
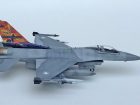
I originally bought this kit years ago and had terrible problems with assembly of the intake which consists of four parts. Fit of these parts is not perfect and I had to use a lot of putty; filling and sanding seemed to be a never ending story so I put the kit aside. But the nice Dutch markings with a tiger on the tail challenged me to give it another try after a year or two. This time I used Milliput instead of standard Tamiya Putty to correct the intake. I sprayed the rear area of the intake with black, only the visible front area is white. This hid all the imperfections. I continued as usual an out-of-the-box build, only replacing the seats with Quickboost resin parts. The camouflage is airbrushed with Gunze Sangyo Hobby Color paints, the exhaust nozzle is sprayed with Alclad II paints.
In my opinion one of the best models that have been produced by Tamiya, the fit of the parts and the ease of build is amazing! Built straight out of the box with the exception of the squadron decals, the model features a highly detailed removable engine, removable and interchangeable weapons via Tamiya’s polycap system and an engine dolly (not shown in the photographs). The General Dynamics model was finished with Vallejo and Tamiya paints, Pro Modeller wash and “88 Superscale” 23rd Fighter Squadron, Spangdahlem decals.Although there are cheaper alternatives in this scale on the market, I would highly recommend this model, the detail that is included within the kit as standard is amazing. Hope you like my interpretation?
This is my Tamiya 1:32 F-16CJ block 50.
It was painted with MRP paints for the main colours and Alclad2 for the engine – various tones.
The Aires resin cockpit was used which is really nice but the instructions for installation are dreadful.
Weathering is done with various oil colours and Tamiya Accent Color.
Hope you like it!
Daniel B.
Academy 1:32nd McDonnell Douglas F/A-18C Hornet
This has got to be so far in my modelling career one of the nicest kits I’ve had the pleasure of making. The amount of plastic in the box is astounding and you want for nothing (well I did) the choice of weapons is fabulous and you also get a radar thrown in!
I added a Black Box resin cockpit for some added detail, this set really does set the model alight over the kit cockpit, but the kit parts are still rather good.
The kit once again is finished in Mr Color paints and weathering is added using lights passes along certain panel lines with Alclad Jet Exhaust.
The Decals were not from the box as I fancied a Marine corps CAG aircraft from VMFA 232. The set I found were produced by MAW decals and were fantastic and performed very well with Micro Sol over a gloss surface.
The model received a commended award from the Southwell expo in 2011 and this made me quite chuffed!
Comes highly recommended
Adam B.
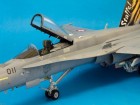
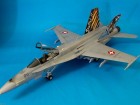
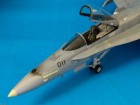
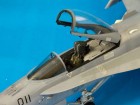
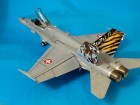
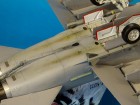
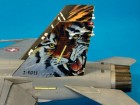
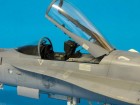
I have really enjoyed building this one, it’s the 1:32 Academy F/A-18C Swiss Hornet, J-5011 “Staffel 11”, finished in Tiger Squadron Markings, J-5011 “Staffel 11”.
It has fitted together well with no major surprises and uses Aries ‘burner cans, Aries cockpit, DMold Intakes and Zotz decals.
Painting: finished with Gunze paints, Tamiya paints, Citadel paints, Mig Wash and pastels.
The only thing I needed to add to this stunning kit was the wingtip mounted Air Combat Manoeuvring Instrumentation (ACMI) pod and this was only due to the particular aircraft I chose to portray. I also chose to add some brake lines and some safety buttons on the left-hand side nose.The kit itself is beautifully produced, including a very well reproduced cockpit and undercarriage bays and a good representation of the radar set that can be made to slide in and out of the nose just like the real thing. Academy also includes metal cores for the excellently detailed undercarriage units, a must given the size and weight of this beast once finished.
I chose to finish this model in the markings of VFC-12 “Fighting Omars”, an aggressor squadron of the US Navy right out of Top Gun. As soon as I saw this decal sheet, and scheme, I instantly had to do it and this was my inspiration for the build. These particular colours for “Red 06” are actually a real life muck up. Story has it that the paint shop tasked to carry out the scheme had run out of the actual colours required, so they just decided to mix up their own batch and this jet is the eye catching result. Could there have been modellers working in that paint shop….?
I had to custom mix the colours myself, with both shades of blue consisting of various Tamiya acrylics blended to match the markings on the decal sheet. The grey was easy enough; Vallejo model air 050 from the pot, and all of the demarcations were masked using Silly Putty “worms” with more silly putty filling the areas in between. I prefer this stuff over regular blu-tak as it is stickier and easier to mould, both aiding in the masking of tricky patterns such as this.
The wingtip ACMI pod was scratchbuilt from a section of the kit sprue, sanding the nose to the correct profile and with Tamiya tape used to represent the bands around the pod. Once painted, a random piece of wire was straightened and inserted for the nose Pitot tube.
The kit supplied figure finished the model off, with the helmet being hollowed out with a Dremel and placed on the cockpit sill.
I hope you enjoy my representation of this awesome looking aircraft.
Cheers, Andy.
Italeri 1:72 scale
This is the Italeri 1/72 kit, finished as a VFA-41 CAG Bird. It needed much work and I used filler throughout. The cockpit was improved with Eduard and spare seats. Weapons came from various sources. It’s finished with Xtracolor, Two Bobs decals, and a Promodeller wash sealed in with matt varnish.
Here’s my 1:48 scale F/A-18F Super Hornet made from the Italeri kit. The kit has plenty of faults but at the time I made this there wasn’t much choice on the kit front.
This model features in the book I did in the Osprey Modelling Series on the F/A-18 (in case you recognise it!).
Plenty of additions including cockpit, filling the airbrake, some re-scribing and adds like the FOD guards etc etc.
Came out well in the end I think – hope you like it…
Geoff C.
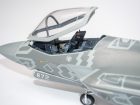
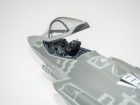
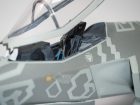
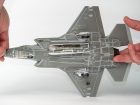
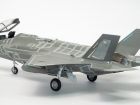
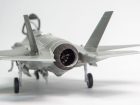
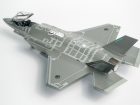
Meng 1/48 (LS-007) F35-A Lightning II
Weapons: AIM120C MRAAM / GBU-10 Paveway II
Aftermarket: Eduard PE set (49864) (Interior & cockpit)
Eduard PE set (FE865) (Seatbelts)
DN Models – Mask set ((48/827) (RAM Panel mask)
Decals: AFV Club 1/48 RF5-S Tigereye
I had the honour once again to participate as a judge in the 14th Annual National Aeronautical Engineering Competition in Singapore, supported this year by the Republic of Singapore Air Force (RSAF) to celebrate their 50th year. My contribution to the ‘Judges Table’ was a representation of a RSAF F35A in the guise of a 141 Squadron aircraft. Although signatories to the F35 program, Singapore has not yet ordered this aircraft, hence the reference to 2044 and the 75th Anniversary of the RSAF. Using the new Meng kit as the basis and adding some aftermarket photo-etch and a GBU-10 from the spares box, this was a fun build.
The model was presented to LTC Giam Tan, who as Head of RSAF Recruitment was present to award the winners of the RSAF Best Model in each category. It will now be displayed at the RSAF Recruitment Centre.
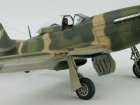
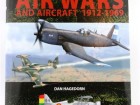
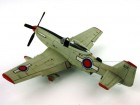
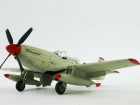
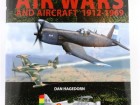
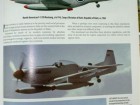
This is one of a series of Tamiya P-51D kits that I built after having been inspired by Dan Hagedorn’s marvellous book titled ‘Latin American Air Wars and Aircraft 1912-1969’. The book is beautifully illustrated and depicts a host of aircraft types in a plethora of interesting and exotic camouflage schemes; I can’t recommend it highly enough. The Tamiya 1:48th P-51 series of kits are all a pleasure to build and to date I have completed 6 in various marks and liveries. By far the most enjoyable of the 6 were the 3 Latin American variants that appear in this Gallery and the most satisfying to paint was this aircraft belonging to the Guatemalan Air Force (Fuerza Aérea Guatemalteca or FAG).The model was built straight from the box with no significant modifications or enhancements other than the seat harness made from Tamiya masking tape and Airwaves photo-etched buckles. The model was sprayed with Vallejo Model Colour paints (Nos 152 – Silver Grey (underside), 95 – US Dark Green, 100 Black Green and 124 – Iraqi Sand) which I applied directly using an Iwata HP_CH airbrush and the decals are from Aztec’s “Latin Eagles IV” sheet. The final finish was produced by over spraying the entire model with Hannants Xtracrylix Flat Varnish. Next in the Gallery will be my conversion of a P-51D into a Salvadorian Air Force Cavalier F-51D Mustang, complete with tip tanks and rudder extension.
Andy B.
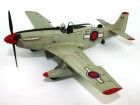
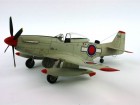
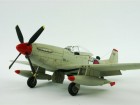
This is one of a series of Tamiya P-51D kits that I built after having been inspired by Dan Hagedorn’s marvellous book titled ‘Latin American Air Wars and Aircraft 1912-1969’. The book is beautifully illustrated and depicts a host of aircraft types in a plethora of interesting and exotic camouflage schemes; I can’t recommend it highly enough. The Tamiya 1:48th P-51 series of kits are all a pleasure to build and to date I have completed 6 in various marks and liveries. By far the most enjoyable of the 6 were the 3 Latin American variants that appear in this Gallery and in my view this Haitian machine was the most interesting of the lot.The model was built straight from the box and falls together with no need for filler, and if you’ve just finished a ‘challenging kit’, then I can recommend this model as the perfect antidote for your stress. To modify the basic kit into the Haitian variant, I fabricated from plastic card and stretched sprue, the 3 antennae that are visible on the spine and under the tailfin and the pylons which accommodate the F-86 drop-tanks that I stole from a Hasegawa kit sitting in my over-large collection. The model is sprayed with Vallejo Model Colour Silver Grey (No 152) and the red embellishments were done with Humbrol Bright Red (No 19). The final finish was produced by over-spraying the entire model with Hannants Xtracrylix Flat Varnish.
The decals were homemade as they are relatively simple and I produced the images using MS Word’s drawing tools which I then printed onto inkjet printable decal paper using my quite primitive HP Deskjet printer and HP Ink cartridges (a must for decal printing as anything other than HP originals produces inferior results!).
Andy B.
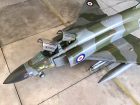
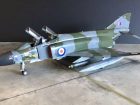
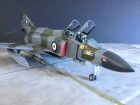
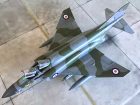
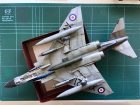
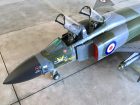
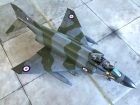
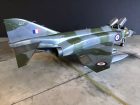
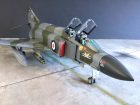
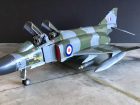
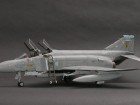
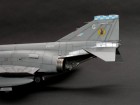
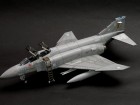
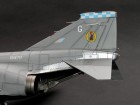
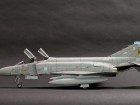
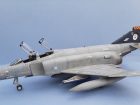
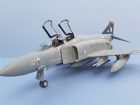
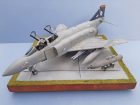
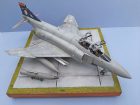
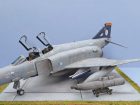
Mc Donnell Douglas F-4 FG Mk.1 – My second Phantom with Spey engines. An original one from the Royal Navy, but still a bit special.
It represents a Phantom FG MK.1 during their farewell tour to the U.S. Navy in August 1978, pictures of it to be found in the British Phantoms 1966-78 book by Double Ugly books on page 100.
The decal set is from Aeromaster – 48-557 Smokers Part 1.
I installed an Aires cockpit, but otherwise a built out of the box!
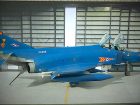
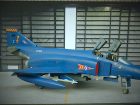
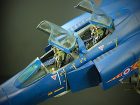
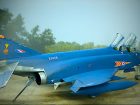
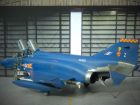
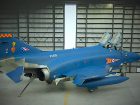
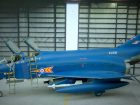
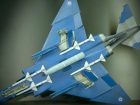
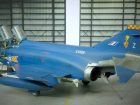
Next Phantom on the production line is a RF-4E in metallic blue.
Watch out and never be out of Phantoms!
Jürgen J.
May I present to you my 1:48 scale Phantom FGR-2 build.
She’s an original Hasegawa-issue kit.
There are some excellently-detailed video builds of this subject in SMN so I’ll just add a brief description of my work on this.
She’s mainly an OOB build. I used aftermarket resin ejection seats, MATRA rocket pods (Flightpath) and decals (Airdoc) for the chosen 14 Squadron markings.
Homemade intake covers were added (plasticard and fuse-wire for the handles). I base-primed the model with Mr Surfacer 1500 Black and used Mr Hobby Aqueous acrylics for the camouflage colours. Tamiya Clear Gloss acrylic varnish was used before and after the decaling process followed by a final coat of Semi-Gloss. All these paints were diluted 50:50 with Levelling Thinner.
The Natural Metal Surfaces were painted with Xtreme Metal enamels. Humbrol and Revell enamels were used on all remaining parts.
Weathering was done with a mixture of Flory Clay Wash (Grime); lead and pastel pencils; panel line wash and Tamiya weathering pastel sets.
I hope you enjoy viewing and thank you for doing so.
All The Best,
Paul A.
Hi Geoff as promised here are some pics of our favourite jet… The St Louis Mudmover!
Revell/Hasegawa 1:48 FGR.2 built pretty much out of the box and when I saw the 92 Sqn decal option in the kit, there was only one choice for me!
Model went together incredibly easy with great fit of parts and minimal filler/sanding required. I did drill some of the more prominent rivet areas at the rear end and in the intake areas.
Added eduard, cockpit, resin seats/belts and wheels as well as Aires FOD guards. All underwing pylons/stores are held in place with neodym magnets.
Buffed Halfords satin black used as a base for the Tamiya XF-8 Flat Blue. Lightened very slightly for the upper surfaces. Alclad gloss black applied to the Hot End of the fuselage and polished before various shades of Alclad2 metallics being applied. Arrestor hook dropped as I have a photo of the aircraft at Fairford with it dropped.
Added a 1.5mm diameter brass rod to simulate hook hydraulic ram.
Alclad Gloss coat for decaling and their satin varnish to seal it all in. Some limited weathering using Flory Dark dirt and pencil lead.
Used the excellent Ian Black and Peter Foster (Aircraft Illustrated) books as references.
Highly recommended and a straightforward build which gives a superb looking model of this Legend!
Stuart M.
1:72 scale
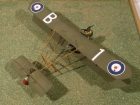
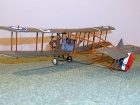
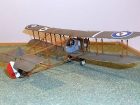
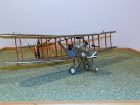
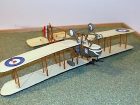
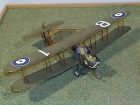
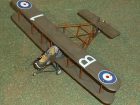
This is a conversion using Veeday BE 2c wings which were extended with plastic card.
The main wheels, guns and struts came from from the spares box and the remainder was scratch built. The nacelle was push moulded from 30 thou plastic card and the engine scratch built from laminated card, plastic rod and wire. The booms were made from florists wire but brass rod could easily have been used instead. The undercarriage represents the original version as seen on early models of this aircraft – later versions had simplified V undercarriage legs. The markings were hand painted except for the serial which was from the spares box and the nose lines which were cut from Letraline rub down transfer. The model is rigged with rolled 44 SWG copper wire which was CA’d into place.
I used plans in the excellent Windsock DataFile no 147 FE 2b at War. If I were attempting this today I would use the far superior Airfix BE 2c as the donor kit for the wings and other parts.
The FE 2b was one of the more important RFC/RAF machines of WW1 yet there is no injection moulded kit in this scale which is very frustrating for WW1 modellers. Aeroclub produced one many years ago in 1:48 scale and Wingnut Wings in 1:32 scale, but these are now collector’s items. A vacuform model was made in 1:72 scale but these too are very difficult to find.
Best wishes, Stephen F.
This Phantom, well, it started life as an FG-1, I filled the leading edge slots in the tailplane, and used the kit supplied FGR-2 nose wheel leg and door. Cockpit interior was from Eduard and various bits of wiring were added behind the pilot’s seat. Ejection seats were from a set by ED Models. Decals were from AirDoc for RAF Germany FGR2’s
Revell’s re-boxing of the old Hasegawa 1:48 Phantom. Despite it being an older kit now it’s still the only option if you want to build a Spey-engined RAF Phantom.
The kit out of the box cockpit area is mainly lacking in a good pair of Martin Baker Mk.7 ejection seats. I replaced the kit items with a pair of resin replacement seats. I also had in the spares box some left over etched items from previous Phantom builds. I added these to what is already good for its age kit cockpit.
Other extras added to the model were a pair of resin rear wheels. These replaced the inaccurate kit items. The weapons again came from the spares box and were modified to represent training rounds. Paint was applied through the airbrush using Hataka orange line paints. The decals and markings are aftermarket items. These depict an aircraft from the RAF of number 92 squadron 1987.
Weathering was then applied to give the aircraft that in-service look. I also made a simple base to display the model. The SUU underbelly gun supplied with the kit was mounted on a scratch built trolley I made after looking at reference photos of the real thing.
Nick T.
Galleries: A | B | B-2 | C | D-E | F | G | H | I-L | M | N-R | S | T-V | W-Z

























Paul Ainsworth says
Superb work as always,Martin.


Michael Lee Smith says
That looks great!
I won this kit at my model club raffle, thanks for the inspiration to get to work on it!