Full Review with Gary Jordan
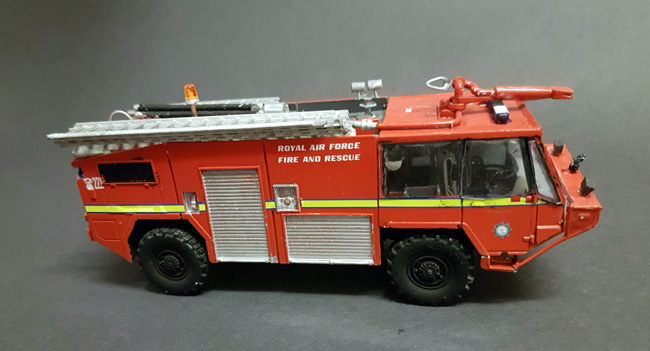
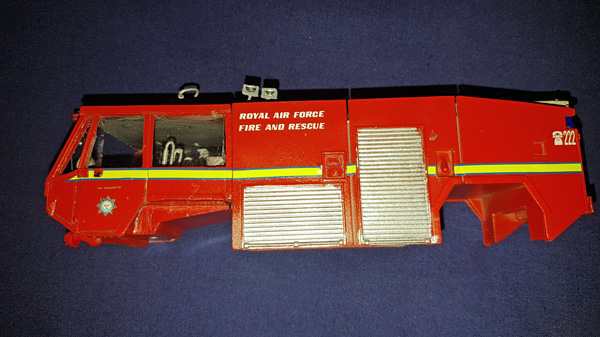
The RIV
The RIV is one of the current crash rescue vehicles used on RAF bases along with the MFV (Major Foam Vehicle) together these trucks form two thirds of a crash combine, the final third being taken up by a crash ambulance.
The ARFM Model
The firefighting vehicle is a rarely built subject, however a small company called Aircraft Rescue Firefighting Models has begun producing kits of both British and American firefighting vehicles in resin and white metal all in 1:48 scale.
The build
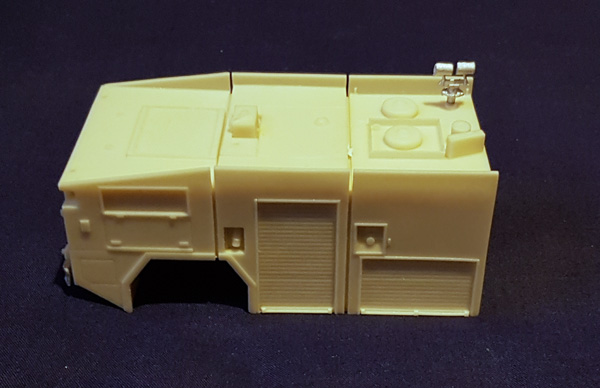
Firstly as any build starts, I rummaged through the parts finding what I knew and then finding out what I didn’t and where it went. Since there are no instructions included I asked the question and was told the bits that were not needed, very helpfully from the company.
You need to wash the kit parts in hot soapy water to clear off any release agent left on the resin.
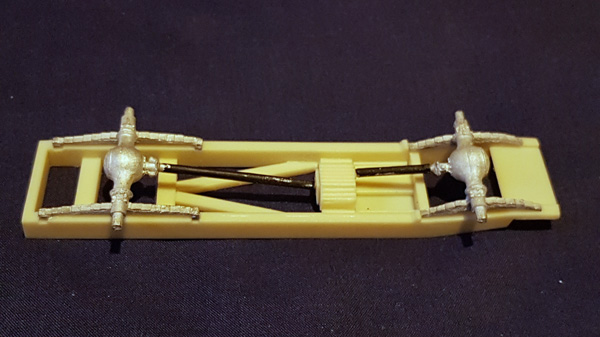
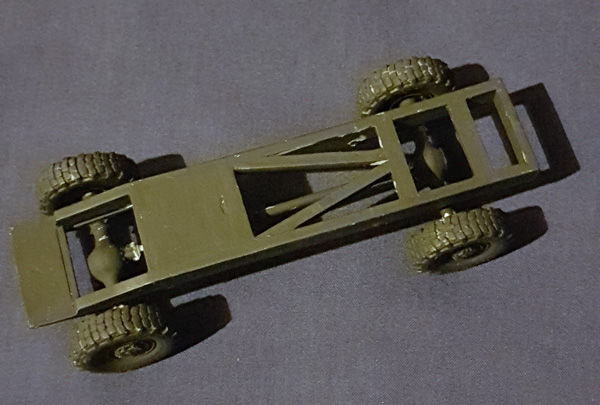
The chassis was my next port of call this was a lovely fit consisting of the drive shafts and suspension springs this being relatively simple only took about ten minutes.
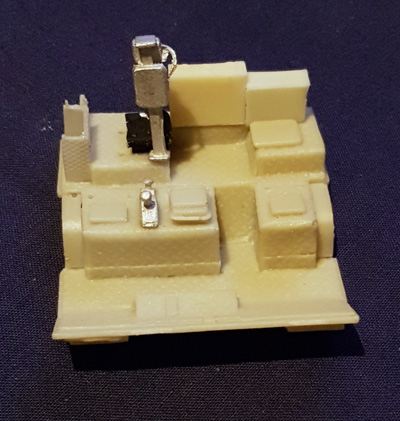
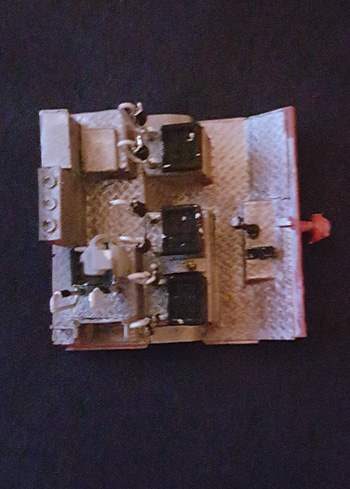
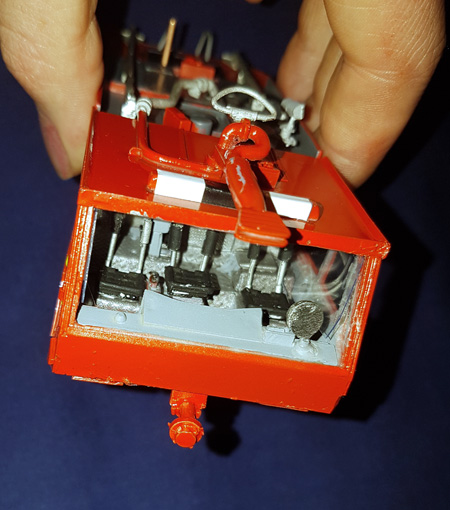
The second part of the kit was to build the interior and this fell together, the only problem being the steering wheel. It is moulded in two pieces and I could not get either to stay together properly. The butt join together with the wheel and rod turned out to be rather difficult, but done it was.
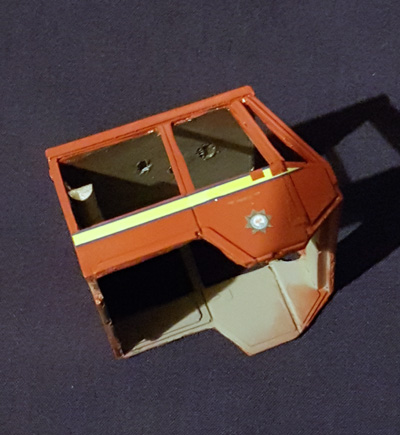
Moving on, I continue now to the next stage which is to prime and paint all the red parts (it is a fire engine after all) and once a coat of Halfords grey primer was laid down on all resign parts I painted the red. For this I chose a rattle can, although difficult it gave a nice finish. The reason I painted the red before assembling the majority of the kit is that it allowed me to paint it without having to mask the windows as I find it’s easy for rattle can paint to seep under the edges of the tape.
Ladders and things
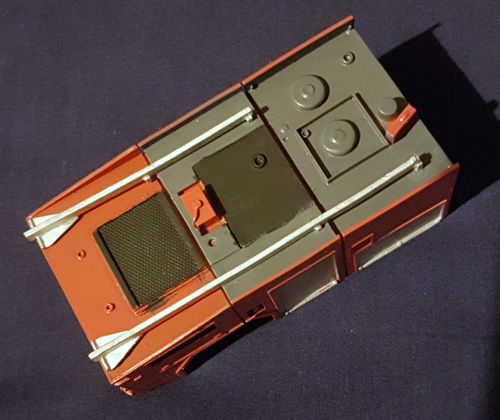
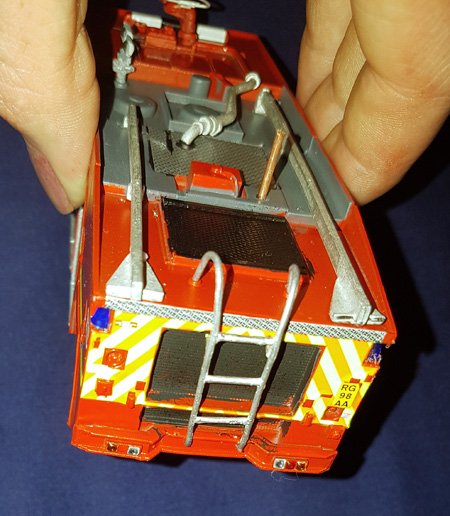
The next stage for me was to put the two ladder racks on and these slotted well in to the guides provided.
Decaling was the next thing on my mind. I decaled the whole vehicle apart from the yellow stripe on the rear. To apply the yellow stripe I stuck the cab to the rear of the vehicle thus making the yellow stripe as straight as possible. After this the monitor assembly went on. A pretty simple assembly but it provides the effect required, the monitor was in fact 3D-printed so required sanding down first. Before painting, the lights were put on with PVA, them all consisting of little plastic gem like things meaning that no paint was required and this helped me greatly as my precision painting isn’t the best to say the least.
The rear ladder (a fortunate extra for me) was included in the kit but it is in about fifteen parts. Thankfully the company provided me with a newly cast white metal one that was one piece.
The bumper was difficult for me as I had done a boo boo and chopped the locating pin off found on the back of the bumper, this also doubles as the water pipe leading to the mini front monitor. To combat my mistake I drilled and pinned it, finally setting it in place nicely.
The orange light was also a helpful extra from the company, now included in all of their kits. It consists of the amber beacon, a brass rod and a small metal light shroud.
The ladders were next and I had no problems with them at all, a nice assembly to put together to say the least.
Lastly the suction hoses, these were tricky as I found them too big to fit in the holder, again to overcome this I sanded a flat spot on all three and they now interlock nicely and are attached to the vehicle.
Ask a question or add feedback:
You must be logged in to post a comment.