Technique 3 – weathered cockpit sills, prop blades, bombs
When you look at images of the cockpit sills, the paintwork is invariably worn back to the metal. You can see how I’ve tried to interpret this on my Hawker Hunter cockpit sill. I quite like the effect here and all that you need to create this effect is an ordinary HB graphite pencil.
How’s it done then?
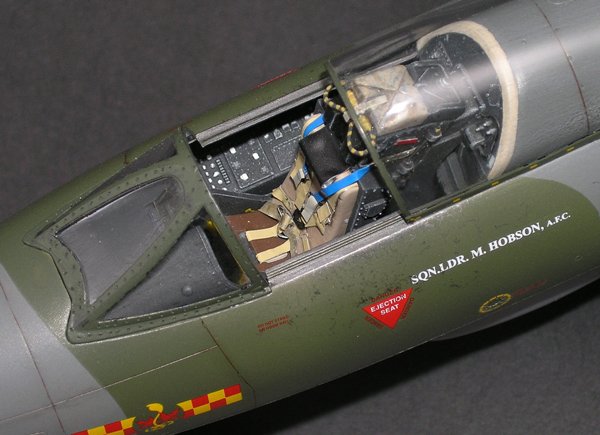
Cockpit sills – Well you need that pencil and I try and make sure that it’s not too sharp otherwise you run the risk of puncturing the paintwork. What you are looking to do here is lay down a thin layer of graphite that as you apply more becomes shinier and more reflective.
You apply it by using a gentle tapping motion with the side of the point. Be patient and the more you tap the greater the reflective area. So it makes sense to apply more on the most worn area – in this case the top central area of the sill. The scratches become less the further you get away from this focal area. It helps to see how the pilot and even ground crew would approach the task of getting into the cockpit – air shows are good for this, try Kemble in the UK if you get a chance and their Classic Jets theme.
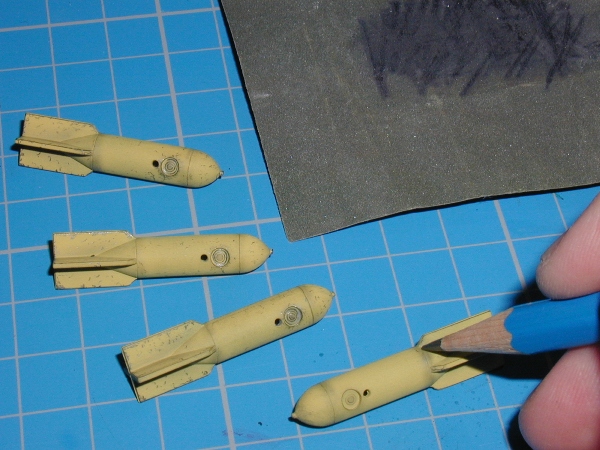
Prop blades and bombs – the application of this technique is very similar to Cockpit sills above. The only real difference and its minor is in your action. This time you use a slightly ‘stabbing’ motion with the point of your pencil, but be gentle and subtle and move around the flat face of the prop blade. You won’t need to do very much before you start to get a pleasing effect. Clearly the technique works best on a flat (matt) surface. You can hopefully see this clearly in the pic of a Focke-Wulf Fw-190A prop blade – the base colour being Black Green.
In the pic with the bombs the grey wet and dry paper is used to sand the sides of the pencil point and re-sharpen it from time to time.
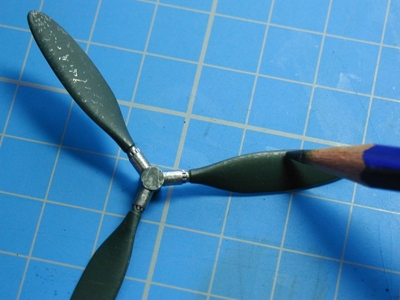
I use this approach to create a subtle metallic effect to the paintwork. To finish off the blade I run the side of the pencil point along the edge of the blade and suddenly the whole unit begins to look real – I love doing this one. The trick if there is one is to be patient – take your time and stop sooner rather than later. You can always add a little more but you can’t remove it. Sorry, no using an erase is unlikely to work as it will buff the flat paint and smudge the graphite – not very convincing.
Technique 4 – scuff marks on the airframe
This is a variation on a theme really – similar to that described for prop blades etc above. Have you noticed when standing near Phantoms and more modern grey-painted jets that you often see lots of scuff marks made by the boots of ground crew.
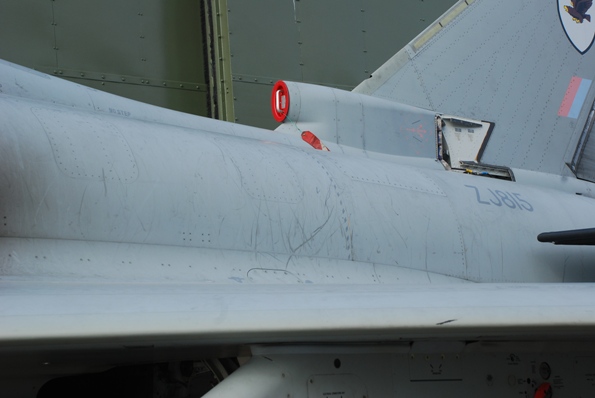
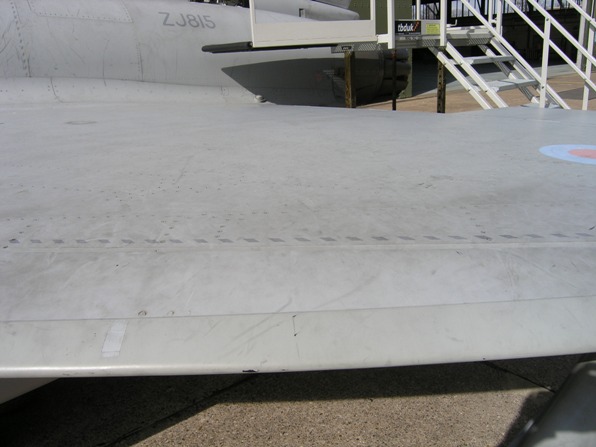
All you do this time is make small taps with the pencil but occasionally drawing the pencil away with a small flick that will create tine scuffs – the largest being about 2mm and many much smaller. You can see me applying this approach below…
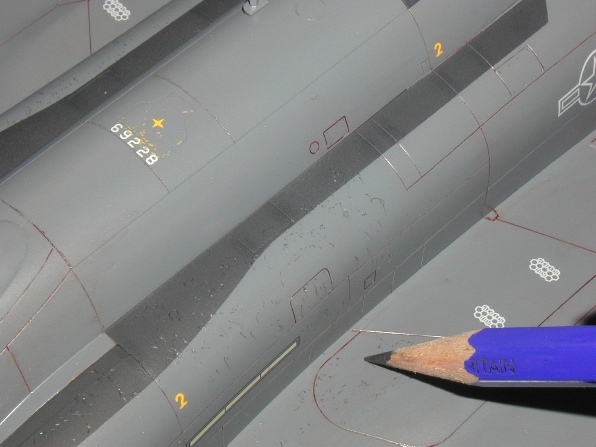
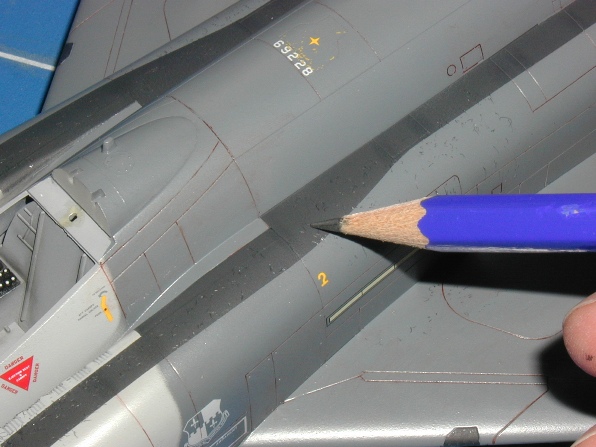
Ok that’s it for this one, hope you find it helpful and if you’ve got a technique you’d like to share with others, send it in to me at SMN
Geoff
